Hi all, getting further along, I don't know why things work out the way they do, Nick, I think the "poppin" works freely because there is almost no friction with regard to the valve, as only the swivelling of the shaft in its bearings, and the slight pressure at the closing of the valve have any real "bearing" on the friction issue. I know that valve friction is important in the Duclos flame sucker, because I've tried several different valve types and have reverted to the spring pressure bronze plate with the tiny slot as the freeist moving.
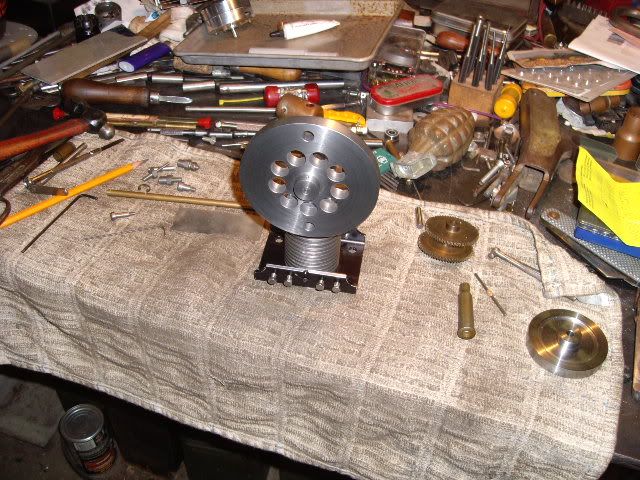
On this engine, I was struck by the nature of some of my scrap, I knew I had a piece of metric ground shafting, small, and with two sintered bronze bushes which came out of a CD player, and I found the box with the scrap from that old player, and the light lit up. First, I had to get rid of the stainless flywheel, so I got to work on the cast iron one
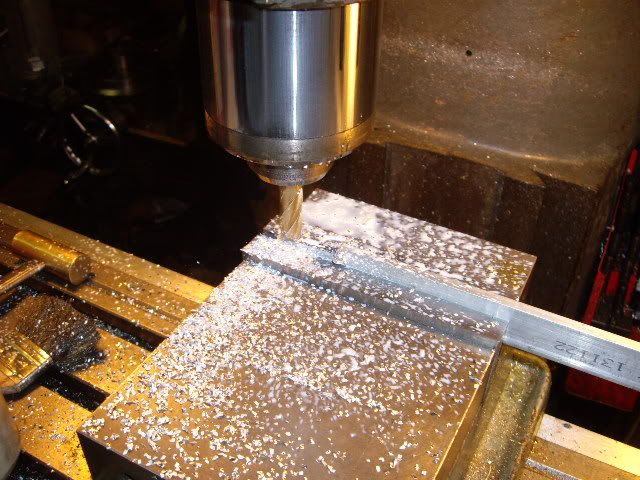
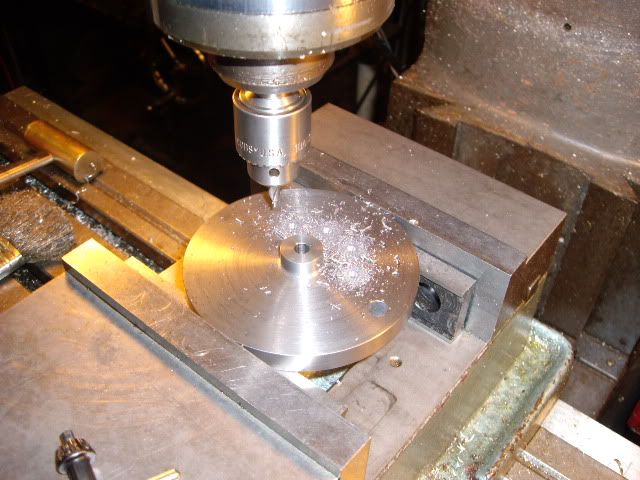 building a new flame sucker
center drilling the iron flywheel for nine holes
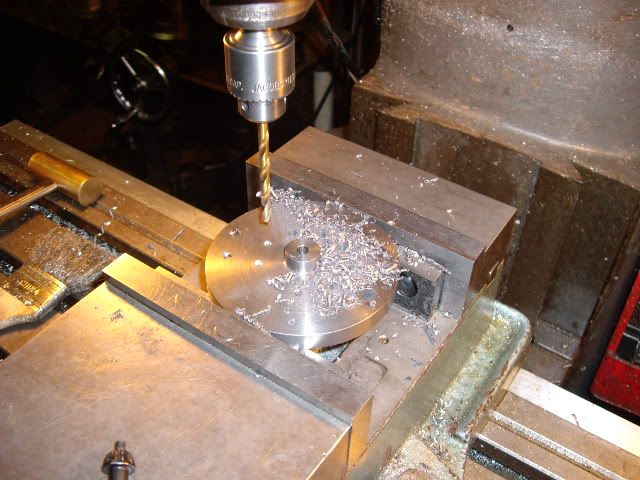 building a new flame sucker
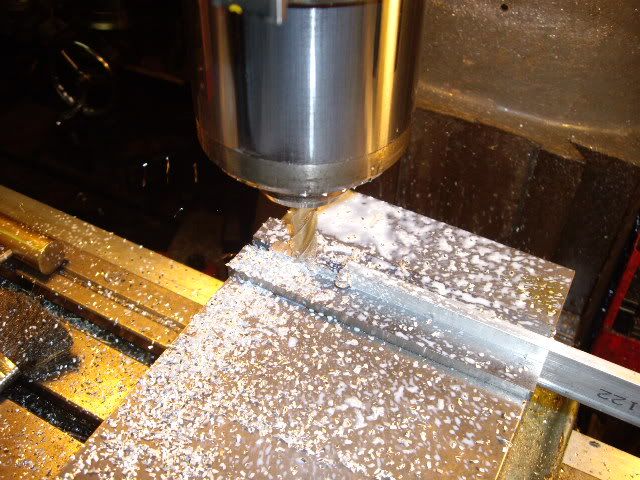
step drilling my way up to size
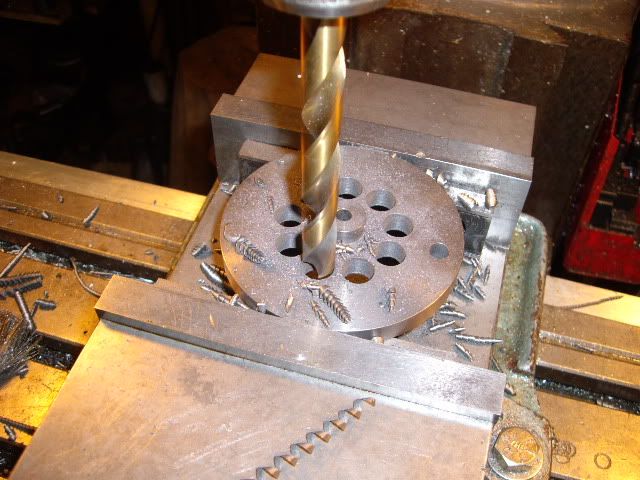 building a new flame sucker
a half inch set of holes is all that would fit where I put them, but it seems like a good flywheel, on just a straight shaft in the main bearings, the flywheel stops at random, so it's pretty well balanced as is
 building a new flame sucker
the flywheel in place
 building a new flame sucker
a frontal view of the flywheel on the engine, note the second "extra" hole, put in to balance the hole that was already in the gear. that 7.62 by 54r casing isn't just there for looks, it is what I used to press the bearings onto the mainshafts, with the pressure entirely on the inner race to keep from damaging the ball bearings
 building a new flame sucker
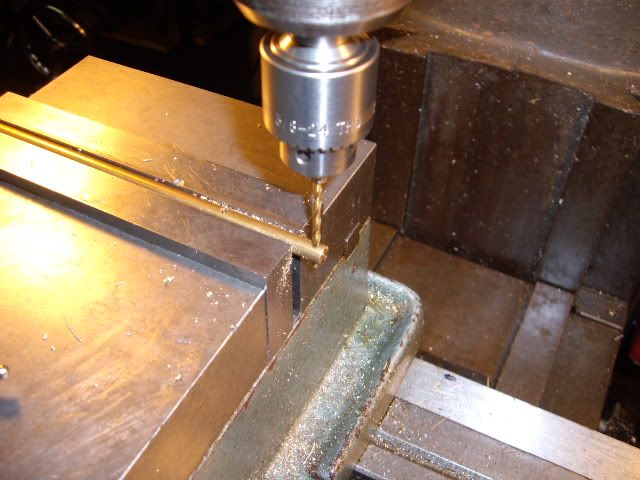
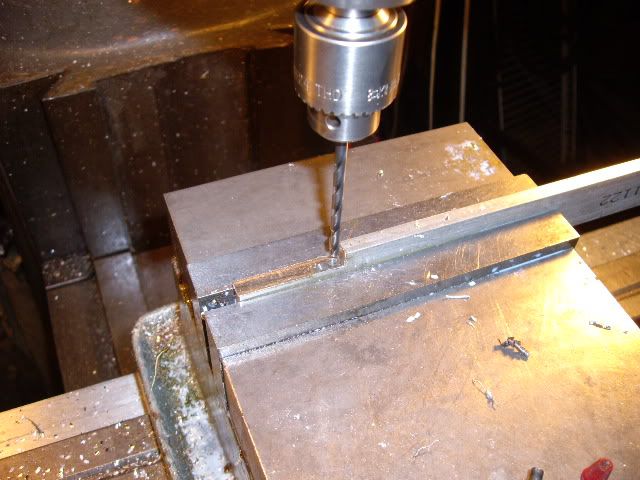
drilling the cross hole in the valve shaft stanchion for the 2.5mm valve shaft, the other cross hole is to the left, in the shaft in the vise jaws
 building a new flame sucker
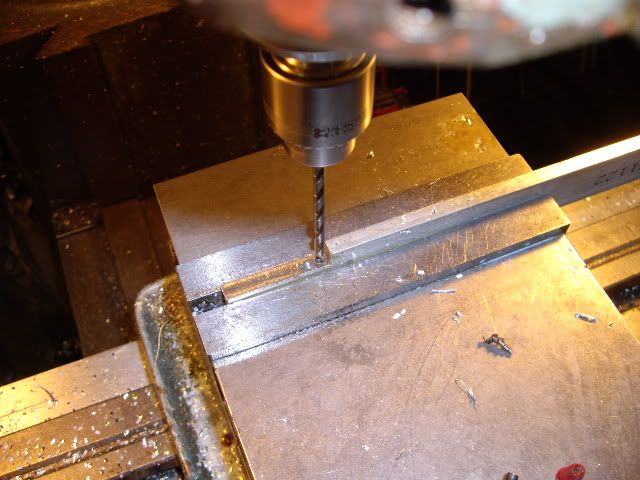
facing off one stanchion to length, measuring from the "bottom" of the shaft hole to the base of the stanchions
building a new flame suckerfacing off the other to match, both have been drilled and tapped #4-40
 building a new flame sucker
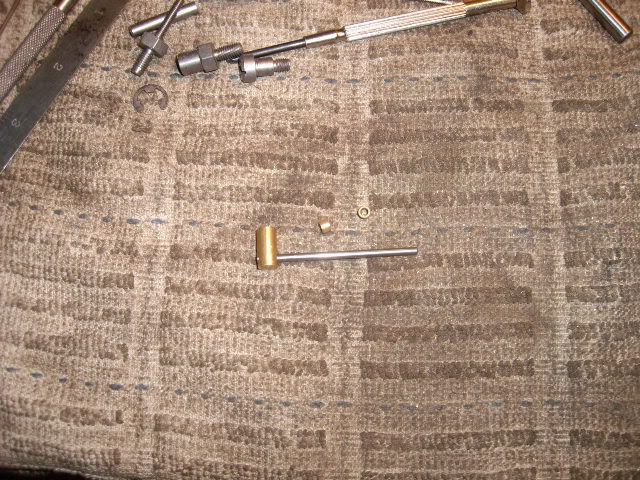
stanchion with valve shaft pressed in place, sintered bushings along side
 building a new flame sucker
stanchion and shaft with allen screw in the base of the stanchion
 building a new flame sucker
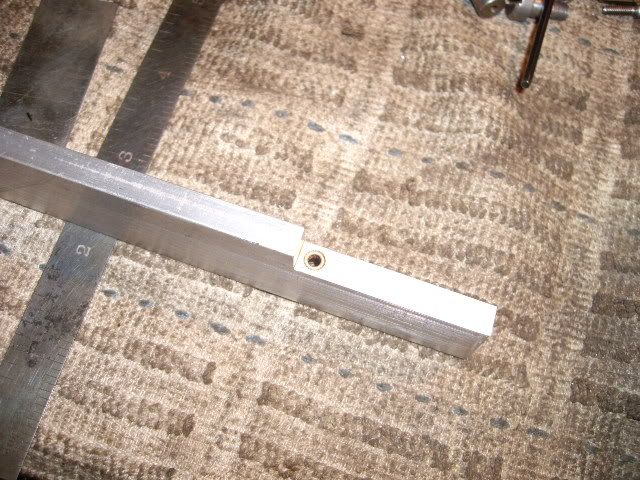
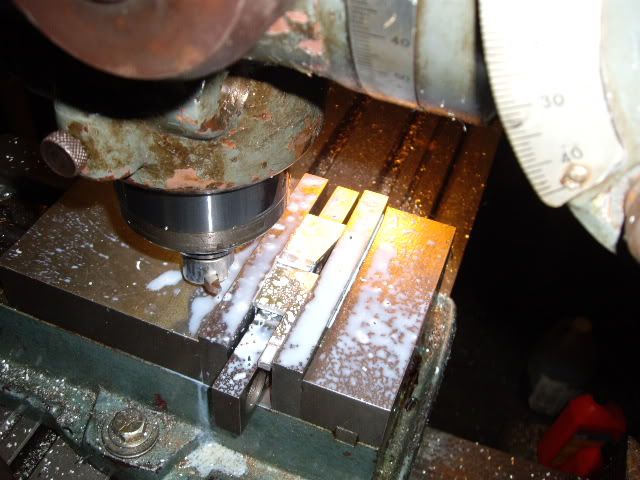
making the valve carrier, narrowing it for clearance
 building a new flame sucker
more milling, started with quarter by one inch 6061-T-6 bar, reducing end to 3/4 inch
 building a new flame sucker
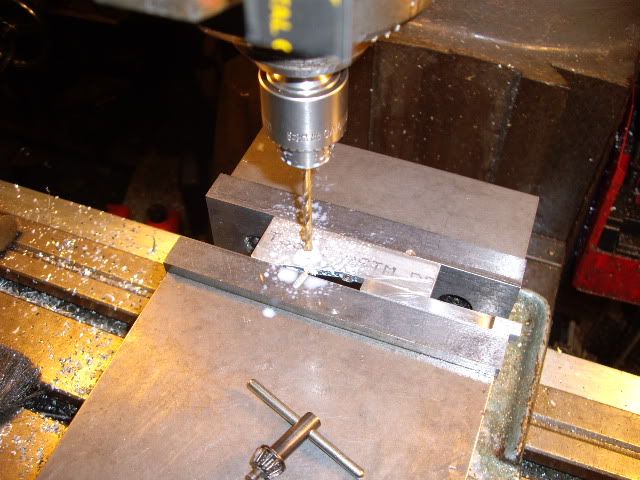
final cut to size, time for drilling for the valve shaft
 building a new flame sucker
after center drilling, drilling through with an undersized hole
 building a new flame sucker
no reamer that size, finishing with a sharp drill on size
 building a new flame sucker
the valve shaft hole with bushings pushed in place with loctite
 building a new flame sucker
another view of the valve shaft bushings
 building a new flame sucker
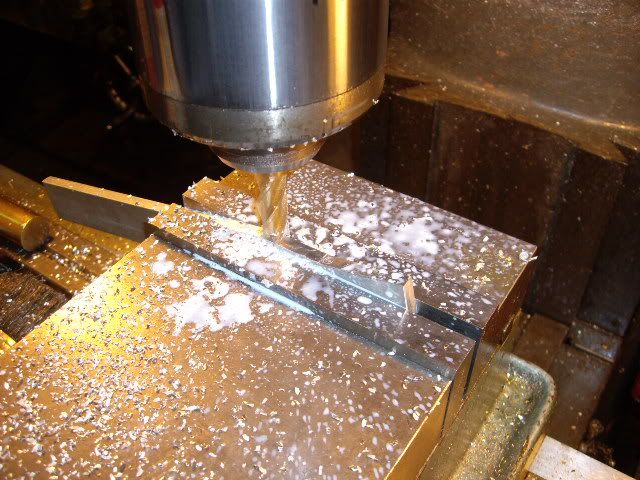
machining clearance in the top of the valve carrier
 building a new flame sucker
machining down the carrier, making room for a valve between it and the head
 building a new flame sucker
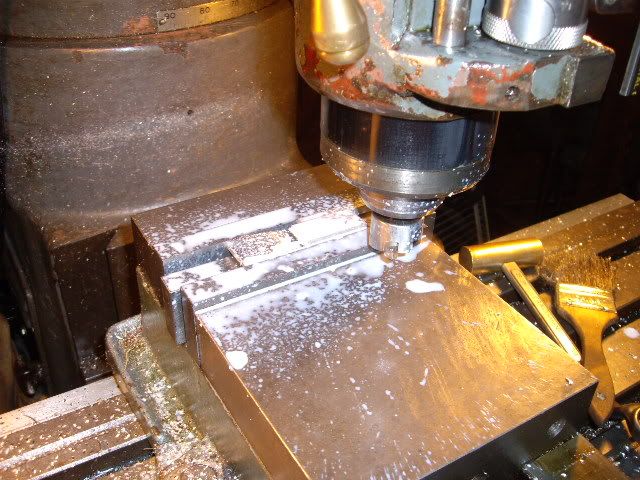
more trimming, with a flycutter, holding the carrier by less than an 1/8th inch in the vise
 building a new flame sucker
taking finishing cuts, checking for clearance against the stanchions and head surface for reference
 building a new flame sucker
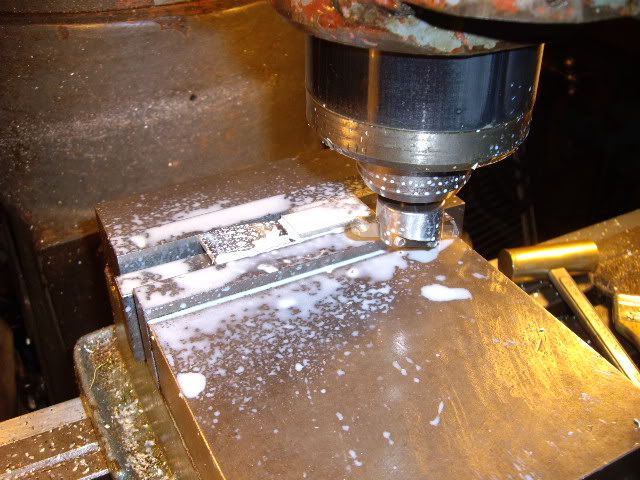
finishing the other side beyond the bushings
 building a new flame sucker
final cuts over the bushings, to ensure they clear the head in action as well
 building a new flame sucker
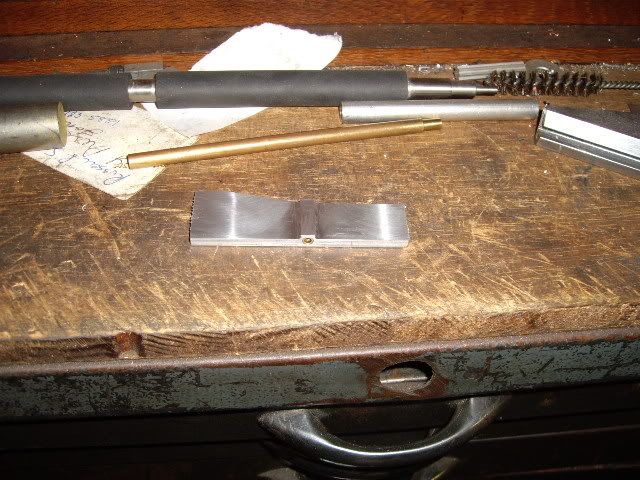
the valve carrier blank
 building a new flame sucker
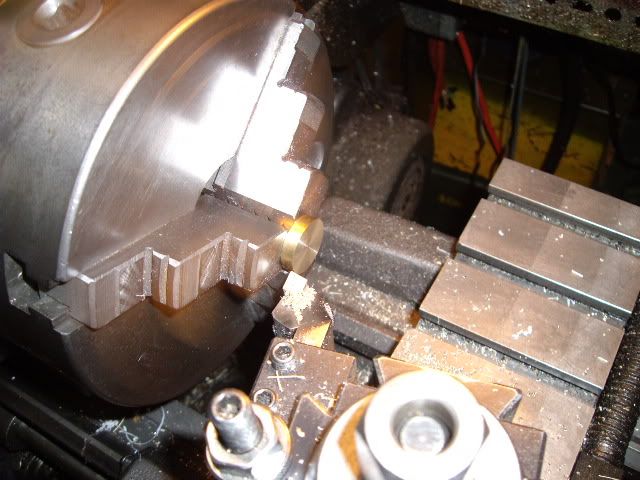
finding a piece of bronze .875 in diameter with a spigot on it, I turned down the spigot to a quarter inch, and chucked on that spigot to face off two thirds of the thickness of the valve
 building a new flame sucker
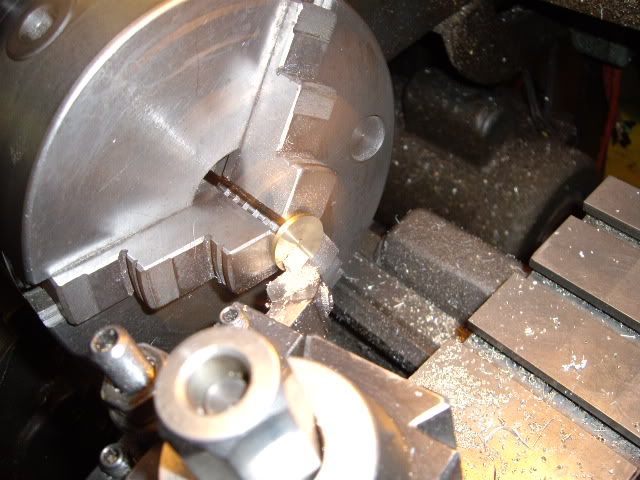
more facing, final thickness will be .090 inches
 building a new flame sucker
with the valve to size, taking a cut to "hollow" the center to reduce the area of contact leaving a good .200 rim laying flat on the head surface for sealing. the hollow is about fifteen thousandths deep, just enough to relieve it.
 building a new flame sucker
after center drilling on the marked spot, drilling through the valve carrier
 building a new flame sucker
with the spigot on the valve turned to .248, reaming the carrier hole at .250
 building a new flame sucker
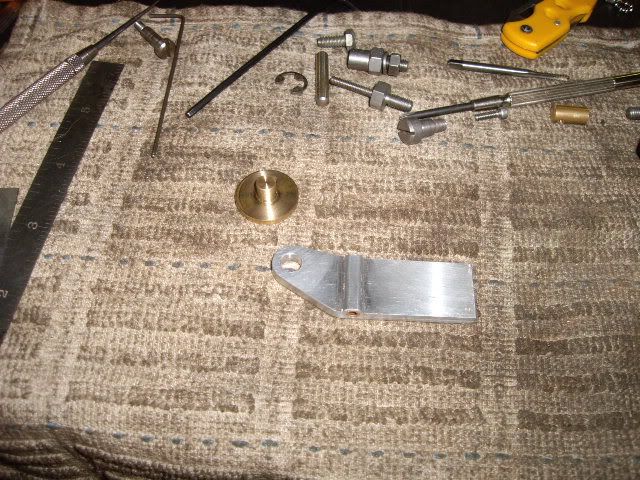
some bandsaw profiling, and filing to a fine finish, the carrier end finished
 building a new flame sucker
the valve sitting in the carrier
 building a new flame sucker
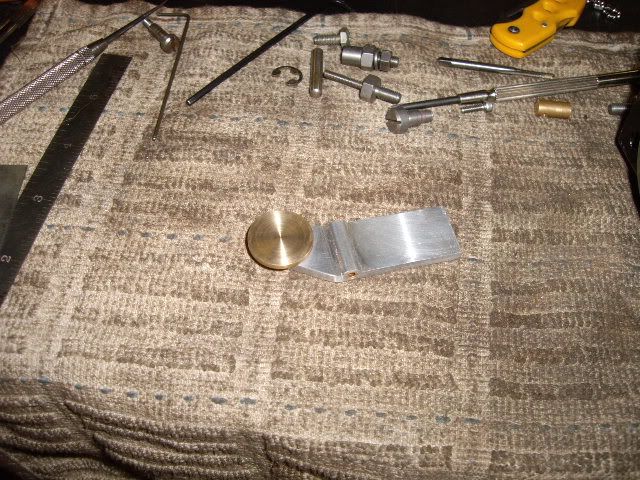
the carrier with the valve, mocked up on the head
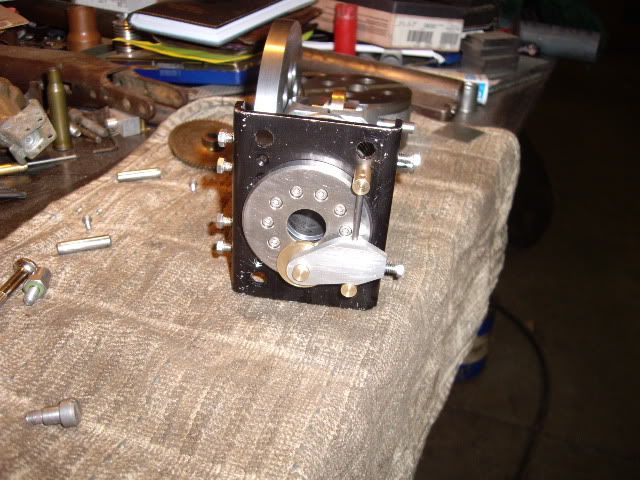 building a new flame sucker
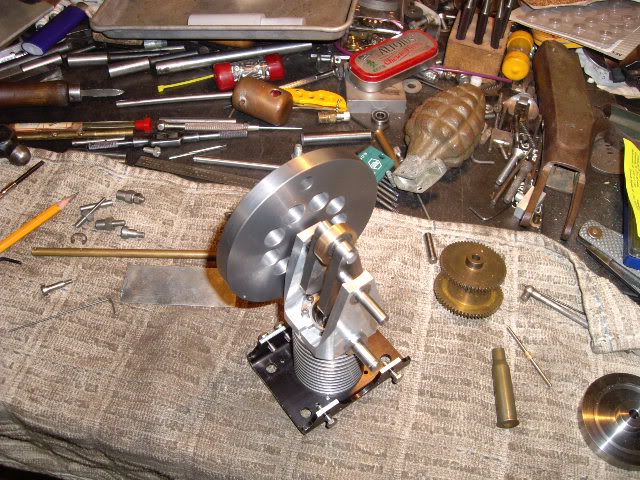
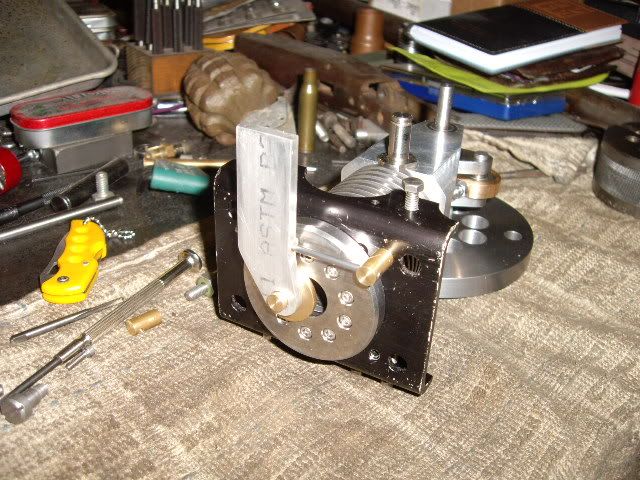
with both stanchions pressed on the valve shaft, with the valve carrier cut to fit, the valve gear fit to the bracket and the valve in place against the head, fitting nicely, freely moving, with a good vacuum seal being the final test. This wasn't exactly what I thought I was going to do for a valve, but it turned out nicely, and fits well, funny how those lightbulbs sometimes don't exactly end up making parts you thought would be there. This valve is inspired by Herr Bettinger and his #2 Flammenfresser, which runs too well not to copy from. Next, I will have to make the operating lever and cam to move the valve in time and space, and maybe look at some sort of frame or something. Thanks for watching and all the comments, I'm having more fun than a human bean is supposed to

mad jack


