I really do like Sieg SX2 (MicroMark labeled), but when it cuts into hardened plate steel, be it chilled aluminum or hardened steel the light weight and associated lack of rigidity shows itself as vibration.
Brass, high density plastics and aluminum cut and mill with no problem. What I saw when milling hard steel however was incredible vibration (and there is a lot of banging noise). There was a lot of what I will call slop in some of the threaded assemblies. It revealed itself as the handles unscrewed from the quillon and tinkled onto the floor, the safety cap and the (silly) plastic column cover bounce off and drop to the floor. The first time mine bit into hardened steel plate (upgrading some parts in my truck) all of the mill's handles vibrated off and the table itself moved an inch. LoL. So much for all that effort to ensure the table was level in that spot. Worse on several occasions the head would drop or the column would suddenly topple sideways.
After the first time that happened I froze the support handles on the spindle shaft pinion with Loctite, and used a breaker bar to tighten the column pivot nut. The next time the handles did not come off the spindle shaft pinion anymore, but the safety cap over the draw bar flew off and so too did the little dust cover on the end of the support column and the only thing using the breaker bar had accomplished was reduce the sudden tilting of the column from 40 degrees to 3 or 5 which was still more than enough to mess up any work being done.
Checking online revealed 100s of web pages with similar complaints from other Sieg X2 and SX2 owners. The first suggestion was a complete take down to the level of the smallest pin or nut, followed by careful lapping of all parts and the use of Locktite when only one or two thread fits were less than perfect.
I found about 50 different designs on the web of support column reinforcement designs and picked one that wasn't too complex (upside down T shape), and of course many pages about filling the column with epoxy or sand.
This is another guy's approach on it from another website.
There would be issues to drilling and tapping the holes of course, not the least of which was the exact placements needed. Further searching on the Internet disclosed someone else had already invented the wheel and a machinists drawing of an X2 column was already out there.
I did the mill take down, clean smooth and re-tighten. Next was the epoxy.
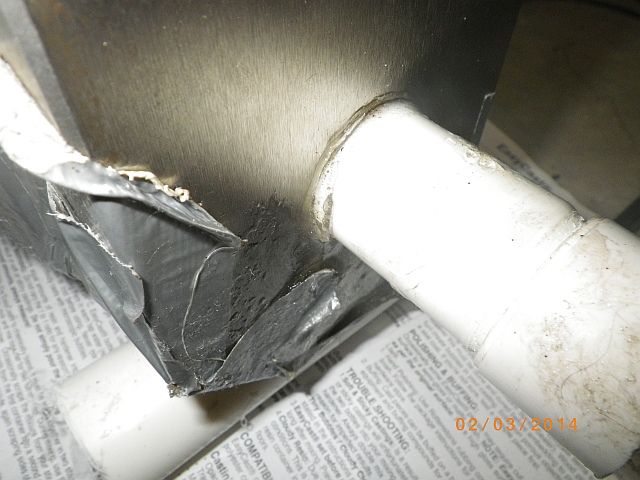
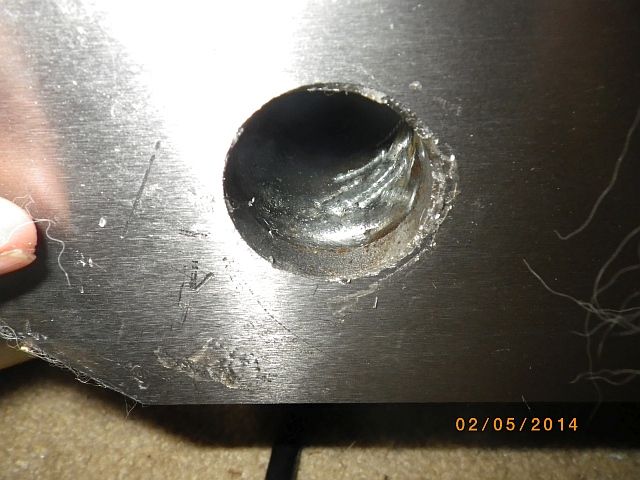
Filling the column with epoxy means finding a way of plugging the bolt hole (15/16ths of an inch in diameter) in a fashion that leaves the hole capable of putting the bolt back in when the epoxy has cured. Most X2 owners wrote they used PVC pipe. Of course no one makes (in the US anyway) PVC pipe of exactly 15/16 inch (0.9375 inch). My solution was to get some 1 inch PVC pipe and turn it down on my lathe to exactly .94 inches.
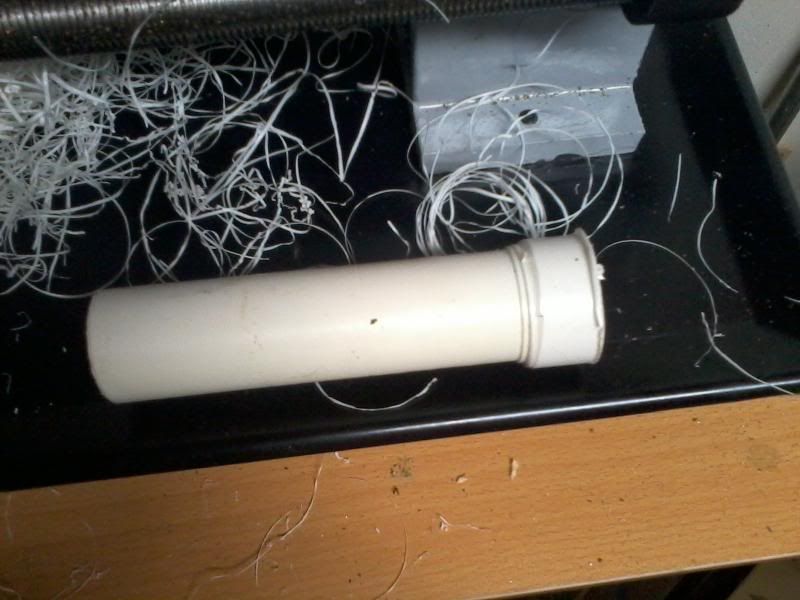
Lots of swarf strings.
This enabled a snug fit that more or less blocked any epoxy (as shown, even though a snug fit, there was some leakage) while still protecting the bolt hole.
Epoxy does not normally stick to PVC pipe, so the pipe would be easily removed when the epoxy dried and the hole was protected.
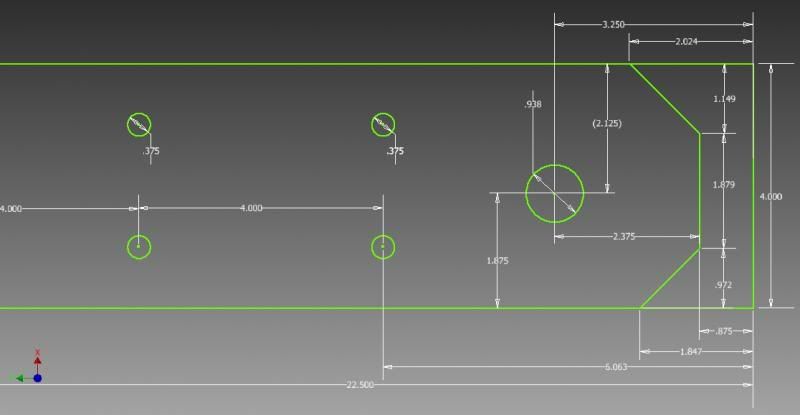
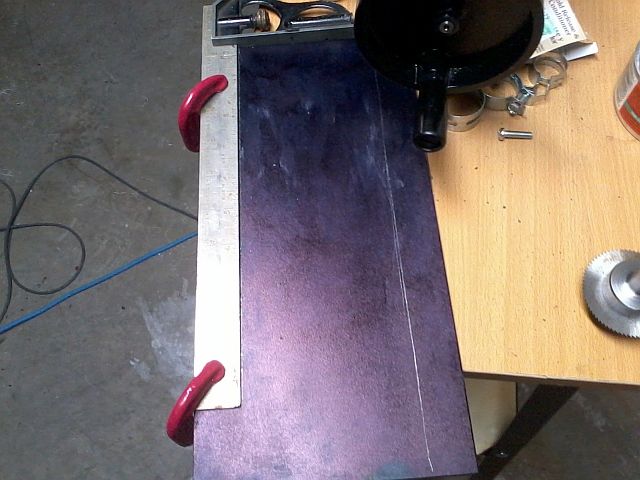
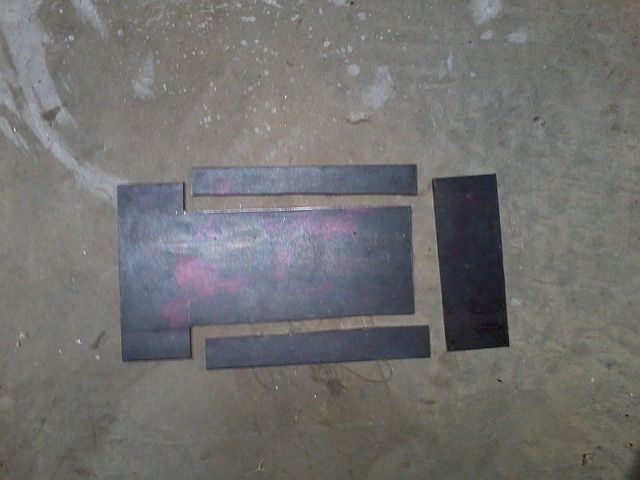
I did the layout & cut a 1/4 inch hot rolled plate to a T shape of approriate size with my bandsaw.
I did a fair amount reading about sand fills, epoxied columns and support bases, et al. Epoxy and gravel, epoxy concrete, epoxy and granite, all that. Vibration dampening properties of sand, cross sectional density, etc., yada, yada, yada. A couple of decades ago someone sold me 20 pounds of sheet metal screws, small nuts & bolts and tiny steel washers. One box, all mixed. I think I had used maybe 5 of them in the 20 years I had them. I own a sand blaster so I already had sand. I decided to fill the voids in the column with a mix of steel bolts, sand and epoxy. Also just for a lark I took some spare 6 inch bolts and added more threading to them so as to give the epoxy more to grip and threw them in there too.
Some minor issues related to working with epoxy arouse, they are discussed later.
When I was done and the epoxy was cured I remounted the column in a normal fashion and trammed it. The only remaining steps I planned to take were the drilling of holes and tapping them. The area where the holes are drilled into the mill's base is not really that thick. I normally like thicker (more room to play if a mistake is made) stock before drilling and tapping a 3/8 inch hole. Besides I wanted to know what the effect of the epoxy fill was. So I tried the epoxy filled column out. Night vs. day was the observation here.
Before when I milled steel everything would vibrate. The table the mill was mounted on would dance on the floor. At all speeds there was noticeable chatter with a 5/8 endmill trying to go 0.1 inches deep through steel. My handles would unscrew from the spindle shaft pinion and drop to the floor, the milling head lock would unscrew and the head would drop suddenly without warning, or the column nut would back off the bolt and the whole mill column would suddenly topple sideways as the table danced around on the floor..
After reinstalling the epoxied column and tramming it, I took the 1/4 inch hotrolled steel plate I had cut to a T shape on my bandsaw, fixed up my 3 inch Flycutter and easily took all of the blue layout die off. I then doubled the RPM speed and did it again. Only a faint burr sound added. The only problem I noted was some Y axis back and forth movement of the table, but once I secured the table with the gib lock that stopped. I next took two pieces of scrap plate, bolted them side by side (Z axis orientation) into a vice and it happily went right through them on a 1/8 inch cut with the same 5/8 endmill that couldn't do 1/10 inch without a problem before. The column didn't tilt and the head didn't drop and nothing unscrewed. My conclusion is I am holding off on any drilling and tapping holes into my mill base or the column. I can always do that if I have to, but for right now all by itself, the epoxy fix works.
Epoxy observations. Coat the column outside with release agent. The PVC type hole plugger will probably require you to turn down a piece of PVC in your lathe. I was totally unable to find a piece of OD 15/16 PVC pipe in any store in my part of the US. Good thing I had a lathe. Even though it was a perfect and snug fit, epoxy leaked around the edges and ran onto the outside of the column. Which is why I mention release agent. Others have said close off the opening at the bottom with duct tape. LoL, what a mess that was. Duct tape is porous, it leaked right on through, not much, but way more than I wanted to see puddling on my clean basement floor. Duct tape, if allowed to get wet with epoxy must be picked off the epoxy one thread at a time.
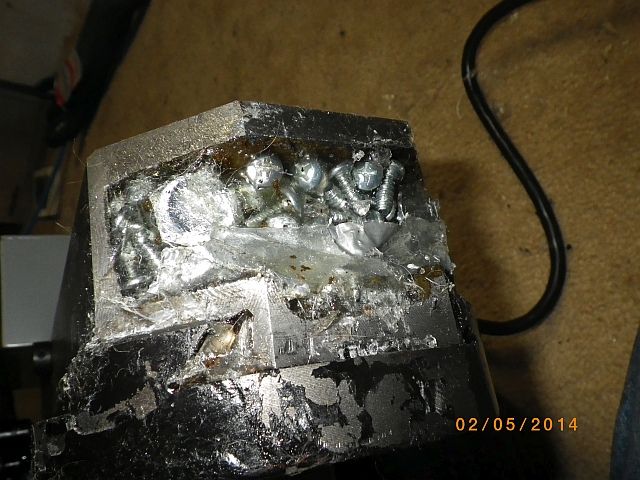
I visited a craft store afterwards. My STRONG suggestion for the next guy is over where they carry the epoxy jewelery mold stuff, they also carry a special clay for making molds for epoxy. Get some. Plug the opening with that, then use the duct tape to hold the easily peeled off silicone clay in place. Someone had sold me several pounds of sheet metal screws and very small nuts and bolts at a flea market decades ago. I finally found a use for them. 50/50 mix of playground sand and sheet metal screws, et al, then 50% epoxy. Stir it in a disposable bowl and pour. Marine epoxy was cheapest, but I had to buy a gallon can of it (Ebay). Later at the crafts store I found something called casting epoxy and it is available in 1 pint or 1 cup containers. If I were doing it all again, I would use the casting epoxy and not have 3 quarts of unused epoxy in a can. Important. Give very serious consideration to removing the support spindle shaft before doing your pour. I was lazy. I left mine in (left the head attached too) and with a long artists brush very carefully (so as to not get any on the column walls) coated the shaft with epoxy release agent before sealing the column bottom and making my pour. Then I sweated for a day hoping nothing would bind. I got away with that, but I don't recommend it. For myself I did multiple pours of small amounts. I would mix and pour then heat the column with a heat gun to about 110 F, according to my temp reader, then tap the column until the air bubbles came off the screws and nuts, then as the column cooled mix the next batch and do the next pour and repeat the process.
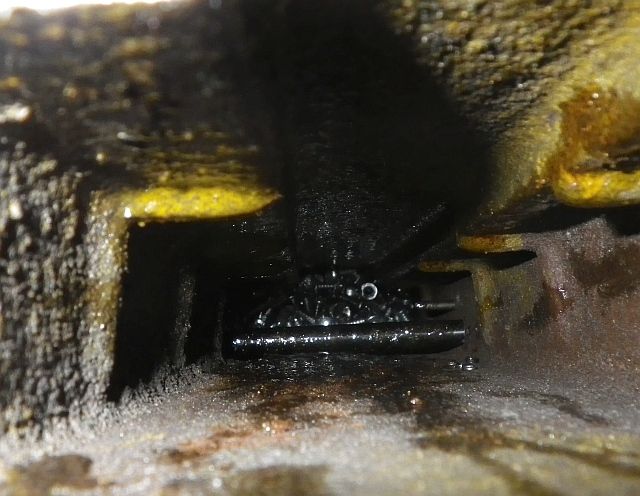
I filled my column up to just about 1 1/2 inches from the cross bar (pinion shaft). I already had sand for sand blasting and a 20 pound box of assorted small metal fasteners, so my total cost was 5 of release agent and about 30 for the epoxy. Result, a much more serious mill IMO, and like I wrote, adding the bolted on plate for column support remains a second option but only if needed.
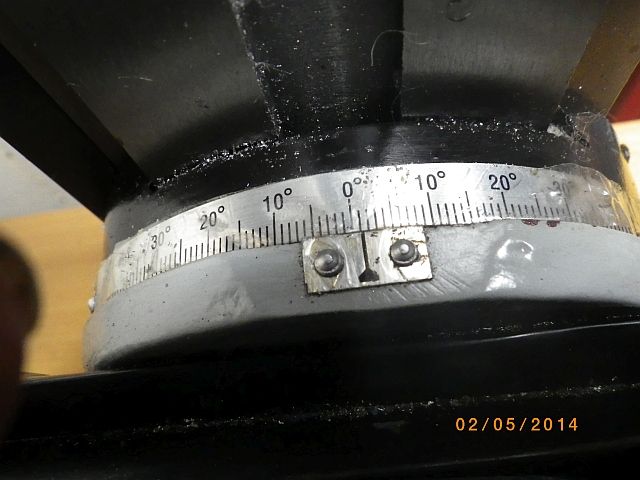
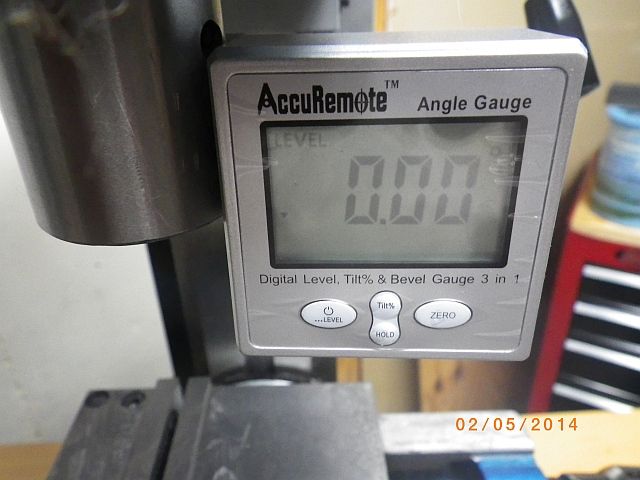
By the way, while waiting for the epoxy to cure an inclinometer I had previously ordered arrived in the mail. Out of curiosity while tramming i brought it into play. You can imagine my amusement to learn that the people who added the protractor to the column mount did not check the placement of the protractor scale. Loosely summed up, the two differ by a full degree.
Inclinometer on the mill's spindle says
But the built on protractor scale says,