Author Topic: DRO on tailstock  (Read 8483 times)

Offline Jonny

  • Hero Member
  • *****
  • Posts: 780
DRO on tailstock
« on: January 02, 2011, 03:41:13 PM »
Been putting this off for many months now and getting no where, its for a Harrison M300. Harrison 140 and L5 would be real easy in comparison jus checked.

Firstly i use loads of coolant and create a lot of swarf so has to be designed around that.

I have these
http://www.machine-dro.co.uk/index.php?target=products&product_id=346
http://www.machine-dro.co.uk/index.php?target=products&product_id=348
http://www.machine-dro.co.uk/index.php?target=products&product_id=347
Encoder has to centre over two part cover with magnetic tape installed in it. Runout 3 degrees and 0.3mm all other dimensions.

Already fitted to Y axis works a treat and only lost 2mm where tailstock butts up to carriage. Excellent  half a thou runout 3 dimensionally encoder set 0.15mm away from two part cover.

Spent days thinking over the last few weeks and trying to figure a robust method without any undue height. Travel needed is 126mm plus 52 for encoder. Can cut down two part to 178mm long if need be.
Thought of two round bars with encoder attached but too hard and too bulky to fit.
Roller bearings, maybe the easiest method but concerned over swarf.

The only other thing i can think of is machine the tail stock casting either side at the top and use 60 degree dovetails. If i got a decent finish on the casting along its length would you honestly think it will slide ok? Considerng its a no return jobby :clap:

Useless at drawing and must be up and running in three days plus need to wire it in.

Offline Jonny

  • Hero Member
  • *****
  • Posts: 780
Re: DRO on tailstock
« Reply #1 on: January 03, 2011, 08:50:57 PM »
Took a flyer late this afternoon and if doesnt work out could resort to using bearings.

Under side of tail stock is on two planes even worse is no where to clamp rigidly so had to resort to removing jaws to fit in to vice. Took a good 50 mins to clock up rectify any runouts etc the check and double check with DTI on ram extended 126mm. Its a no return jobby if goes badly got be looking at several hundred to replace from a scrapper.

Rear of tail stock getting a working edge after clocking up 3D off the extended ram. At least that horrible green paints going.


Chopping away some metal before dovetail cutter goes in. It will al become evident later.


You will see why its under size later.


Now you are wondering, thats for the two part cover to sit inside 6.9mm deep allowing 0.1mm runout in that axis. Allowed 0.5mm vertically for clearance.

At this point i did see some vibration but couldnt do anything about it or lose zeroes and concentricity.

Change to 60 degree dovetail cutter taking a skim off top edge. All depths come from this as the other working edge. Not a good piccy.


Cutting the rear dovetail could only go 5mm deep. Will see where T cutter went in its still thicker than 90 degrees to left of casting.


Mock fit to show two part cover with magnetic strip not cut to length yet with the encoder centred underneath.
From casting the cover will only protrude 17mm, enabling quick unobstructed access to tail stock lock and ram lock.


I have only aluminium 6082 thats wider than 2 1/2", in this case the part that goes in to the dovetails will be from 4"x2"x16" lg and double up as a cover and bracket for two part cover. Will have to make some slides dont want alum to steel.
In this instance felt it was better to fix the encoder rather than having it move with a fixed cover.

Offline Jonny

  • Hero Member
  • *****
  • Posts: 780
Re: DRO on tailstock
« Reply #2 on: January 04, 2011, 07:33:17 PM »
Had a good session today need to get this up and running, jobs to do next week.

The only thing suitable i had was 4" x 2" aluminium to make a top slide on top of the tail stock.
This would need two gib strips of some kind and again posed another set back, i have very little steel, brass and manganese bronze too soft. Do have 3/8" sq spring steel but not large enough or would leave no where to bolt the encoder to if used.
Set about hacking that joint down all went great almost ready to cut dovetails after 5hrs then thought i have some 3/4" square tool steel but nasty to machine.
Any way had to use that tool steel and alter what i had done up to now by recessing these inserts 10.1mm below top dovetail.

Had to remove job to machine up that tool steel and would have to bolt it down substantially to the alum.

Cutting an even longer story short i had to get the job back in the vice. This time rather than the DTI used the illuminating contact (never spin these) and zeroed the 3 axis DRO on mill. Soon as probe makes contact it lights up and you can take a reading off the DRO- simples.

Still rusty but only machined up 3 faces before bolting down. These bolts later would double up as locks.

Beginning to wish never started and plenty more left to do. This dont look nothing special but thats well over 12hrs. Of course a Bridgeport would do it far quicker but still looking 8hrs+. Just to fetch them tool steels down to workable limits with my favourite Ceratizit tipped and roughing cutter over 6hrs.

As is fractionally steel inserts proud but when dovetail cutters go in i usually take a skim off a zero the DRO as a working edge.

Thats a weird one alum machined aound 8hrs earlier and can see white spots like a chemical reaction already.


Offline Trion

  • Full Member
  • ***
  • Posts: 239
Re: DRO on tailstock
« Reply #3 on: January 05, 2011, 12:56:31 PM »
Very nice work, looking forward to seeing the finished result! :thumbup:

Offline Brass_Machine

  • Administrator
  • Hero Member
  • *****
  • Posts: 5504
  • Country: us
Re: DRO on tailstock
« Reply #4 on: January 05, 2011, 01:05:48 PM »
Keep going at it Jonny, will be worth it when you are done!

Eric
Science is fun.

We're all mad here. I'm mad. You're mad.

Offline Jonny

  • Hero Member
  • *****
  • Posts: 780
Re: DRO on tailstock
« Reply #5 on: January 07, 2011, 03:10:25 PM »
The tail stock magnetic type is 90% done as is, just waiting for some screws and sealant.

I didnt intend it this way when i first put the post up, put two and two together and thought no one has seen one, hence the piccies so far.

I have piccies from last two days but need sorting. Some tasks are a bit scary like drilling and tapping M4X20mm deep end on down the tail stock ram for three fixings M4. Really didnt know what to expect as regards hardness but had to be done. My saviour these Titex Plus taps, nothing else comes close, awesome.

Couldnt use clamp method only had 2.6mm protruding or it would have been easy.
The other nasty was i had to bang out the steel inserts and distorted the one i wanted as the main runner edge, now modded and both adjustable.

Whilst at it shows piccy of modded top slide, thought i would convert to the same arrangement as the Harrison 140- slide toolposts in and out quick.


Offline Jonny

  • Hero Member
  • *****
  • Posts: 780
Re: DRO on tailstock
« Reply #6 on: January 08, 2011, 09:15:58 PM »
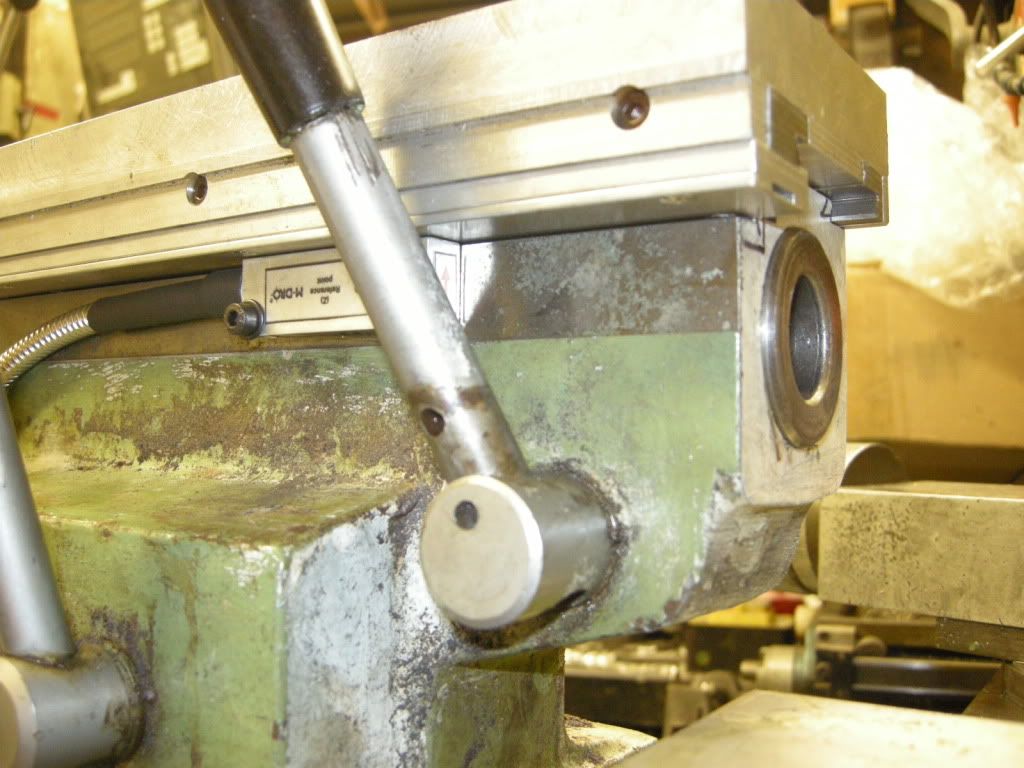
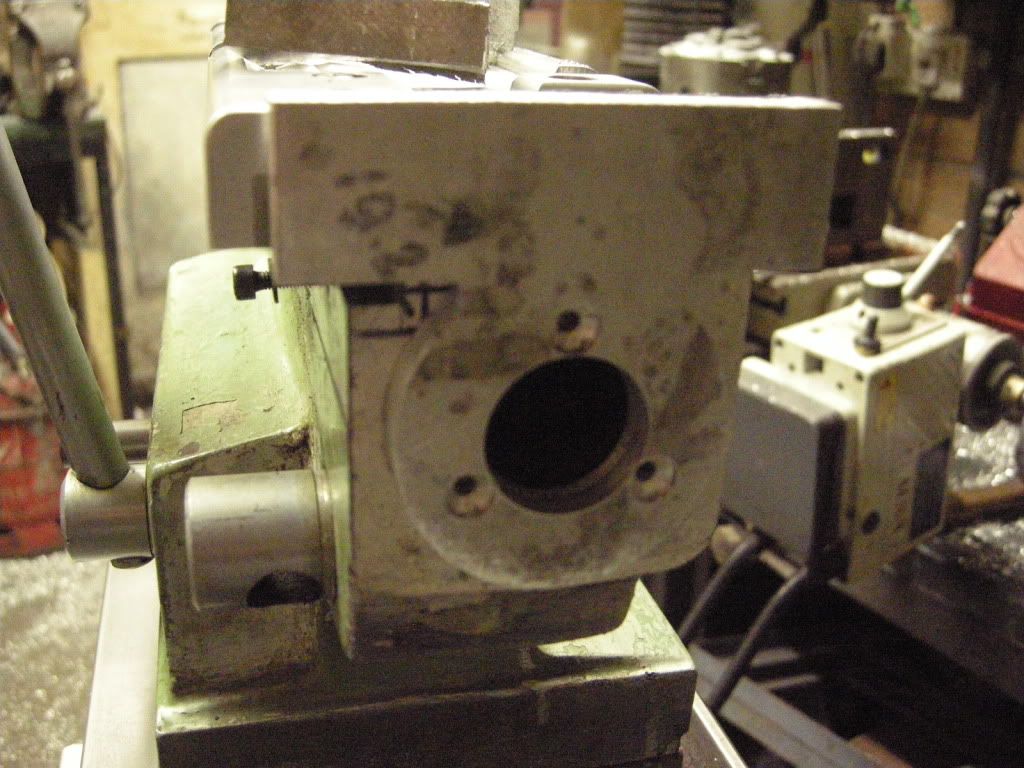
This bit is purely for the tail stock ram. Different to most as fully back it only protrudes 2.6mm from front of casting ruling out the easier method of clamping round the ram.
Heres what we are dealing with and mock up of install.


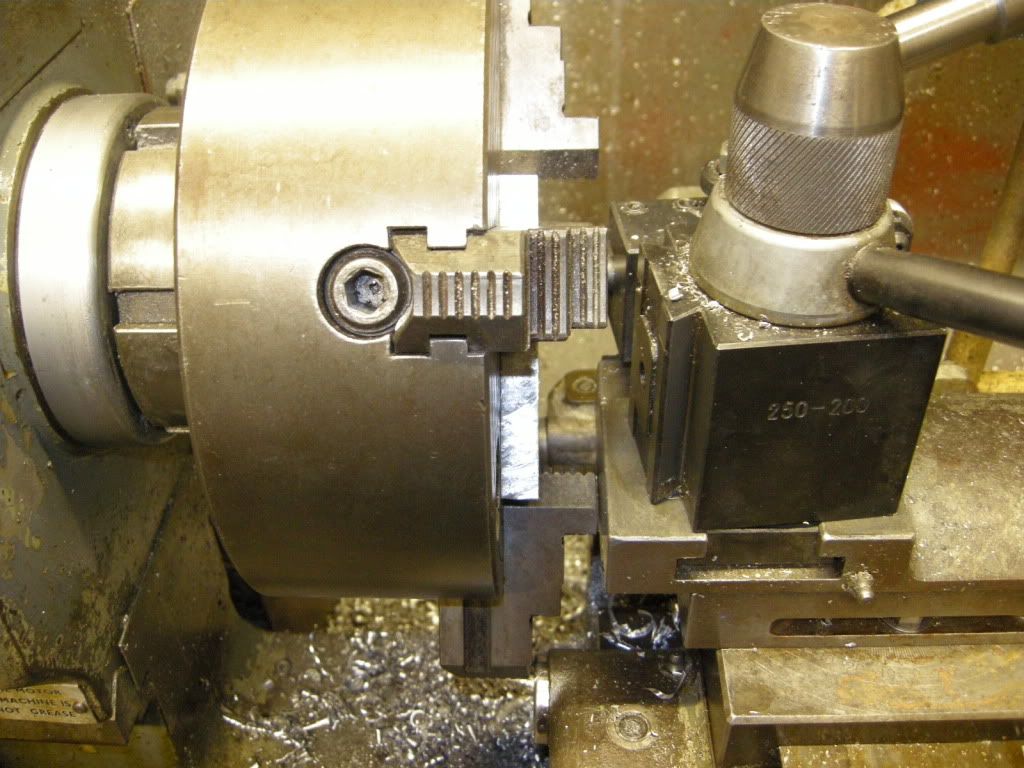
Couldnt be bothered to turn jaws round i still had clearance on carriage and top slide, just checking clearances. 11" chuck feel the wind as it rotates ::)


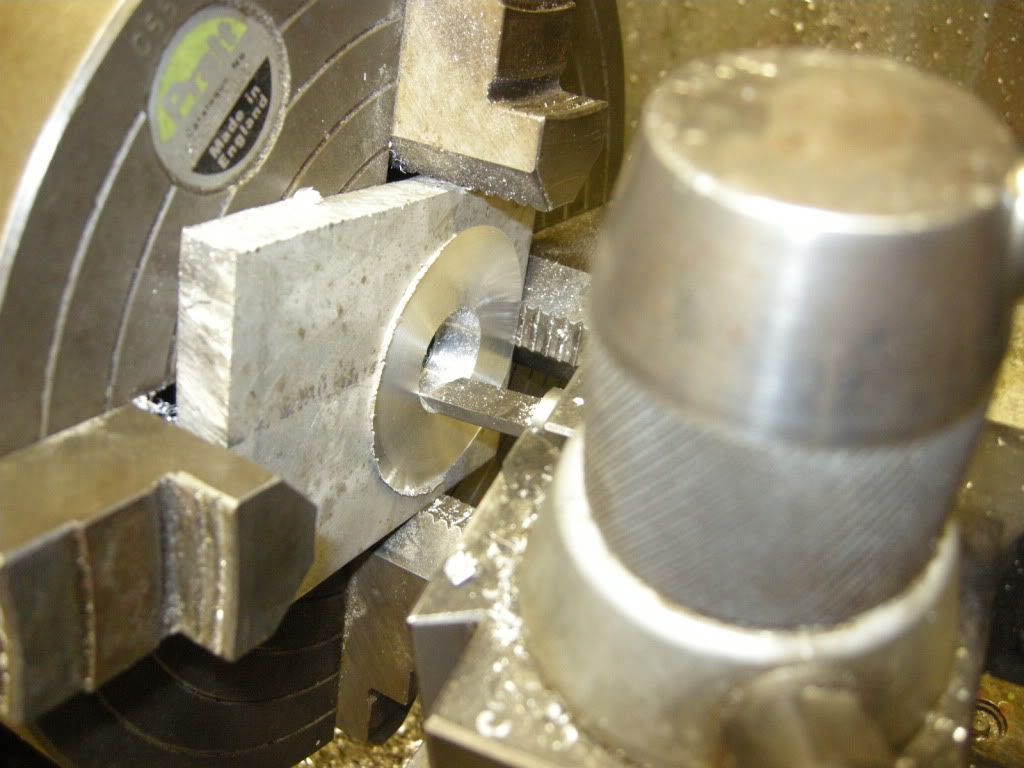
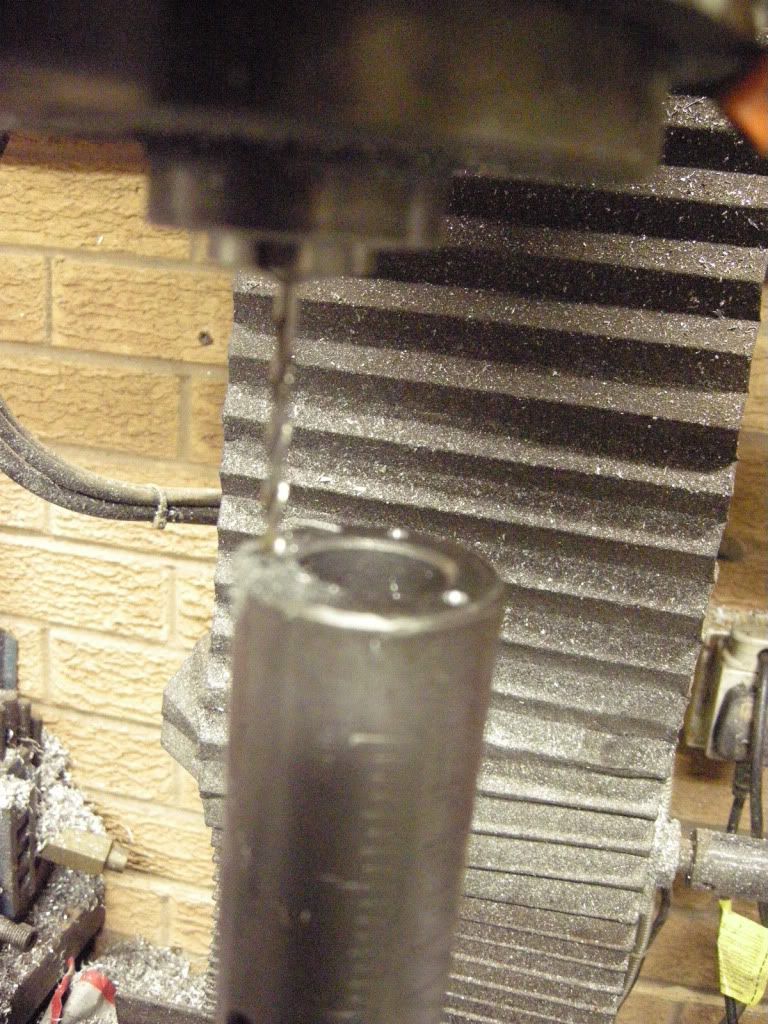
Easy job drilling through 1/2" thick aluminium. Unknown grade but quite hard.


Easier to use boring bar to face off getting close to the lowest jaw.


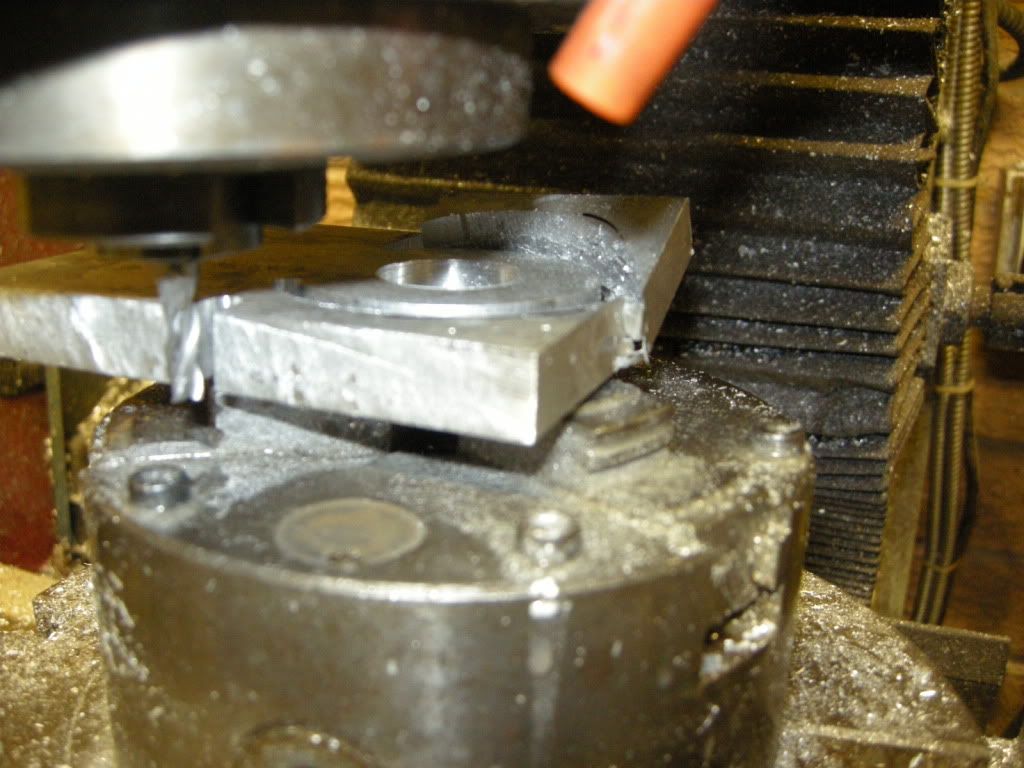
Down to the nitty gritty i normally do this type of work quite often. If the aluminium was 6082 i wouldnt be going through in one pass with 5mm dia cutter and coolant. Thats still 12.7mm thick using FC3 disposable cutter in 8" rotary table and 5 1/4" 3 jaw chuck. Just get a feel for whats happening!


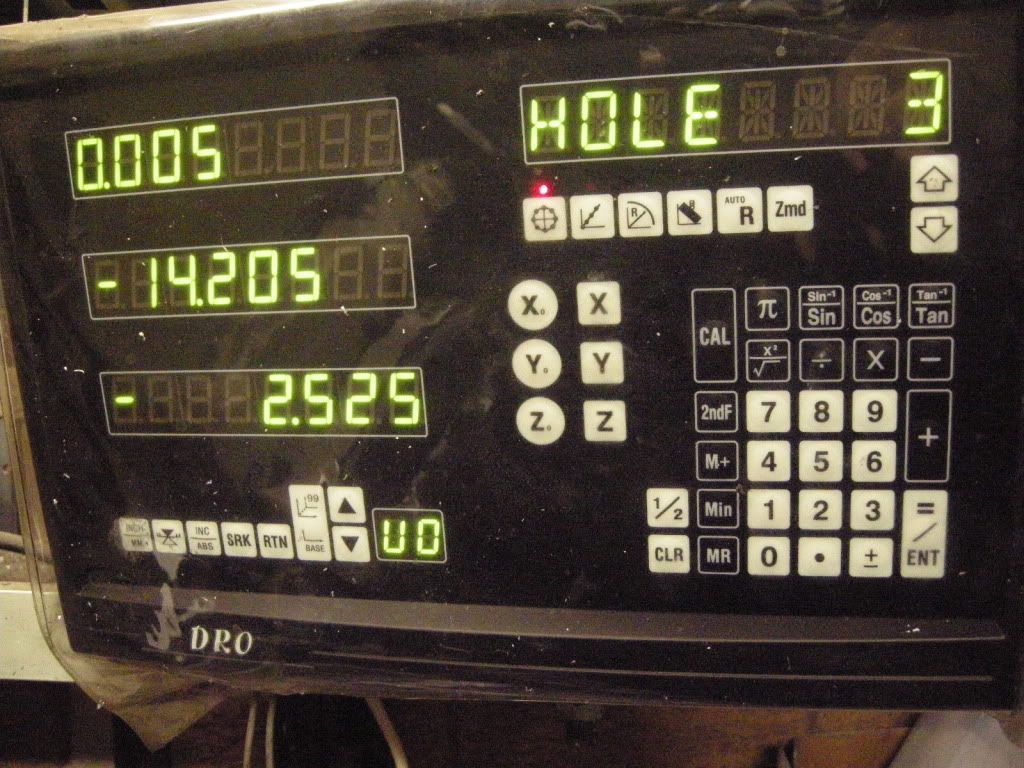
Done it differently here, dont know what come over me but thought i would try the mill readout out for PCD stuff. Also showing that superb three flute 3.3mm drill in MT3 collet.


Never read the manual for readout but self explanatory in the programme to create PCD, just put in what you want. This is the cheap readout bought over three years ago and thought at time it was easier to use over all others.
All you have to do is press up and down to select next operation and bring into position so readout registers zero.


Patterned out with drilled 3.3mm holes countersunk pushed on to tail stock ram. Hand drill marked the locations with 3.3mm drill perfectly centres, thats why i didnt drill 4mm plus for screws at time.


Ram removed from tail stock and in 3 jaw chuck on rotary table. 3.3mm decent drill in 1/8" MT3 collet.


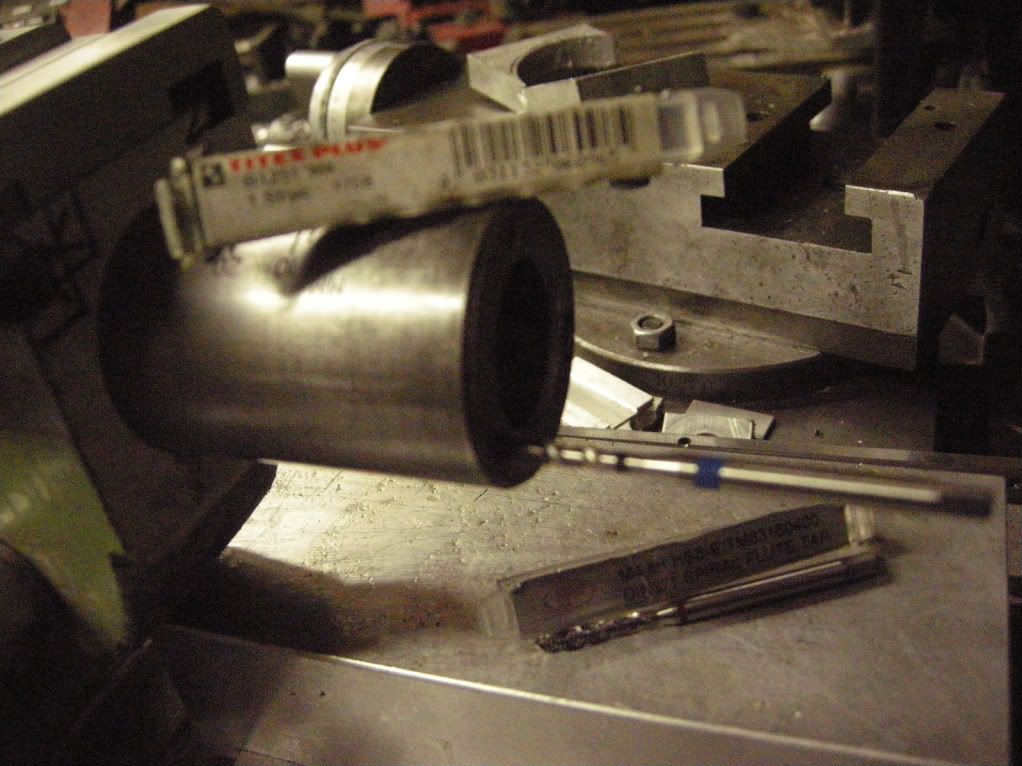
Finally tapping the tree M4x20 deep holes in ram.
From above i am totally amased how good these taps are. There are hard patches in the ram and only when hit them i had to back off like you would normally use a hand tap. Otherwise just ploughed straight in. Didnt have the bottle to power in when drilling them, if M6 and above yes.

Also shows the modded top slide to accept the Harrison 140 style of T. I have loads of tool posts all with multiple tools in each. I wouldnt have time to make 30 T2 QR tool posts as i hate having to put tools in to holders and centring for maybe 10 secs work.

Offline Jonny

  • Hero Member
  • *****
  • Posts: 780
Re: DRO on tailstock
« Reply #7 on: January 08, 2011, 09:30:51 PM »
Heres the bottom fixing part of the two part cover.

Already shortened some where near i only needed 126mm + 52 for 5 micron encoder, this covers around 250mm long. Drilling the new fixings to attach to slide. M4 again but 3.3mm drill to aid alignment after!


Counterboring for M4 cap head screws 4.05mm deep.


Slide fitted on to tail stock, positioning checked and adjusted. Allowed 0.1mm in recess used G clamp to hold in place hand drill marked then picked up with g clamp and cover removed.

Magnetic tape is positioned in place bearing in mind the recess is on the top cover with sticky on wrong side.
What i need to do now is put a smear of silicon on top of the tap and a bit at the front of tail stock, this will aid water and ingress getting in. The encoder is IP67 rated and will be left un protected. The Mitutoyo vernier above is IP66 but do IP67.


Offline Jonny

  • Hero Member
  • *****
  • Posts: 780
Tail stock DRO
« Reply #8 on: January 13, 2011, 09:12:10 AM »
Just an update i read the instuctions :palm:
Seemed easier to use silicon and also would act as a seal for any moisture getting in to the cover. Magnetic strip removed from the backing.
Dollop of silicon


Sticky side up magnetic strip pressed in to silicon, excess wiped off.


I didnt bother cutting the magnetic strip to length, i required 123mm+ travel plus 52mm for encoder, you can see how short you can keep these as well.

Top cover screwed down, ends sealed and left to cure.