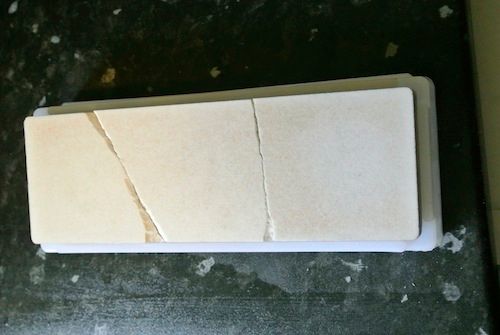
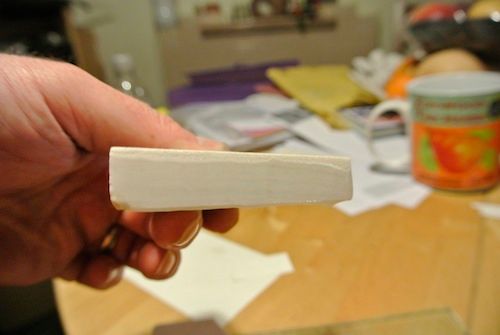
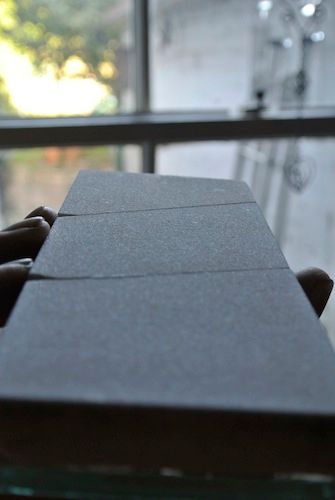
I think I've effected a permanent repair to the GBQ35 Whetstone, if you remember, it looked like this;
 How not to make a Japanese style toolbox
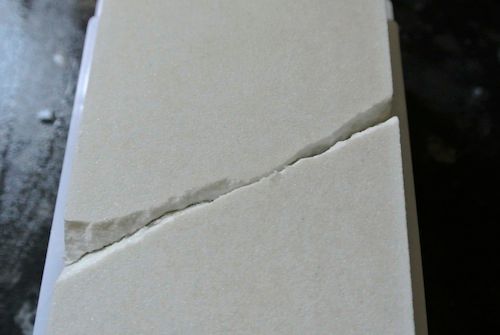
Due to the crumbling on the edges, I thought I wouldn’t even be able to glue it back together;
 How not to make a Japanese style toolbox
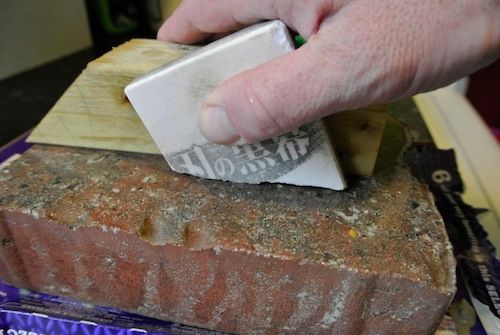
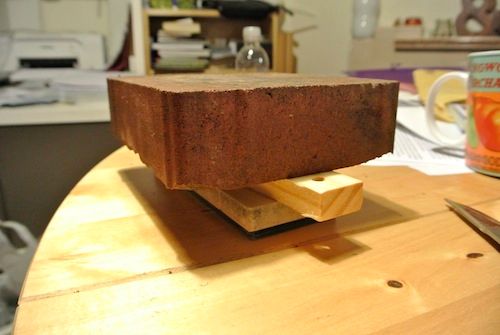
…many “boo hoo hoos” later and a bit of web-looking and following some great advice from a couple of guys on the UKWorkshop site, I thought I might be able to salvage it. First thing to do was grind the broken edges, here I’m using a concrete paver, left over from the new path and a bit of 2x2 to hold it square;
 How not to make a Japanese style toolbox
…to do the next bit I made a guide to hold the next piece at the reverse angle to the first bit;
 How not to make a Japanese style toolbox
…and then I “lapped” the ground edges together for a good fit and to correct any angles between them, I was using a contoured tile I found in the garden, possibly a flat one or some glass would be better;
 How not to make a Japanese style toolbox
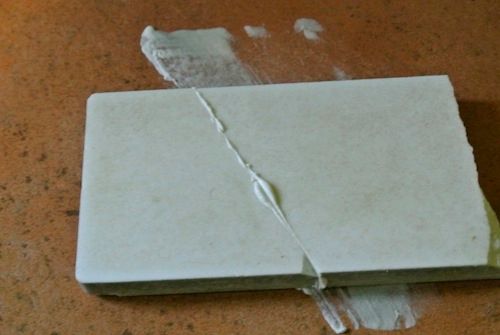 How not to make a Japanese style toolbox
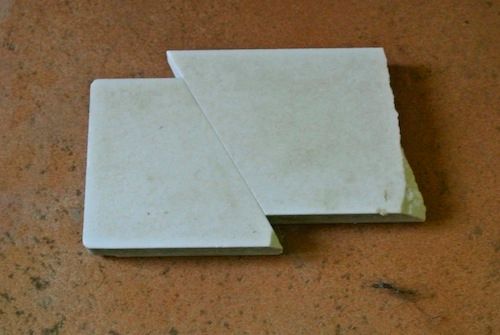
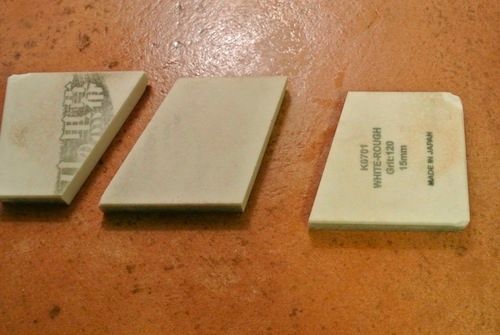
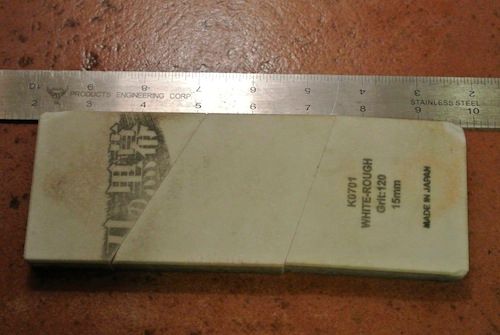
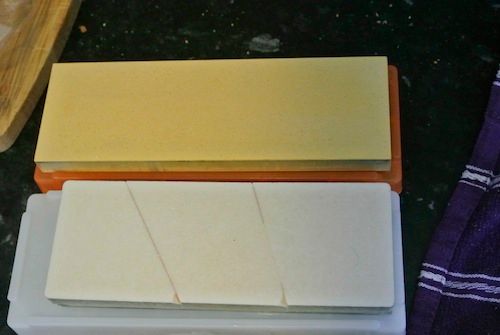
I wish I’d kept the sludge, as I could have mixed this with glue to fill some gaps! I was left with three regular, non wobbly bits of whetstone;
 How not to make a Japanese style toolbox
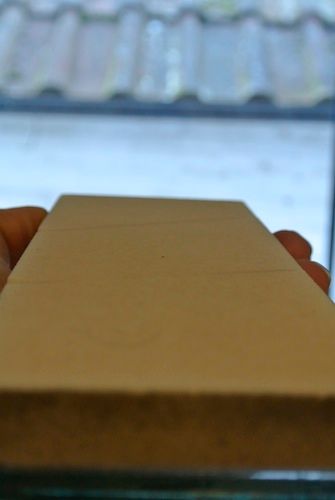
Not 100% straight but good enough for government work at least;
 How not to make a Japanese style toolbox
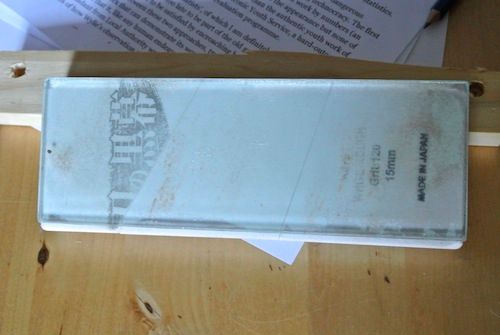
I left these long enough to dry out and the next day I phoned the local glaziers, who had moved, so are no longer local and within 6 hrs I got delivered a cut to size, ground edged, piece of 6mm laminate glass. This was a fiver so I recommend these guys;
 How not to make a Japanese style toolbox
I was so chuffed with the service I gave the driver a 2 pound note for his efforts. I had intended to use a flat tile, but there weren't none in the garden. We had some under the sink once, but since recently fitting new taps (again) I'm not going down there!
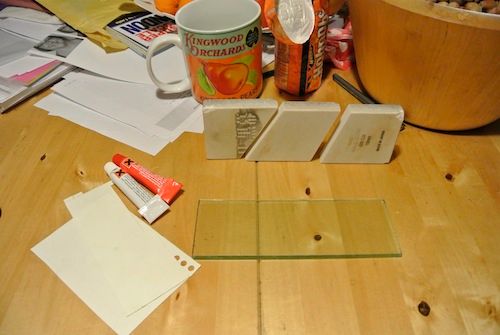
Next I got to the repairing bit. 1 packet Hobnobs, ¾ pint tea, two tubes of Araldite normal (found in spare room), some plastic card stuff, glass and the bits of stone.
 How not to make a Japanese style toolbox
araldite was mixed, spread on the glass and on the lower sides of the joining edges;
 How not to make a Japanese style toolbox
…all the bits were assembled;
 How not to make a Japanese style toolbox
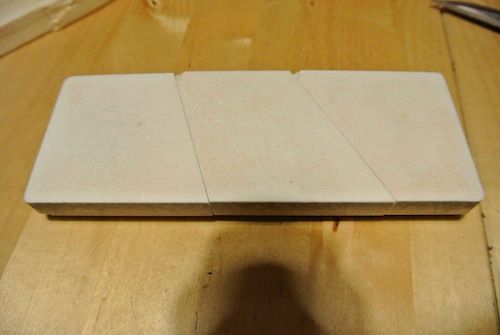 How not to make a Japanese style toolbox
and the flattening stone was re-deployed to weigh it all down;
 How not to make a Japanese style toolbox
I found I couldn’t put pressure on the ends of the stone to hold the joints together. Being wedge shaped, they just slid sideways. I think something rigid on either side would be needed, but as I wasn’t sure if this was normal or rapid Araldite (it turned out to be normal), I didn’t want to hang around to work it out. Come the morning, everything was looking okay;
 How not to make a Japanese style toolbox
I could see the top surface was a little off true and a bit of glue had squirged out the gap;
 How not to make a Japanese style toolbox
....so I took it outside to the “flattening station” and it all came right;
 How not to make a Japanese style toolbox
It’s a wee bit shorter than it was, but still very much a usable size;
 How not to make a Japanese style toolbox
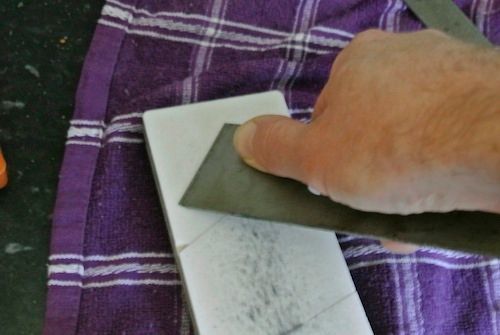
To see if it was up to scratch I took an unfettled plane iron to it.
 How not to make a Japanese style toolbox
…and I can safely say it works just as well as it did before I dropped it. I am also very pleased that spending a fiver saved me having to get a new one. If I wasn't afeared of the under-sink monsters it could have been free!


