Just a bit of an intro.
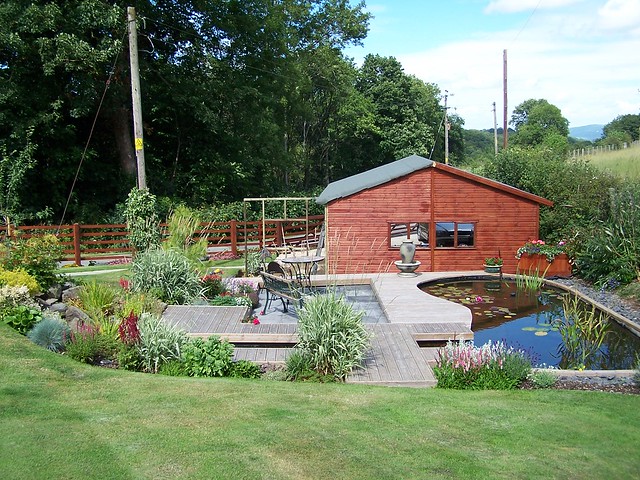
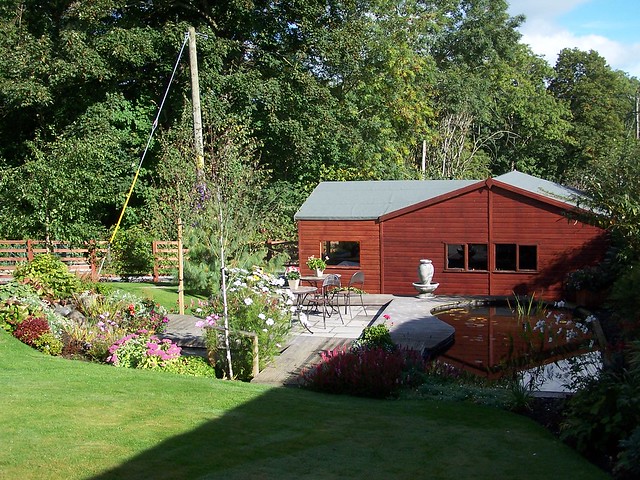
I built my wee shop as an attachment to the existing garage after the Planning Officer had turned his back. The garage is as big as we are allowed without planning permission but it still wasn't big enough for two vehicles and the gardening gear plus some workspace. It takes eight or nine months for his hopelessly dilatory department to issue permissions, so stuffim.
It wound up as a 13' x 6' space, double skinned with an apex roof, two windows and a five foot wide door to allow big thingies to get in and out. I won't bother to post all the construction pics, we've all seen a wooden shed before, but here's a snap of the initial frame going up, followed by the finished article. The only hiccup was when the rain we had in the winter overwhelmed the drainage and water came in over the brick plinth and soaked into the Sterling board floor. Clearing the drains and relaying the floor lost me a couple of weeks.
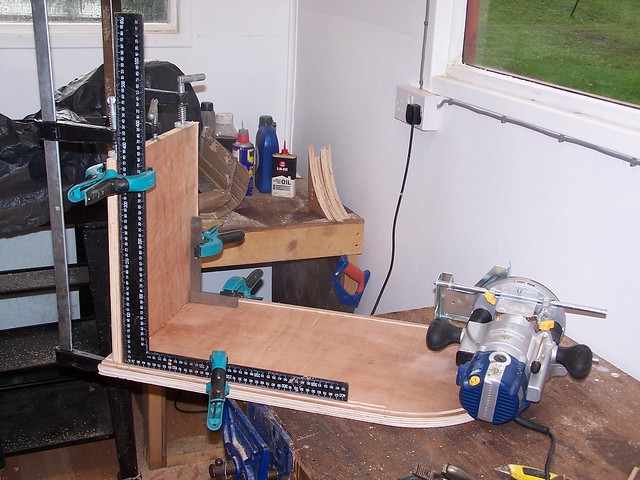
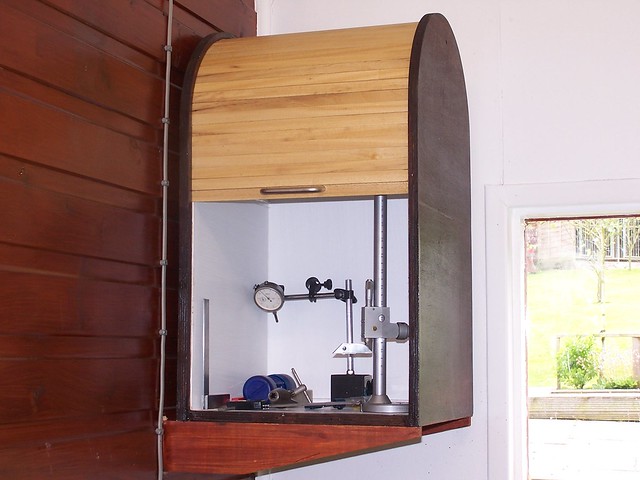
I have an aversion to kitchen wall units in workshops, especially small ones; the doors are inconvenient when open, the units are never the right size, and they look crap anyway. I had an idea of making bespoke cupboards to fit the available spaces, but make use of a rolller shutter instead of hinged doors. I had a bit of 18mm ply lying about that was basically sound but not too clever cosmetically, so if it didn't work out I hadn't lost much; it was worth a try.
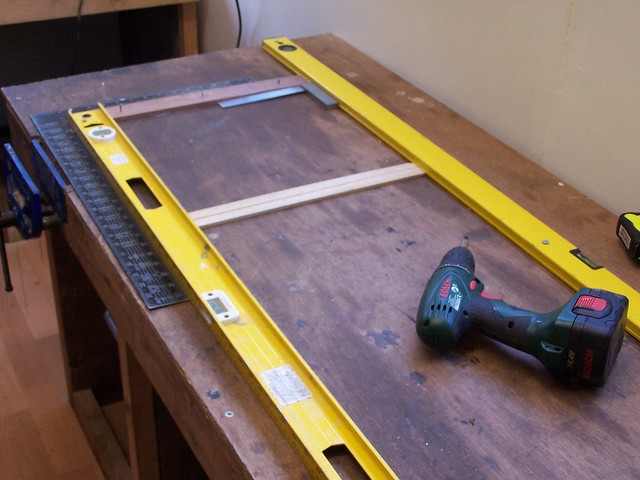
I had a dummy run on some scrap, routing a curved channel and fiddling about with bits of flat stock to see what was needed for a smooth running roller; standard off-the-shelf timber and router bit sizes worked well enough after I'd eased the rear corners of the slats with a Stanley knife.
Making the chassis was simple enough I just made sure the two side members and cross pieces were the exact same size, routed out the roller channels plus one for the back panel then glued it all up using wooden dowels. I took some trouble to make sure it was all square, I think if it was skewed the roller wouldn't run smoothly.
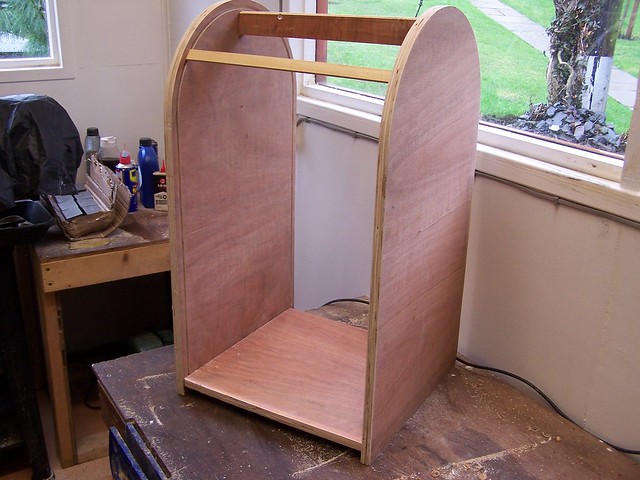
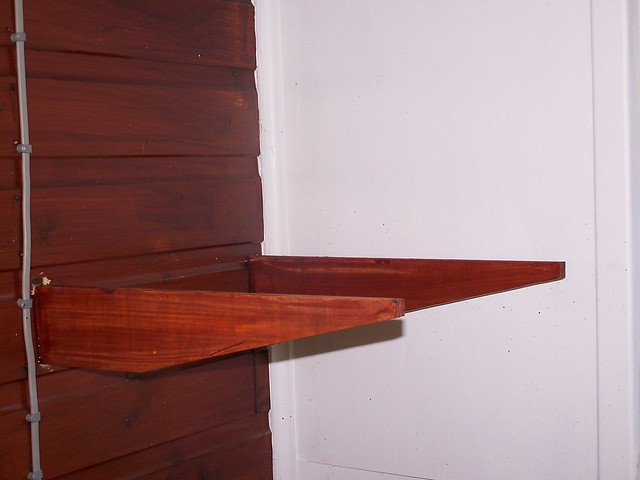
Mocked up in position above the headstock end of my lathe it looked promising. It's not too far back nor too tall reach, and I've got good access to the lathe countershaft and change wheel train.

The roller (properly called the tambour) was next; having worked out the length required I laid out a frame on the bench and filled it with the appropriate number of slats, held all nice and snug with wooden wedges; again I took pains to keep everything square. The sides of the slats where they run in the grooves were stopped off with masking tape for 3/8" to avoid getting glue on them and interfering with the fit. The second pic shows the muslin backing material laid out ready to be glued to the slats.
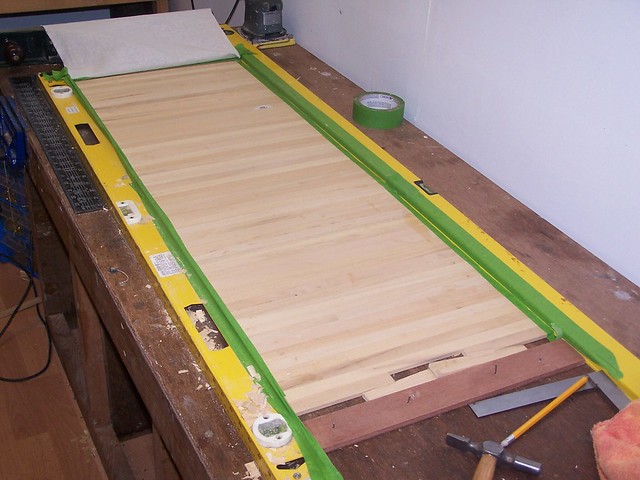
The process of gluing up isn't one I could photograph, you've got to move pretty smartish laying down a smooth, even coating of PVA wood glue, stretching out the muslin and rolling it down to remove lumps and air pockets. When all was dry, the ends of the slats were cleaned up and any excess muslin snipped off.
Final assembly prior to paint looked pretty good, so I popped in a pair of wall brackets, splodged some paint on the carcasse and varnished the outside of the tambour.
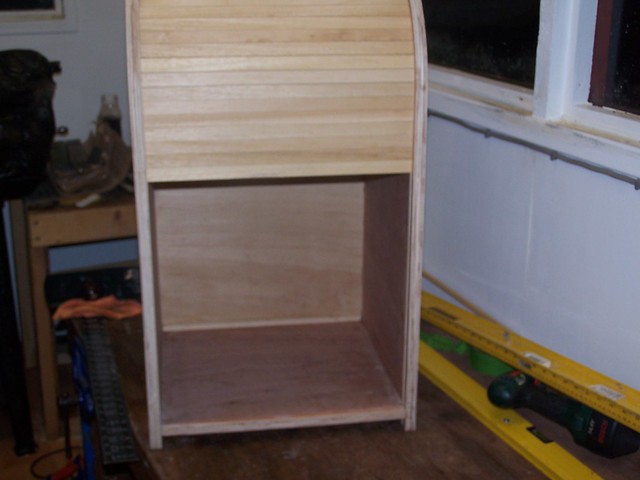
Chuffed!
I'm using it for measuring gear pro tem, that will probably change. The next one will be floor standing at the tailstock side with storage for lathe tools and accessories and some slidy out shelves to put bits and bobs on as I'm working. Hope you didn't fall asleep!
Eug


