Phweeweee! It was very hot today so I took a small break at about 2:00 and then popped out at 6:00 to put everything away. So not a massive deal has been done but at least the rafters for the roof are now underway, even if none have been cut yet! In fact it was so hot, this is the sum total of action from the apprentice;
Ooh wotsis then
looks a bit of orl right this gaff, I can see meself movin in when its finished;
.Yeah, (Yawn) very cumfy, I think Ill just have a quick lie down, zzzzzzzzz!
..And as I say, that was him for the rest of the day, didnt even want to go out and get Hob-nobs!
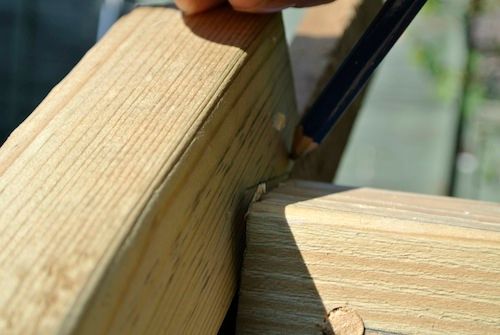
Id been wondering about the end rafters (theres probably a proper word for them, something to do with eaves or what-ever). Id never really been sure about the first lot I did;

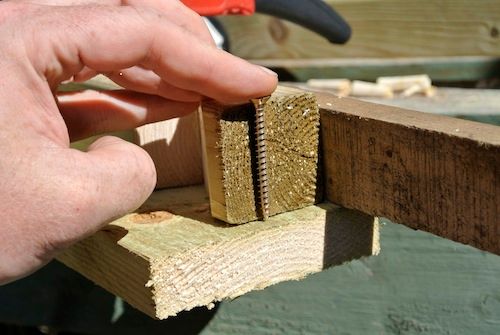
They were 3 by ¾ board, laid on their side, with sort of birds mouths cut into them. The principle seems okayish (yes, you dont need to remind me rafters should only be cut into 1/3 of the way, I do remember something from night school!). But the bare beam ends seemed a bit clumsy. I had thought of cutting into the beam ends and laying the end rafters onto the posts, but this would cut into where the mortice and tenon was, and the post could pop out the end of the beam. Or I could just screw the board onto the edge of the posts, but there would only be enough room for two screws and I thought this would be weak. Plus you would see two, non-traditional posi-drive Screwfix screws. So after a number of cups of tea I decided to put a rafter down the ends, made from 2 x 2 and see if I could stick a board on the end next to it. First, clamp a bit of batten on the end to support a bit of wood;

The top of the batten is in-line with the top rear corner of each post. Then stick a bit of 2 x 2 on this and mark the top of the post;
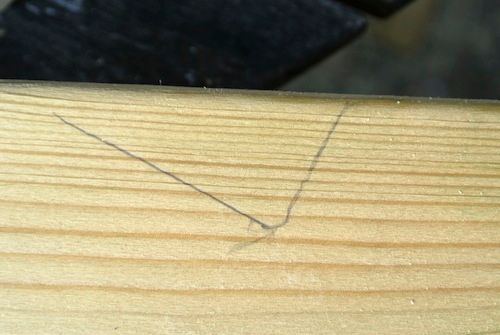
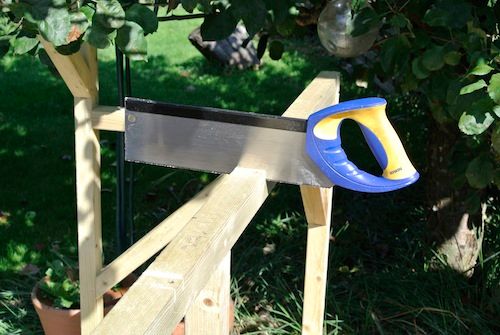
After this, I clamped the bit of wood up so that the lines for the birds mouth were vertical and apply some damage;
I know it looks like the saw is doing the work itself, but believe me, Ive tried forcing and not-forcing saws, they never do the work themselves. And after a bit of faffing and paring, voila, one rafter (sort of);

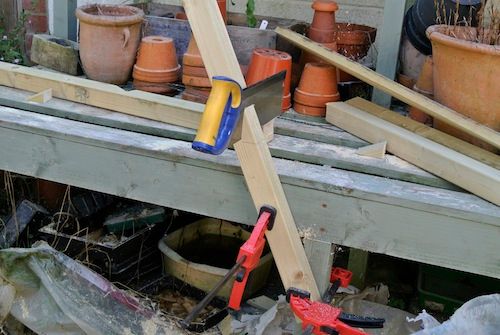
Once this was in place I could lay up the board next to it and a bit of batten on top. The batten was to raise the height of the rafter to the top of the board, so that this could take the weight of the roof, not the end board (barge-board?);
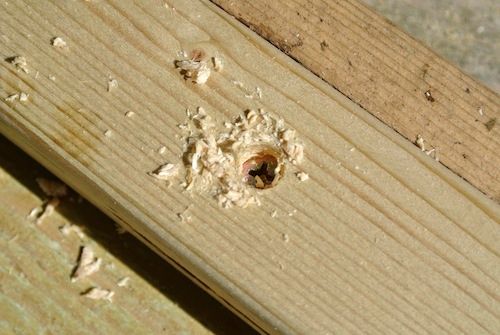
That photo actually had me trying to be clever with some other jiggery pokery, but hopefully you get the idea. Next thing was screwing the barge board? to the rafter, I could get more screws in now, but the screw heads would look ugly, but suddenly bing (light bulb goes on over my head). What if I screw in from the inside, with the pointy bit inside the board, thatll do the trick. However I realised, out of what remains of my 3000 odd screws, all the sizes were just wrong. Either theyd stick out of the board (ouch), or not go far enough into it to hold;
So Id need to counter-bore the hole. I could use the counter-bore wotsits, but as mentioned earlier, they dont, well not in this type of wood anyway. So I counterbored with a big and little drill, using the piece of masking tape round the drill method for depth control and there we were, nice counter-bored screws. (no-onell see em anyway!);
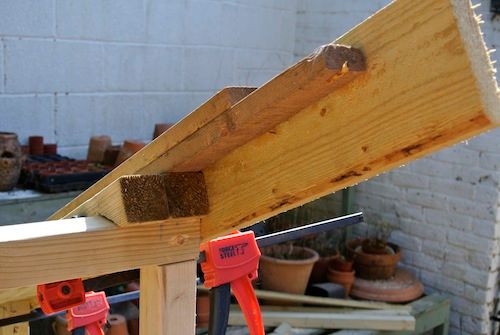
Resulting in a bit of wood screwed to another bit of wood screwed to some more wood;
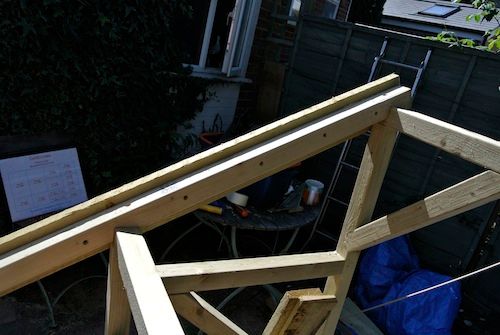

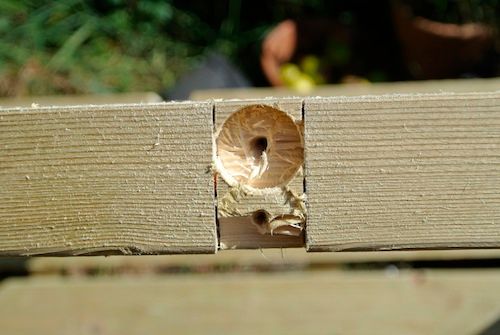
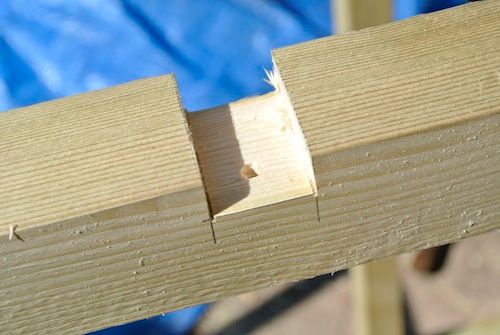
Do that again and..lots of wood stuck together. Next thing was putting the middle rafters in. I had though about setting them into the beams (wall plates?) somehow, not just resting them on the beams (plates) with birds mouths. Apparently there was a traditional method of angled housings/slots what-ever, but I decided to just do some straight slots/lap-joints (So, the accused says he wandered into Double-mint Hippo, under the apprehension it was a pub? Yes MLud Look Michael, we both went to the same school, You should know the pubs on Fetter lane are not for the likes of us, you really should try Ooh Lah Whiplash on Chancery Lane) Cutting in for the joints;
Now Id have to go get another chisel as these were 1 joints, so off for the Medium Swede, which is 25mm, so not right but close enough. However, although being somewhat sharp, twas not sharp enough so off to the grinding station, only to discover what happens if you leave your nice Japanese Whet-stones wet for too long;
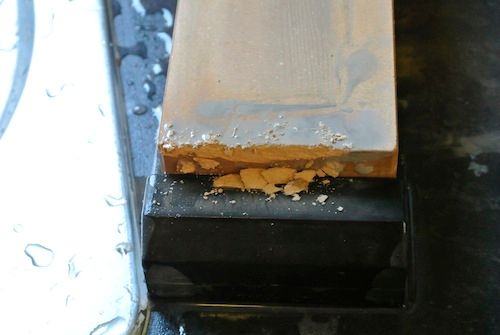
Hmm, Crumbs, crumbs! There seems to be lots of conflicting advice about these (strangely enough), Id suggest either drying and refacing them every time you use them, or, buying new chisels every time you need to make summat! Shimm shimm shimm and a bit of assault and battery to some wood. I found I was still not getting great joints as this wood chunks out a lot, so I got a 1 (25mm) spade bit and used a motor to remove a lot of it first, the finish seemed to end up better that way;
Now it was time to start marking out the middle rafters so, line them up so the top end is above the back face of the store;
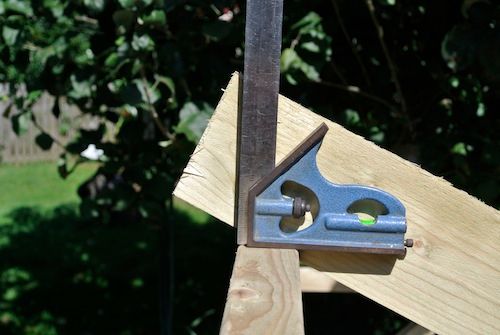
.mark out which one is which and where the birds mouths going to be;
And then stick em in, temporary like, with wedges;
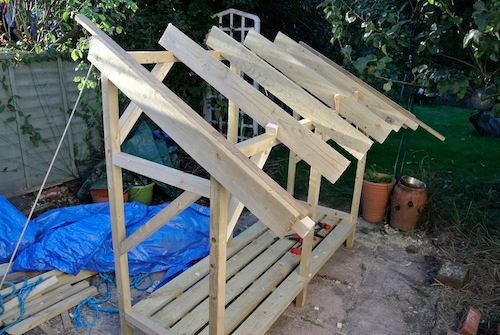
And thats as far as I got in about 4 hours. For whatever reason, it knackered me out. Oh and then the apprentice woke up. wotsat, whos er, ah, got any Hob-nobs?