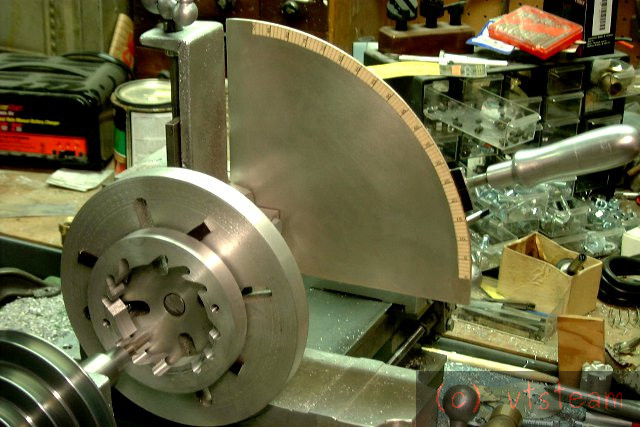
The final stage in building the milling attachment was adding a big angular measurement sector of aluminum to the vertical slide, and a handle and arm (tommy bar) to rotate the work arbor and rotary table (faceplate).
The handle can be seen mid right, and there is a black aluminum index strip also attached to it that gives a reading against the graduations on the sector. I only made one index mark, since there was already sufficient accuracy for my needs with such large spacing of the graduations, but I could have put 10 marks on the black strip and made a vernier reading that way for measurements of tenths of a degree.
To make the markings for the sector, I printed out a scale with a computer printer from a layout I did in a simple cad program. This was glued to to the aluminum sector. To turn the work arbor a full 360 degrees you would need to do that in 4 steps, releasing the arbor to bring the handle back to zero after turning the full range of 90 degrees.
The handle had a wonderfully simple mechanism for attaching and releasing to the work arbor, as needed. The work arbor was 5/8" diameter. So I simply took a 5/8" machinery collar (shaft collar) and removed the set screw. from it. The handle rod consisted of a length of 5/16" steel rod with the end threaded to match the setscrew thread. It simply screwed into the machinery collar. You could grip the arbor by twisting the handle, or release it by twisting in the opposite direction. The top of the rod had a cast-on grip of aluminum. I used a wooden file handle as a pattern when I cast it. This whole mechanism was practically put together from ready-made components.
To turn the rotary table to any particular angle all you do is twist the handle, tightening the machinery collar on the work arbor and then rotate the arbor to the angle desired.
If it is more than 90 degrees, I would first rotate to 90 degrees, twist the handle to loosen the collar and bring the handle back to zero, then twist to tighten and proceed to the measurement desired. That's all there was to it.
This is the last picture in this series. It is of cutting a scroll housing for the Tesla disk turbine (for an experiment trying it as a compressor, rather than a turbine). The Gingery lathe, and own milling attachment are finished and doing interesting work.
Thanks to madmodders for asking me to write about this, sort through these old pictures, and get them out for people to see. I hope it stimulates people to imagine new possibilities for their own equipment if they have a limited shop or limited means. Again thanks also to David Gingery's inspiration and guidance through his books.