I use a printers brayer. They can be had at the crafts stores.
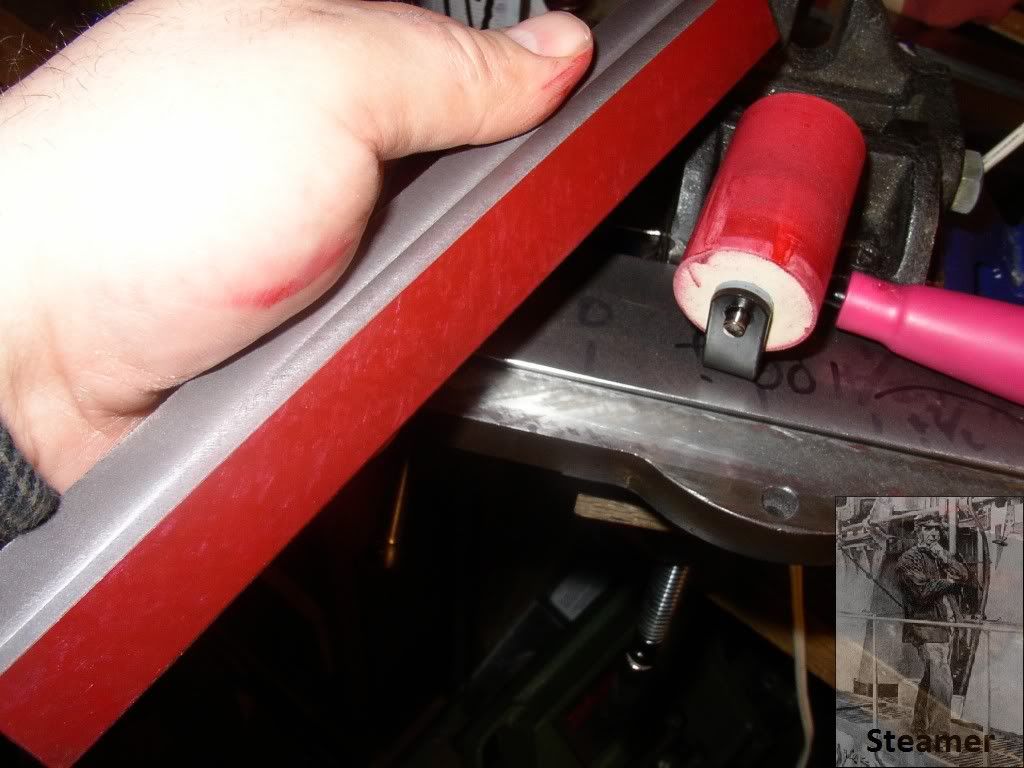
It's the roller looking thing in the upper right.
Scraping usually is performed with a reference surface, in my case of making a straight edge, I used a granite surface plate. There is always the 3 plate method of generating a surface but using 3 plates marked to each other in a binary pattern, the end result is a set of three surfaces that are flat ( It uses the premise that 2 things equal to a third thing must be equal to each other), That method is kind of academic though, and a surface plate is used most often.
There are different ways of marking up a part. I mark up from the reference. I put a small amount of marking medium on the plate and roll it out with the brayer. I then clean the item to be marked and gently rub it on the plate. DO NOT PUSH DOWN...that will deform the part and you will get a false bearing. Just slide it side to side about 1 inch about a half dozen times.
How thick to put the medium on and how to interpret the markings is important. and takes practice.
What your looking for is bearing points. They look like "bullseyes" where you have a shiny point in the middle and progressively heavier compound as you move radially from the shiny center.
Here's a in process shot of a lathe cross slide (my SB 9)
See the bulls eyes?
Initially, it's not touching everywhere, so you work "areas" first to rough it down like my angle plate repair.
http://madmodder.net/index.php/topic,7439.0.htmlFirst thing I did was to sit if down on the plate and see if it rocked.....it didn't....probably should have though looking at the first mark up!
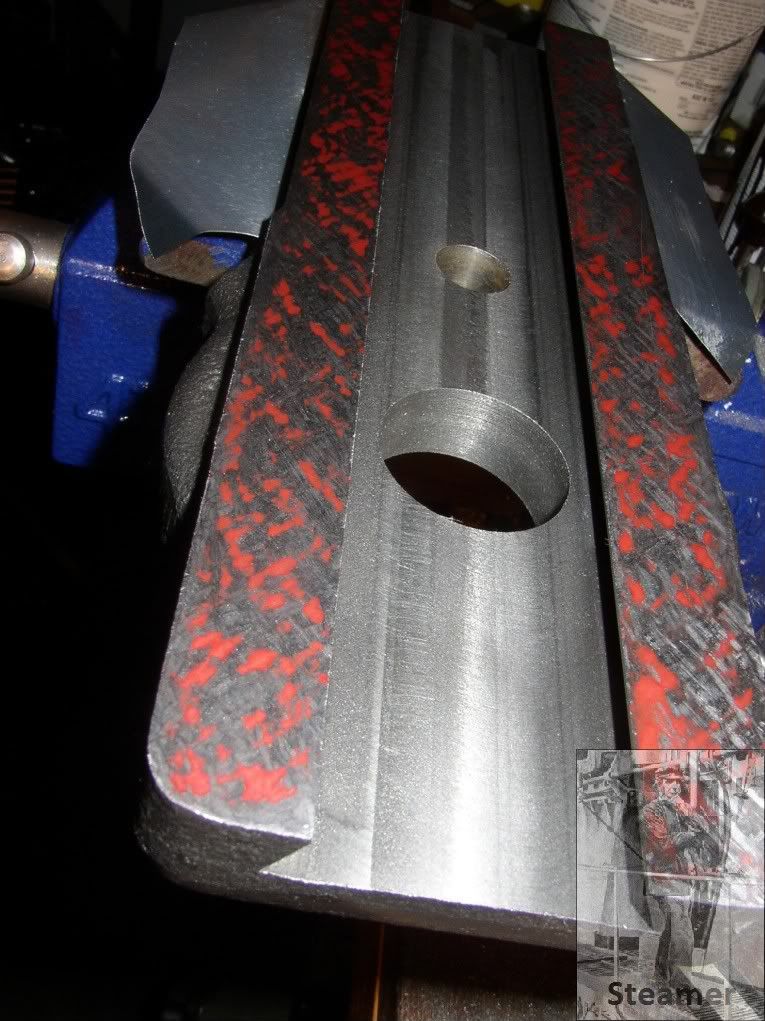
As you can see, it's touching only at the ends ....and not all the way across the part either! So the ends are high...they're touching... while the center and left side are low.
I started by cutting these areas rather heavy cutting once, and then crossing the cut and cutting it again. This is a double cut, and is used while "roughing" a part in. I then checked it against the plate by rolling out the medium again, stoning the work surface and wiping it clean and then doing another rub......and keep repeating the process! Each time through is called a "cycle"
After about 20 cycles, I got the next photo in the thread. You will notice the center is starting to fill in and mover to the left. PROGRESS!
After about another 20 cycles I got to the bottom photo, and the bearing has now "carried" across the part. If I was to bring this to gage quality, I would shorten my strokes, only do single cuts and focus on just the beairng spots. and then keep going until I had 30 or so points per square inch....LOTS OF CYCLES!
This is not a fast process....especially for an newbie such as myself!....but you can control it and there is no magic surrounding this...it's just work and the gray stuff between the ears....which this forum shows there is plenty of that! So don't be intimidated by it. Get your favorite piece of scrap iron out of the box and start in on making it flat....the worst that can happen is you put that piece back into the scrap box......and you will learn something!
What will get you is a part that is crowned in the middle, as that part will not mark repeatably, and will drive you nuts unless you recognize it! Hence seeing if the part rocked in the first step. Giving the part a gentle spin on the plate will also point out if its high in the middle or not....if it spins freely....its not flat!. In those cases, I usually take just the center down until it bears on the outer edges of the part and then work back. The part will show a stable mark up now and be way less annoying!

Dave


