Author Topic: Harrison L5 rescue  (Read 133940 times)

Offline doubleboost

  • Madmodder Committee
  • Hero Member
  • *****
  • Posts: 1619
  • Country: gb
  • Newcastle Upon Tyne
Re: Harrison L5 rescue
« Reply #125 on: May 31, 2013, 05:11:58 PM »
It is starting to come back to life  :lol: :lol: :lol: :lol: :lol:
Very nice (clean) rebuild a credit to you  :thumbup: :thumbup: :thumbup: :thumbup: :thumbup:
John

Offline NickG

  • Madmodder Committee
  • Hero Member
  • *****
  • Posts: 1890
Re: Harrison L5 rescue
« Reply #126 on: May 31, 2013, 05:23:08 PM »
Very nice, is the clutch adjustable in
Any way? Mine has started dragging and not disengaging, never really looked at it always just assumed It would be a simple matter of adjusting
Something but now thinking the pins
are probably worn like yours were.
Location: County Durham (North East England)

Offline krv3000

  • Hero Member
  • *****
  • Posts: 2183
  • Country: gb
Re: Harrison L5 rescue
« Reply #127 on: May 31, 2013, 06:14:46 PM »
well mick its shaping up nice  :thumbup:

Offline micktoon

  • Hero Member
  • *****
  • Posts: 797
  • Country: gb
Re: Harrison L5 rescue
« Reply #128 on: May 31, 2013, 06:30:44 PM »
Hi Nick ,
    the clutch is adjustable, it would appear from my manuals there are several versions like everything else Harrisons did lol, You can tension the spring at the end  by screwing the retaing top hat sort of part in that the spring sits in, but if you remove that ( LH thread ) and take the spring off under this is the steel disc you can see that is between the spring and the copper friction plate in the photo. This is another top hat shaped part that has splines inside it that slide over the drive shaft, if you remove this, its actually two parts screwed together the far side of it rests against the pin going through the shaft, by screwing and unscrewing these parts within each other it in effect makes this part thicker or thinner where the pin pushes up against it, when you screw this inner centre section around the splines will line up then not line up as you go, you will need a point where both sections are in alingment to slide it back onto the shaft or it will only slide back on half way if that makes sense. I am not sure which way it needs turned to be honest, for the dragging or not driving effect, I was just going to try and see once the motor etc is on.
  If you have a go with yours Nick I would just note whats where as you inspect and count turns etc as you take apart so you can get it back to where it was if all else fails , but all in all not that much to it so have a go , I will be taking this back off as I need it off to get the back part of the belt cover back mounted again so can take photos then, that will show it better.

 Cheers Mick

Offline vtsteam

  • Global Moderator
  • Hero Member
  • *****
  • Posts: 6466
  • Country: us
  • Republic of Vermont
Re: Harrison L5 rescue
« Reply #129 on: May 31, 2013, 08:47:30 PM »
Great job on a very impressive piece of machinery!! Looking forward to the next installment.  :thumbup: :clap:
I love it when a Plan B comes together!
Steve
https://www.youtube.com/watch?v=4sDubB0-REg

Rob.Wilson

  • Guest
Re: Harrison L5 rescue
« Reply #130 on: June 01, 2013, 03:42:02 AM »
Good to see the lathe going back together Mick  :thumbup:


Rob

Offline jb3cx

  • Jr. Member
  • **
  • Posts: 86
Re: Harrison L5 rescue
« Reply #131 on: June 01, 2013, 04:14:55 AM »
Looking good mick,are you going to power it up before you paint it ?remember when I did the head on the bridgeport,I had to take it apart again because the power feed on the quill was not engaging correct,had to repaint the twat again, :thumbup:

Offline NickG

  • Madmodder Committee
  • Hero Member
  • *****
  • Posts: 1890
Re: Harrison L5 rescue
« Reply #132 on: June 01, 2013, 05:40:54 AM »
Thanks Mick, might have a look at that tonight.
Location: County Durham (North East England)

Offline NickG

  • Madmodder Committee
  • Hero Member
  • *****
  • Posts: 1890
Re: Harrison L5 rescue
« Reply #133 on: June 01, 2013, 09:26:55 AM »
Tried adjusting that and backed the spring tension right off as far as I dare - still about 1/2 of threads on collar engaged. This has improved things but still drags when disengaged in low gears. I didn't bother trying to screw the other top hat apart, I think I'd need to shorten it but it was fully home. Think this would need stripping down somewhat to find out what the problem was.
Location: County Durham (North East England)

Offline gndurant

  • Jr. Member
  • **
  • Posts: 10
Re: Harrison L5 rescue
« Reply #134 on: August 08, 2013, 06:28:39 PM »
Hello again Mick,

Just wondered if you'd made any progress on the lathe re-build recently?  Or is the next step of painting putting you off?!

Cheers
Graeme

Offline micktoon

  • Hero Member
  • *****
  • Posts: 797
  • Country: gb
Re: Harrison L5 rescue
« Reply #135 on: January 29, 2014, 06:27:58 PM »
 :update: :update: Well I have FINALLY got back to doing the Harrison, As Graeme suspected the painting was putting me off and after spending two full days sanding , scraping and bodging I was right to be put off lol .
  This is the stage the lathe was at from last time, I had to jog my memory what was and was not done.


I then had to strip some bits off to make the prep for paint easier , which seemed like the wrong thing to do after its took so long to get back to ! Its the only way to get into things really though. This is after some parts removed and the bits that are still on have been masked up. You can not tell on the photos really but the castings are all back to bare metal so all the factory filler is off so quite a bit of filler needed, all horrible places to sand down too edges to stub fingers on etc. All inside the webs on the bed casting needed sanding and inside the cabinet.


Not to mention this little lot and a few more brackets etc that are not in the photo, every bit needs filler and sanding , all the stuff with gray paint on, had been painted by some naughty school boy as a punishment at some point so all has to be removed as its old caoch paint and scratched and battered and will probably react with the new paint, this is inside most of the covers too so lots of elbow grease involved in getting it al off or to a stage where its sound and smooth.


This is the pile of bits after the process, all dents and scratches etc filled and all the old paint gone or sanded to a decent lower layer, The cabinet door with Harrison cast into it still needs more work as it has horrible old paint around the raised letters , this will be pain to get off but the base layer of grey is not bad so I dont want to strip the paint right off as the casting will no doubt be rough and full of filler. I am going to etch prime the lot , check if any more filler is needed then high build primer the lot and the lathe too and do the apron, saddle , gearbox and tailstock as seperate job after...oh and the light the suds tank and frame....... oh and the motor and mounts ....oh and the steadies


This is the lathe after a few sessions of filler and sanding , I have brush painted etch primer inside the cabinet and on the lower section I will give this a light sand and spray another coat over it when I spray the lathe, I have also sealed around the usual edges that trap oil and crap and done the same around seams on the splash guard. I am hoping to get it etch primed and primed tomorrow, Then a final rub down and grey paint which will be next week now. The plan is to get all this lot painted and then I can assemble the belt guards , motor , electrics box , cabinet doors etc then prep and paint all the other parts the other parts.


  Cheers Mick.

Offline doubleboost

  • Madmodder Committee
  • Hero Member
  • *****
  • Posts: 1619
  • Country: gb
  • Newcastle Upon Tyne
Re: Harrison L5 rescue
« Reply #136 on: January 29, 2014, 06:35:18 PM »
It will look great once you get it painted :drool: :drool: :drool: :drool: :drool:
The attention to detail is a credit to you  :lol: :lol: :lol: :lol:
It wont be green will it  :jaw: :jaw: :jaw: :jaw: :jaw:
John

Offline Manxmodder

  • Hero Member
  • *****
  • Posts: 739
  • Country: gb
Re: Harrison L5 rescue
« Reply #137 on: January 29, 2014, 10:24:04 PM »
Nice one Mick, We'll keep willing you on to finish her this time,she's gonna be a classy looker.
It was this lathe project of yours that originally guided me to this forum and as I've said previous I own an L6 MK1.  I can see from your photo album the gearbox internals are pretty much identical to my own. We have both arrived at a similar solution for the rattly clutch fix except my oversize replacement pins were machined from carbon steel,I would have preferred the rollers you used but I never thought about that option at the time(May 2013).  The other problem we've both encountered and arrived at similar solution is the burrs raised on the gear bevels (mine are also sporting evidence of clumsy gear changes) you solved it with diamond files and stones,and I'm going to use diamond discs in the rotary tool to correct the damage.
I picked up a couple of the original Harrison 'C' spanners of the internet for dismantling and adjusting the headstock taper bearing lock rings,some brute has been at them with pin punch in the past.
Did you fit new Timkens in the headstock? if so where did you get them from and what sort of price?...OZ.
Helixes aren't always downward spirals,sometimes they're screwed up

Offline micktoon

  • Hero Member
  • *****
  • Posts: 797
  • Country: gb
Re: Harrison L5 rescue
« Reply #138 on: January 30, 2014, 06:48:42 PM »
Cheers John , Oz I did replace the bearings , They were Timkens but I replaced them with a cheaper make but same spec , it ended up about £100 for the two taper bearings and races, the front one has a flange on the race to set the depth, G&Mtools on Ebay did have new old stock for some Harrison Bearings so if you know the numbers you might be lucky. What spindle nose does your L6 have ? , I have been told they are the same as mine , that is two and a quarter inch 6tpi Whitworth, I still need a drive plate and face plate if they are the L6 fitment it might be easier to find them.

   :update: Well after another day of none stop masking last minute rubbing down and general cleaning spray guns etc etc , I have made some more progress.

A bit more masking off of machined surfaces and a general sort out and sweep up, panels arranged upside down to do the etch primer underside then once dry turn them over and do the side that matters.


All coated in self etch primer , no nasty surprises and it always looks better when things become one colour , you fell like you are finally getting somewhere. I fitted the one door back onto the cabinet but the other needs a good go over so the primer would not have got done today if I had got the cast door ready too so will do that in with the next batch of parts. It took a bit of messing about to do one side then the other then move some parts so there was room for the other bits but got there in the end.


As I was doing the etch primer I could hear screaching from the compressor belt and the rate at which the pump going was varied, as the etch was drying I truied to tighten up the belt but the motor was already as far as it would go so I had to drill four holes in about 10mm plate where the motor mounts and file them into slots joining the exhisting holes , the compressor if in a cupboard so not an easy task took about two hours but did the job. I then sprayed three coates of high build two pack primer, the castings etc got a bit more so they will flat down nice and smooth, all went well and no reactions of paint so as long as its dried without a hitch its almost ready for the gray top coat.  These last shots were taken with the primer still wet.


 Cheers Mick

Offline awemawson

  • Global Moderator
  • Hero Member
  • *****
  • Posts: 8972
  • Country: gb
  • East Sussex, UK
Re: Harrison L5 rescue
« Reply #139 on: January 31, 2014, 04:13:20 AM »
Mick that is looking superb  :thumbup:

Don't you find that the overspray gets everywhere? I was amazed, when I had to spray my Edwards folder indoors, that although I'd put sheets up and lined the floor, and was careful to be lenient with the gun, a fine sticky dust settled all over the place  :scratch:
Andrew Mawson
East Sussex

Offline micktoon

  • Hero Member
  • *****
  • Posts: 797
  • Country: gb
Re: Harrison L5 rescue
« Reply #140 on: January 31, 2014, 08:43:53 AM »
Hi Andrew, I know what you mean and it is a problem but this paint is the lesser of the evils like cellulose its tens to dry in the air so londs as dust as long as things are not too close to where the item getting sprayed is. The enamel type paints like the old Techaoyd type stuff is horrible the whole workshop takes a coat of fine wet mist, two pack is not much better too.
  I like this paint for finish and hard wearing but the less mess element of it is the main reason I like it.
 Cheers Mick.

Offline Pete.

  • Hero Member
  • *****
  • Posts: 1075
  • Country: gb
Re: Harrison L5 rescue
« Reply #141 on: January 31, 2014, 12:27:14 PM »
Cracking job Mick, I certainly admire your tenacity. Nice big open work space you have there too - I'm very jealous of that!

Offline Pete W.

  • Hero Member
  • *****
  • Posts: 852
  • Country: gb
Re: Harrison L5 rescue
« Reply #142 on: January 31, 2014, 02:36:22 PM »
Cracking job Mick, I certainly admire your tenacity. Nice big open work space you have there too - I'm very jealous of that!

Hi there, Mick,

I certainly agree with both of Pete's comments.

Nobody has responded to my requests for help about painting on my Myford QC Gearbox thread.  Once I've drilled and tapped all the holes for the fittings on my gear cover casting, I've got to paint it.  I was anticipating using Hammerite Special Metal primer, it's water-based and I assume from the chromate yellow colour it's an etch primer.  Then I was going to finish coat with Myford grey brushing enamel.  Alternatively, I might use what John Stevenson calls a 'rattle can' if I can source one the right colour at an affordable price.  That would be the nearest I could get to spray painting.  I hadn't considered using a filler - what filler have you used?

I've recently been watching a series of Youtube videos by Dan Gelbart.  His video on surface preparation is interesting.  He reckons preparation by washing with a solvent is useless because it leaves a surface layer of hydrocarbons one or two molecules thick, microscopically thin but he says it's still thick enough to prevent the paint bonding to the metal surface.  But then he's using powder coating.

He also shows a natty electrostatic painting rig - the job is grounded and the paint (powder) gun is at 30 kV!!!   :zap:   :zap:   :zap: 
I don't remember his giving a maker's name for the gun and I haven't researched it myself yet. 
Best regards,

Pete W.

If you can keep your head when all about you are losing theirs, you haven't seen the latest design change-note!

Offline krv3000

  • Hero Member
  • *****
  • Posts: 2183
  • Country: gb
Re: Harrison L5 rescue
« Reply #143 on: January 31, 2014, 03:57:51 PM »
well its looking brill mick its a bawt time you started to put it back together

Offline micktoon

  • Hero Member
  • *****
  • Posts: 797
  • Country: gb
Re: Harrison L5 rescue
« Reply #144 on: January 31, 2014, 04:29:36 PM »
Cheers Pete ,
   Hi Pete W  I havent seen the hammerite special metal primer but if its water based I doubt it will be etch primer but I could be wrong. You can get rattle (spray cans of etch primer from motor paint suppliers ) which might be an option , you can also get spray filler primer too in cans but to be honest its not as thick as you could spray it through a spray gun so a half hearted version really. Rustoleim brand do good cans of gloss in lots of machine and RAL colours , they probably do primers too, Cromwell tools sells them so you could look up online.
    In general with this old stuff if its not too big or a total nightmare shape you are better off getting back to metal or mostly metal, then using car body filler Davids isopon P38 or similar fill the worst deep stuff or if an area has multiple srtatchs , gouges or dents try to do a skim right over the area and then sand down using say P80 grit with foam block etc to contour it, once the shape is ok and edges feathered in sand overall with say P240 then 320 then etch and then filler prime it, you will then see how good you have got the surface and may have to re do some areas but the bodge is hard and sandable in minutes and the primers both dry quite quickly too especially if you warm the part with a fan heater too. Once you are happy with the primer give it a light sand with about P600-800 and three coats of gloss if you are spraying and you should get a good finish.
 Its all in the preperation Pete so unless your finshed primer once sanded looks spot on your top coat will only highlight any flaws, Mind I am being a total fanny here and want car type finish so you can probably cut some corners and still get a smart looking finish for a machine  :)

 Bob ...............You aare dead right Its about time I got this project done   :palm:... next week will see big changes, today a funeral and dentist appointment spoilt progress.

Offline Manxmodder

  • Hero Member
  • *****
  • Posts: 739
  • Country: gb
Re: Harrison L5 rescue
« Reply #145 on: January 31, 2014, 10:25:44 PM »
Hi Mick,yes I can confirm (2  1/4" X 6TPI) spindle nose thread on my  L6.

Have you considered getting hold of a 5" chuck backplate and making a faceplate up by attaching an old car or light commercial vehicle engine flywheel from the breakers or cheaper option still is to machine and screw cut your own mounting boss to suit spindle thread and fit an old flywheel to that,
I can give you the dimensions of a standard Harrison 10" faceplate if you wish.

I've gone this homemade route a couple of times myself to make faceplates and also as circular table for the pillar drill.

Vehicle flywheels tend to made of decent stuff in order to withstand the high loads exerted on them.

Here is a link to a L5/L6chuck backplate casting for sale on G&M ebay shop,but I think he's being a bit ambitious with the quoted carriage cost .....OZ

http://www.ebay.co.uk/itm/5-2-1-4-x-6TPI-Chuck-Backplate-Harrison-L5-L6-140-Lathe-etc-Clearance-Price-/360838637858?pt=UK_Home_Garden_PowerTools_SM&hash=item5403a8a922
Helixes aren't always downward spirals,sometimes they're screwed up

Offline micktoon

  • Hero Member
  • *****
  • Posts: 797
  • Country: gb
Re: Harrison L5 rescue
« Reply #146 on: February 03, 2014, 09:10:14 AM »
Hi Oz, I had seen that chuck back plate on Ebay but he is being a tad greedy I think , I just missed one that went for £6.50 as forgot when the listing ended ....same old story , I can probably make them at a push and no great rush for them just good to know that it is the same fittment as the L6 as does open up the chance of finding one maybe ?

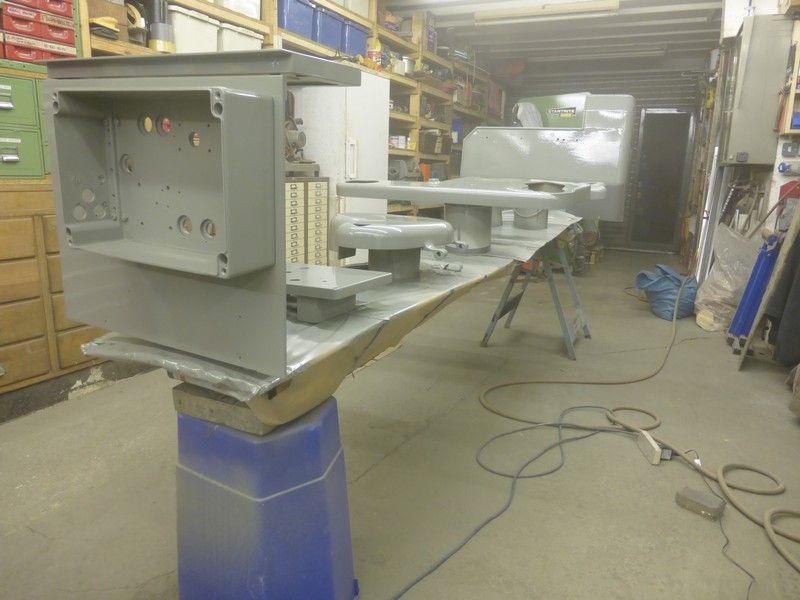
  Well I am glad to say things have moved on a bit over the weekend and the main parts of the lathe are now covered in three coats of grey paint. There was the usual messing about trying to sort out how to spread out all the parts to be done and still be able to get around them to paint them, I had to make a couple of brackets and mounts but managed in the end, once spraying I used a hand held lamp to move about and keep the reflection in the right place , this is to see where the paint is covering wet and where the edge of the new wet coat is so you dont get dry areas with no shine or areas getting hit twice and then runs, three of these old scrappy desk lamps packed in on me as I was trying to keep going and get around the bits, I ended up using one of the Ikea LED lamps Doubleboost gave me and it worked spot on.

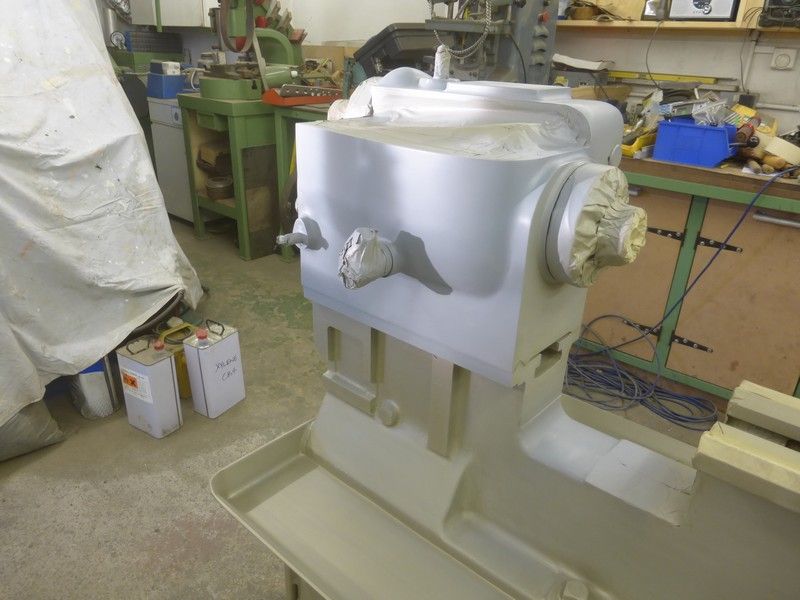
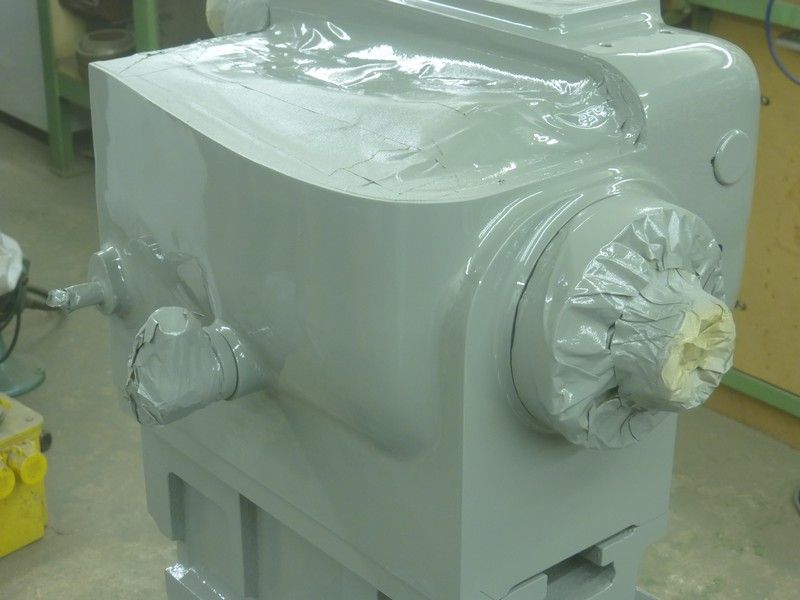
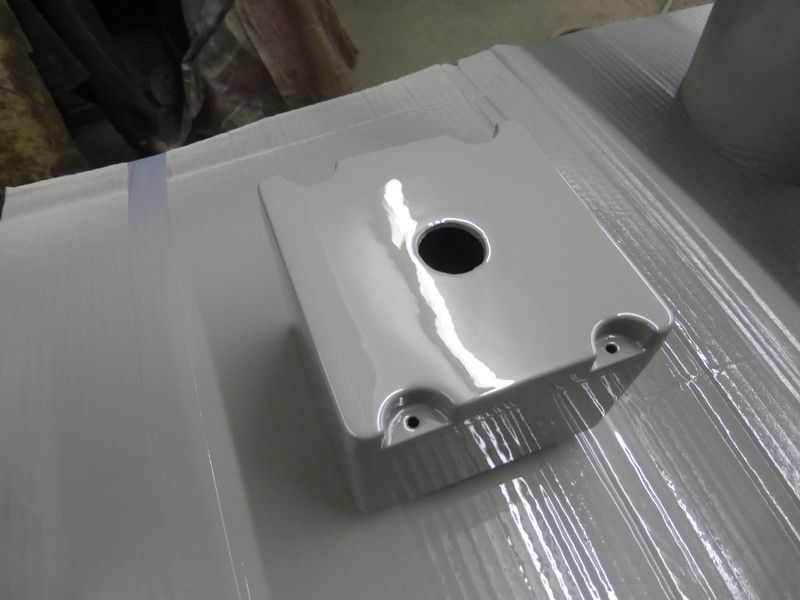
 After rubbing down all the primed bits there is always the odd bit that needs touched up where the primer has flatted through, I did this with rattle can primer as it dries in minutes and needs only very light flat off as its so thin. The grey areas are the rattle can, on the second photo you can see the sun ( that has not been shining for weeks) casting light and shadow right across the headstock , this is a disaster lighting situation for spraying as you have not got a clue where you are hitting , I had to wait like a vampire for the sun to go down as I could not blank off the window easy and it was getting dark soon anyway.


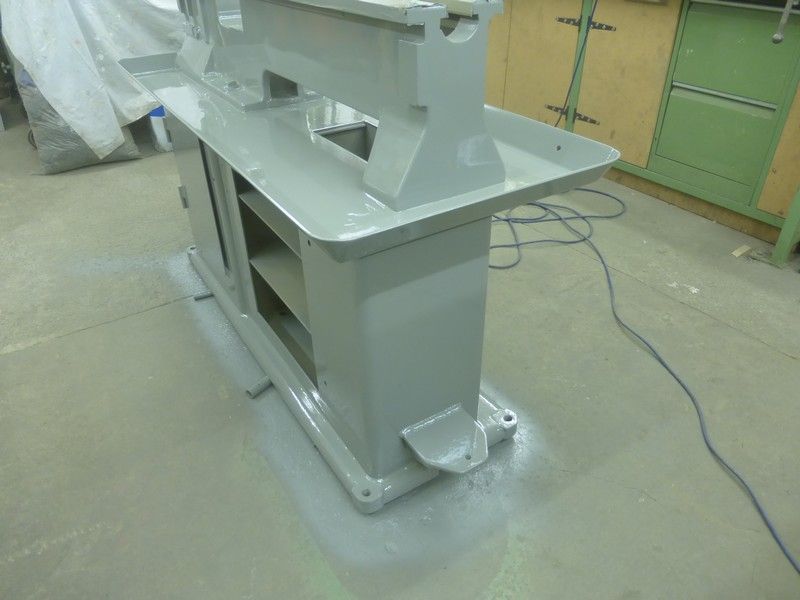
This was the final set up for painting , some bits have been assembled to lessen the area taken up spraying, I would rather stand things up like this than hang them , partly it seems easier and also its amazing how much things can sway about when getting sprayed. The top shelf on the electric box panel is fitted the wrong way around as it will let the paint hit all the areas that will be seen unlike if ifway fitted in its final position


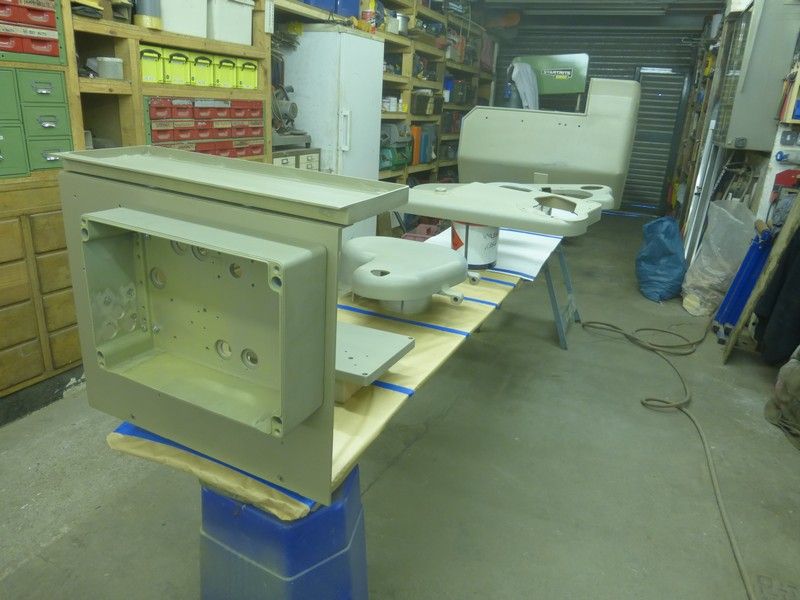
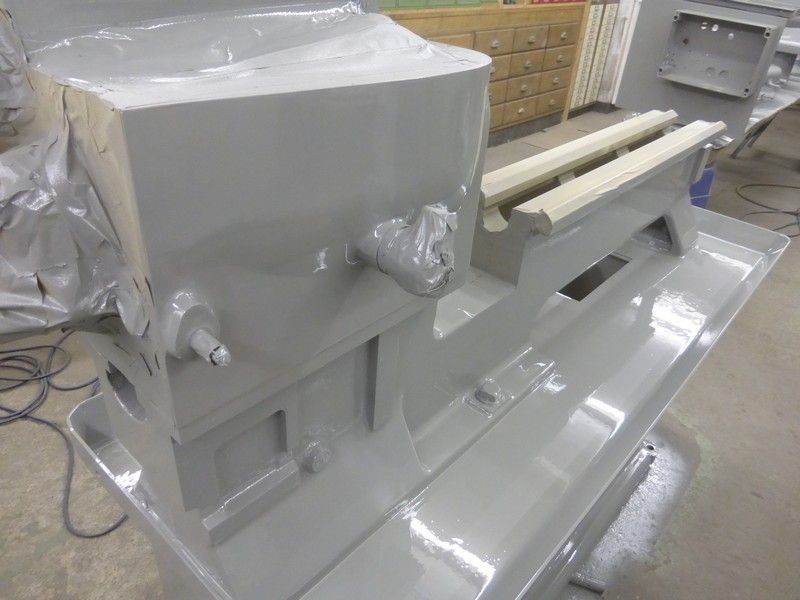
First coat of grey on


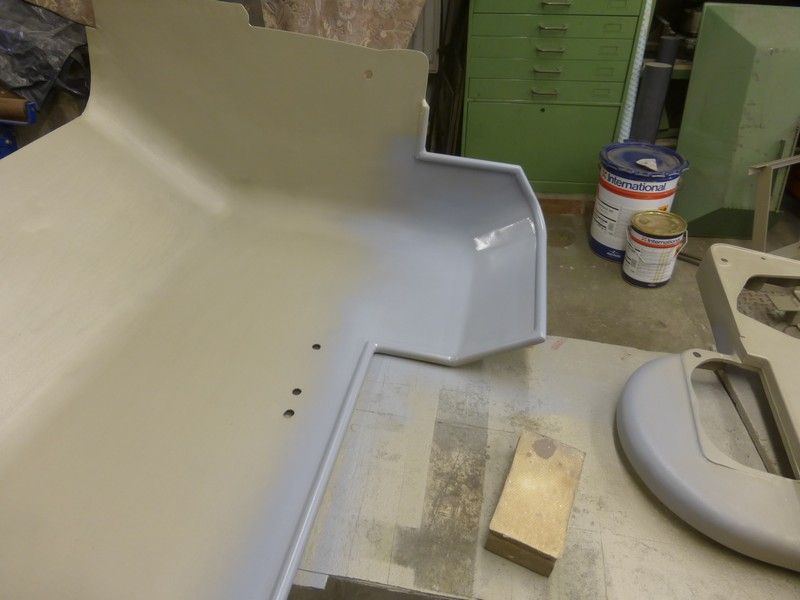
This is the finished job after three coats of gloss, I have pushed it to the limit for not running but I hate dry areas and nice glossy paint is easier to wipe down too. The paint is still sort of wet here so a bit mist in the air still and I also had left the camera on the wrong setting for some of them hence the variation in colour on some photos, its the right colour of the original layer of paint anyway.


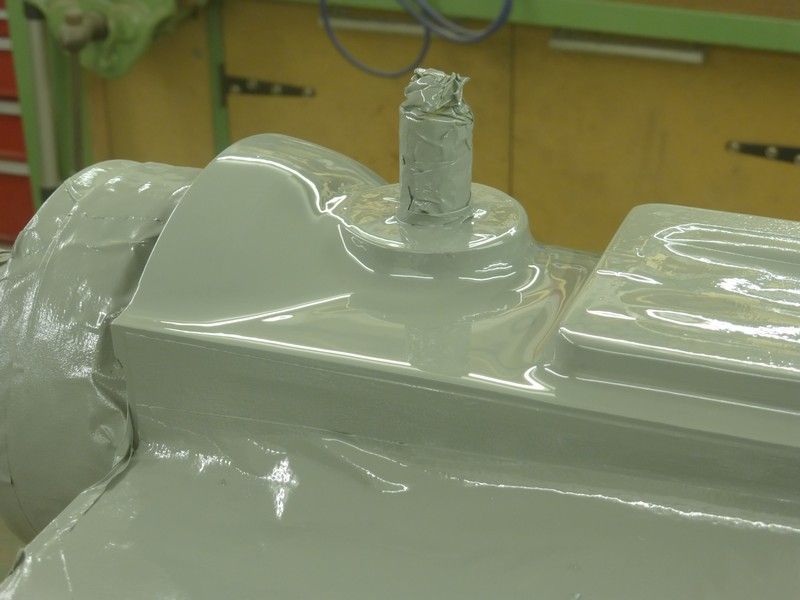
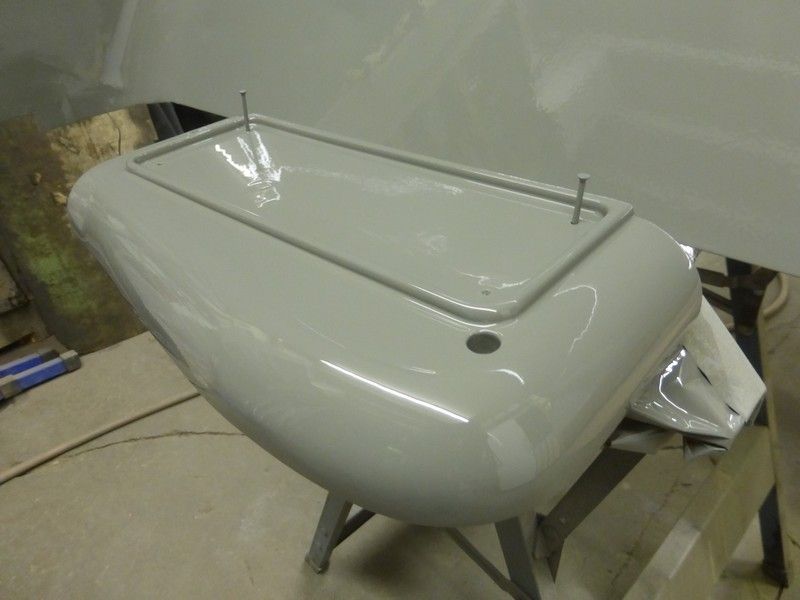
 I am glad to report that it all dried fine apart from the odd small areas that had a fault or too that would piss you off if on your new Rolls Royce but livable with on a 1959 lathe !
  I can start to put some bits back on now and start on batch two of parts that need painting..........more to come soon.
  Cheers Mick.

Offline philf

  • Hero Member
  • *****
  • Posts: 1123
  • Country: gb
Re: Harrison L5 rescue
« Reply #147 on: February 03, 2014, 10:38:33 AM »
Mick,

That's beautiful!   :thumbup:

It'll be a shame to create nasty, hot & sharp swarf with it!

 :beer:

Phil.
Phil Fern
Location: Marple, Cheshire

Offline awemawson

  • Global Moderator
  • Hero Member
  • *****
  • Posts: 8972
  • Country: gb
  • East Sussex, UK
Re: Harrison L5 rescue
« Reply #148 on: February 03, 2014, 11:49:00 AM »
 :bow: :bow: :bow: VERY nice Mick  :bow: :bow: :bow:

How long do you reckon to leave it to harden off before re-assembly ?
Andrew Mawson
East Sussex

Offline Pete W.

  • Hero Member
  • *****
  • Posts: 852
  • Country: gb
Re: Harrison L5 rescue
« Reply #149 on: February 03, 2014, 12:04:29 PM »
Wow, Mick,

That's very impressive.  I shall be revisiting this thread when I get to the painting stage on my Gear Cover!!   :bow:   :clap:   :bow:   :clap:   :bow:   :clap: 
Best regards,

Pete W.

If you can keep your head when all about you are losing theirs, you haven't seen the latest design change-note!