
- Thanks Dave. That pencil torch was driving me up the wall anyway, so it's good to find a better use for it.
Some days are just a pleasure in the shop; today was one of those golden days, with everything just going right

First thing up was the tap needed for threading for the filler valve... I could have single-point turned the thread, but a tap would be convenient, as I have two other boilers that I want to build gas tanks for, and some future projects will also require it. From other posts and documentation, I know the "standard" Ronson style filler valve uses an M4.5x0.5 thread, but the one in the donor pencil torches is definitely M5.5x0.5. No matter; I don't have a tap for either anyway.
I chucked up a bit of 6mm oil hardening silver steel, and turned it down to 5.5mm for a length, added a run-out groove with the parting tool, a step on the front that's exactly 5mm diameter, and a gentle taper just by eye using the topslide. The tap will be used on through-holes, so there's no need to make it in the shape of a plug tap:
Then I set about carefully honing my "small" 60 degree threading toolbit to a really nice sharp tip on an oilstone - using a "fishtail" gauge to make sure I didn't go out of kilter on the angle. A 0.5mm pitch is a relatively fine thread; the total infeed needed is only 0.25mm / just under 10 thou, and the tool must be really sharp to cut accurately:
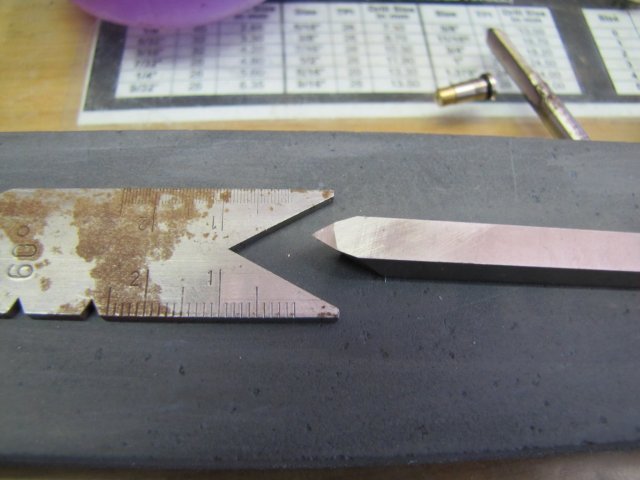
I used a rod chucked in the tailstock to set the tool squarely, once again using the fishtail to check:
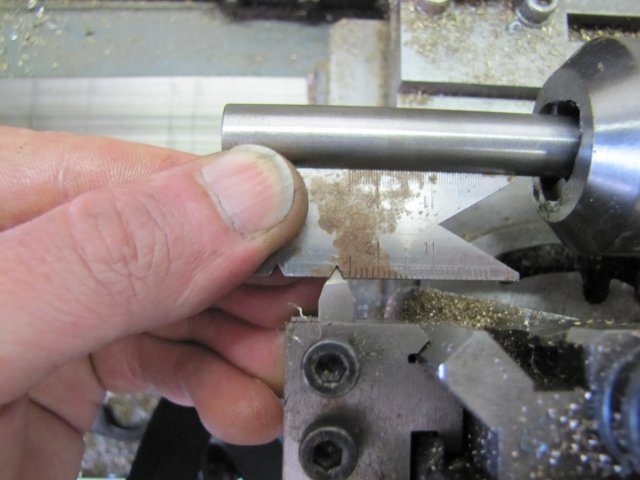
Then I spent a good half an hour setting up the ML7's change wheels for 0.5mm pitch, and thoroughly cleaned each and every gear tooth and the lathe's leadscrew with a toothbrush before giving it all an even coat of oil. Fine threads don't like gunk in the drivetrain. My lathe does not have zero-able dials on it; so I found the total depth of thread reference reading by feeding in till the tool _just_ touched the 5mm section. I wound the cross slide out and dialled in an ~2 thou cut for the first pass:
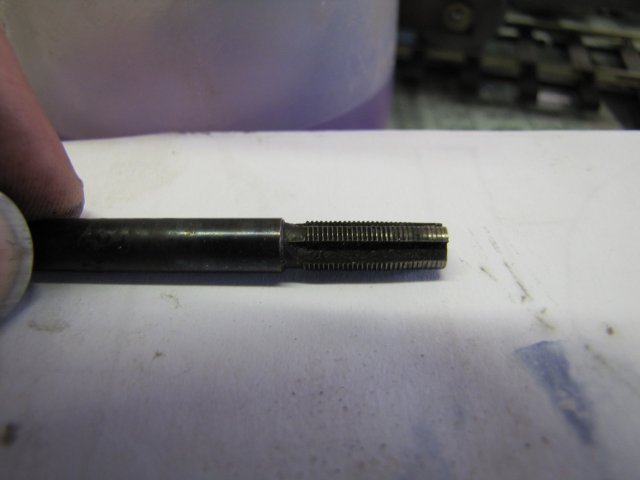
Three more passes at 2 thou infeed each followed - with a good amount of cutting fluid applied for each pass. This sounds like very little, but with the extremely sharp tip needed on the tool, anything more might easily chip off the tip. On a coarser thread this would not matter much, but on a fine thread, that would mean re-doing everything; it's difficult to pick up a thread properly if one have to re-grind the cutting tool, and all dial readings go out as well. Fine successive cuts also helps to make a really smooth thread in my limited experience, and that's exactly what I want from a tap. My original depth reading was between 45 and 46 thou on the handwheel - and as close as I could judge it at about 45.75 thou - but that already left a scratch, so for the last two passes I went to 45.5 thou; one to cut and one to finish. This is what the result looked like:
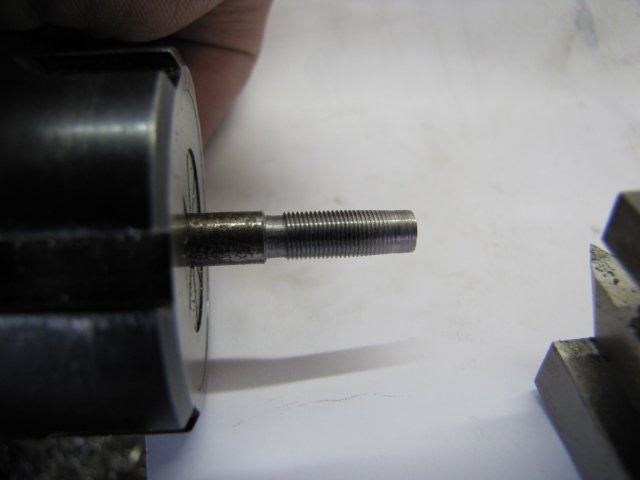
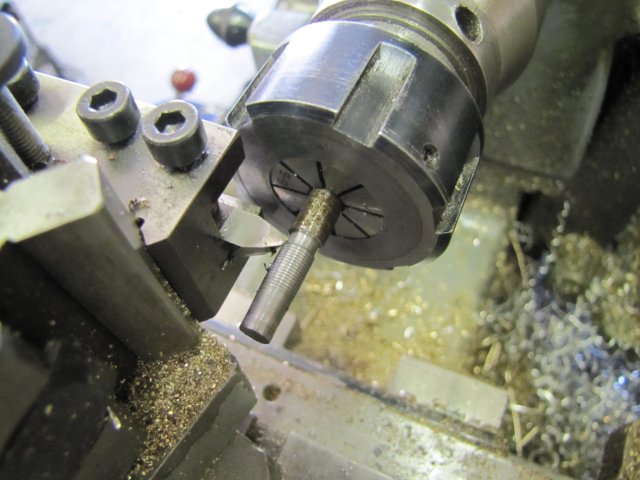
It's always nice to have a reference to check with; in this case the body of the donor pencil torch, and it screwed on smoothly right away - but more importantly with no free play in the thread at all - just what I wanted:


Can anybody tell I love doing single point threading on the lathe ?
- I'll stop boring you now and get on with things.
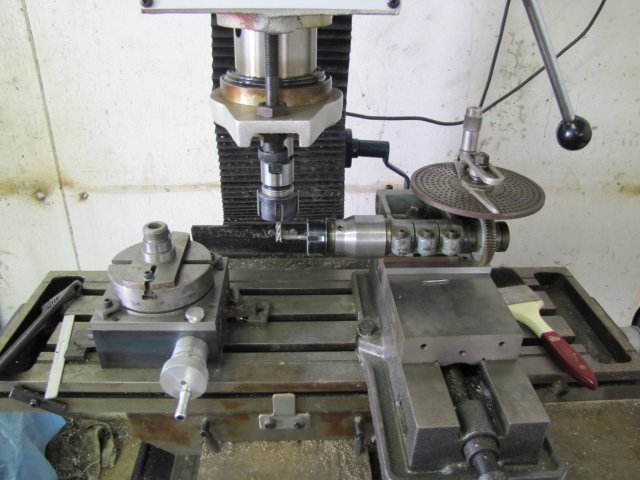
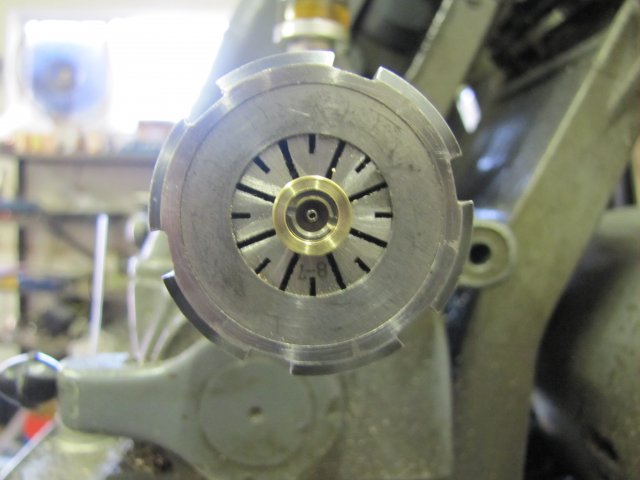
I used this setup to mill the tap flutes - it's nice to have a dividing head that can plonk into the mill vise in just seconds:
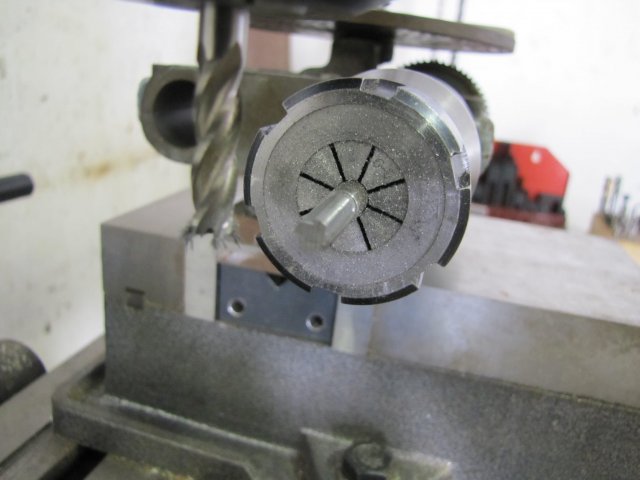
A bad photo follows; focus was on the chuck and not on the face of the workpiece

- I milled in the flutes - with the milling cutter cutting about 0.1 mm below the centre line. This provides some relief on the tap's flutes for cutting, and also allows a bit of sharpening after it's been hardened:
After milling out the flutes, I coated the workpiece liberally in some semi-dried-out dishwashing liquid, and shoved it on a dirty and well-used bit of firebrick that I don't care much about:
The soap makes it easier to get a bit of shine back on the workpiece after hardening it - and more importantly, it provides a bit of protection to the delicate threads by forming a kind of coating when heating things up.
I took that lot, a bucket of used motor oil I have hanging around, a pair of pliers, a fire extinguisher, a leather welding glove and a small blowtorch outside to the driveway leading to my shop. There I set up things so that I would be up-wind of any fumes, with the fire extinguisher behind me - ready to grab on-the-run.
Why all this boo-hah ? - well, I can't get my hands on water hardening silver steel (drill rod) - so I have to use oil hardening. I do have some air hardening silver steel, but that always warps, so is pretty much useless for a job like this. Hardening the workpiece means heating it till it's bright red, and then dunking it in the oil to cool rapidly. That produces a good bit of potentially highly flammable/explosive smoke - so safety is paramount. It's not nice getting burnt; I know very well from some non-shop but first-hand (well, both of them in fact

) experience.
No photos of the process; that's a distraction that I'm not comfortable with, and besides, things get a bit hectic; there's simply no time to take a piccie

. It goes like this (I'm right-handed):
* Welding glove on right hand, and make sure there are no open or smouldering flames about; not even a pipe/cigarette; this is a no-smoking zone...
* Start torch and with left hand blow flame length-wise across workpiece, moving torch around to get as even heating as possible. Uneven heating will cause warping.
* With pliers in gloved right hand, rotate workpiece around a bit while heating.
* Next lot must be done very quickly...
* Once workpiece is bright red hot,
turn off torch -
make sure it's turned off, pick up workpiece with pliers, take a deep breath and hold, then dunk workpiece vertically into the oil at arm's length (with gloved hand). Once it's submerged, swirl it around a bit. There will be a lot of smoke coming off for a couple of seconds. When the smoke stops, keep the workpiece swirling under the oil for another 20 second or so - it is still very hot when the smoke stops. Oh, and it's safe to start breathing when you're sure you're not going to breathe in any of the oil fumes. If anything lights up and start burning, drop everything, make a dash away, grab the fire extinguisher "en passant" (that's why it must be behind you when you start), then at a safe distance turn back and decide what needs to be done.
* Wipe excess oil of workpiece, and use a file you're not particularly fond of and try to file a bit off the workpiece in a place where it does not matter; I tested with the edge of a half-round file in the thread run-out section of the tap. If the file just skids over without actually filing out a bit, you've got success. If it files a bit out, you get to re-do the whole process and you have to be a bit quicker and/or heat the workpiece a bit more than on the first try. The file skidding off (and actually getting blunted in the process) is an indication that the workpiece hardened correctly.
If you have access to water hardening silver steel/drill rod - you can fairly safely skip a lot of the previous write-up; just heat it bright red, vertically dunk in water (careful: the steam coming off can scald you) and swirl. A fire extinguisher behind you is still a good idea though; one never knows

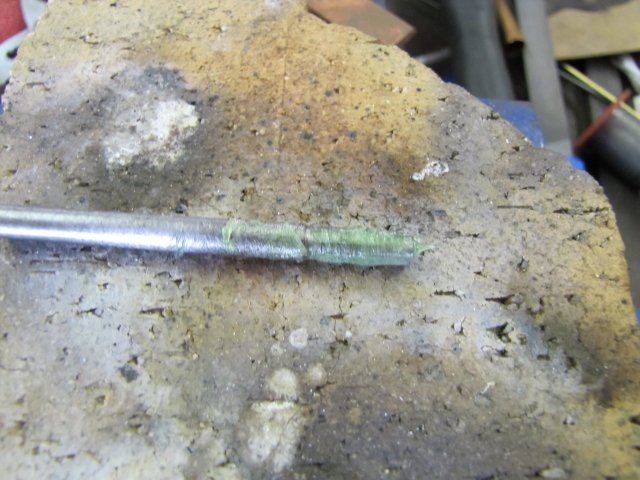
Now came the hard bit; tempering the tap. As-hardened previously, it is like glass; it will easily shatter or break if dropped or bent. The tempering process adds a bit of toughness back to it, at the sacrifice of some of it's hardness. Tempering means bringing it back up to a certain temperature and quenching again - there's a lot of references available that mentions different temperatures and their associated colours. There's fancy ways with precision equipment to do all of this, but I don't have any of those, so I went by the book according to older engineering books. I don't foresee this tap getting used in anything but brass, or maybe bronze, so it does not need to be all that tough - in other words, just lightly tempered. If its hard, it'll stay sharper for longer. So I used a bit of Scotch-Brite to shine up as much of the tap tip and shank as I could do easily (this is where that soap I put on earlier really helps). Then, by just heating the shank with a small flame (NOT on the tapping teeth itself) I could let the heat run through for what I think is the so-called "light straw" colour. I still used too big a flame, so the heat transferred a bit rapidly, and I was in a near panic to quench it again - this time in water; it does not seem to make too much of a difference if the tempering is done in water compared to oil, as long as the heat is stopped. In this photo you can see where I stopped it; the tip of the tap and the teeth are yellowish compared to the paper in the background. The rest is dark blue to black - meaning tough but not hard. You can click on the photo for a larger image:
I used a diamond needle file to clean up the flute's cutting faces, and ended up with this:

Not pretty, but hopefully effective.
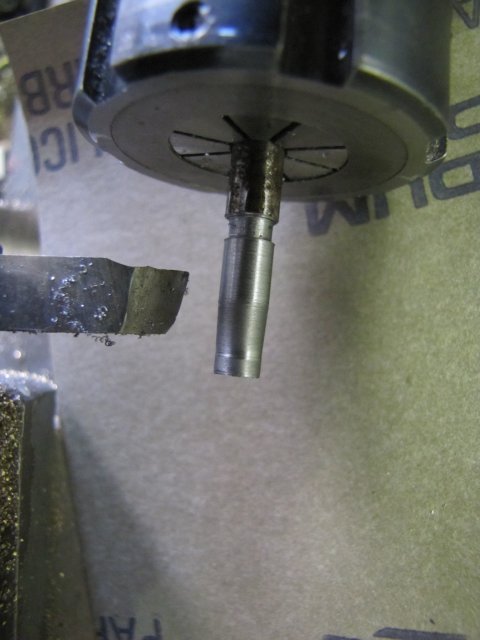
I had to try the tap out, so I turned up a brass bush to silver solder in the gas tank - drilled through at 5mm (tapping size), and 6.5mm to a depth of 2mm to mimic the original pocket on the donor torch. Then I tried the tap; just chucked up in the tailstock chuck:

It works a treat; it actually tapped easier than my shop bought M6x0.5mm taps; no squeaks from the brass, and barely any effort needed to turn the collet chuck - I'm right chuffed with the result

And the proof of the pudding; the filler valve screws into the bush easily and accurately:
I ended up making a couple of more bits, and ended with this lot for today:
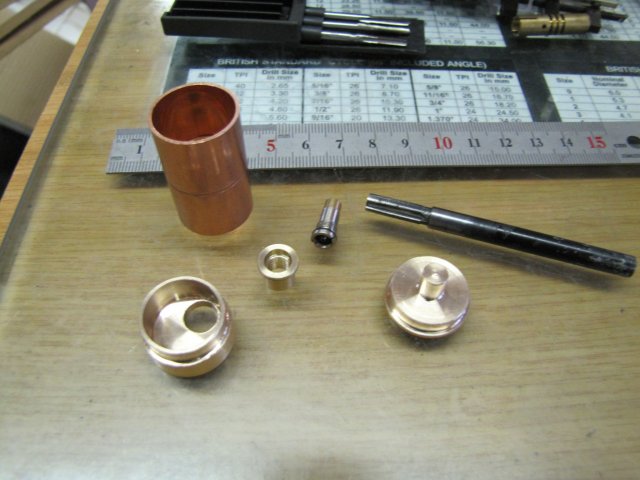
It will go together like so:

The copper fitting is an ACR grade pipe coupler; rated at a much higher pressure than the original plans call for. I'll have to do a bit more single-point turning to make an adapter to match up with my pressure gauge to pressure-test the gas tank once soldered up. I need to make the regulator first as well,as it's body must be silver soldered to the tank as well.
, Arnold


