Author Topic: my compressor repair  (Read 11092 times)

Offline John Rudd

  • Hero Member
  • *****
  • Posts: 2526
  • Country: gb
my compressor repair
« on: January 29, 2011, 11:53:04 AM »
Thought I'd start a new thread for the repair of my air compressor...
Having bought a new regulator that would not fit or that had useable parts I set about machining a new bonnet for the air regulator.

Having found a sizeable piece of alloy bar and playing around with thread cutting on the lathe, here are a few snaps I took along the way....

The picture below shows the main body of the regulator on my compressor


Now this is the old part of the regulator that I treid to repair but it melted when heated with a torch...( I said torch not flame thrower! )

« Last Edit: January 29, 2011, 12:05:50 PM by John Rudd »
eccentric millionaire financed by 'er indoors
Location:  Backworth Newcastle

Skype: chippiejnr

Offline John Rudd

  • Hero Member
  • *****
  • Posts: 2526
  • Country: gb
Re: my compressor repair
« Reply #1 on: January 29, 2011, 12:00:29 PM »
Ok next up, I threaded some 32mm dia aluminium bar...Sort of a suck it and see job this...
The dia of the threads measured some 31.6 ish mm, but using metric thread gauges didnt tell me what pitch..None of the usual pitches didnt fit...

I guessed...I measured the pitch with my vernier, sort of around the 50 thou pitch , so I took a stab at 18-20 tpi...No idea what the thread angle is, so I stumped for 60 degrees...( plus I havent got a 55 degree tool )
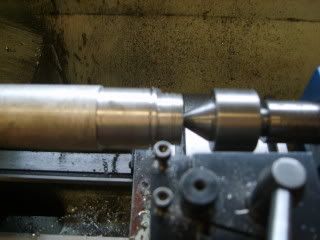


After a few cuts,


 and time for a trial fit...


It might not be perfect but it fits without too much aggro...

« Last Edit: January 29, 2011, 12:05:13 PM by John Rudd »
eccentric millionaire financed by 'er indoors
Location:  Backworth Newcastle

Skype: chippiejnr

Offline John Rudd

  • Hero Member
  • *****
  • Posts: 2526
  • Country: gb
Re: my compressor repair
« Reply #2 on: January 29, 2011, 12:03:57 PM »
After much more cutting, measuring and cussing...I got this far...


To finish the piece, I need to do a bit of boring for the spring to fit inside, the major hole you can see is for the piston that acts on the reg valve( which is mounted in the main body...)

I think I might make a brass insert to fit in the top and thread that, a bit harder wearing than the ally bar..What do you reckon? Good idea? :scratch:

More to follow...

Time for tea..
eccentric millionaire financed by 'er indoors
Location:  Backworth Newcastle

Skype: chippiejnr

Offline arnoldb

  • Hero Member
  • *****
  • Posts: 515
  • Country: na
  • Windhoek, Namibia
Re: my compressor repair
« Reply #3 on: January 29, 2011, 01:04:45 PM »
Looks good John  :thumbup:

Yes, a brass (or even better IMHO, phosphor bronze) insert would definitely work better and would be smoother in operation as it would not tend to gall as much as the ally either.

 :beer:, Arnold

Offline j45on

  • Sr. Member
  • ****
  • Posts: 380
  • My tiny workshop Location Ashford Kent
Re: my compressor repair
« Reply #4 on: January 29, 2011, 01:07:08 PM »
Watching with interest John as I think I have the same compressor  :thumbup:
Jason

Offline krv3000

  • Hero Member
  • *****
  • Posts: 2183
  • Country: gb
Re: my compressor repair
« Reply #5 on: January 29, 2011, 04:18:39 PM »
that looks good

Offline matthew_g

  • Jr. Member
  • **
  • Posts: 9
Re: my compressor repair
« Reply #6 on: February 01, 2011, 06:50:55 AM »
Watching with interest John as I think I have the same compressor  :thumbup:

Yep I got a red one too :-)
I never enter a battle of wit with an unarmed person

Offline John Rudd

  • Hero Member
  • *****
  • Posts: 2526
  • Country: gb
Re: my compressor repair
« Reply #7 on: February 01, 2011, 07:48:22 AM »
Watching with interest John as I think I have the same compressor  :thumbup:

Yep I got a red one too :-)

Yeah,.....Maybe we should for a 'Red compressor club'? :clap:

Did some more today, I'll post up the pictures later but its looking good so far..

( ermm maybe I should come clean and say this is the mk2 version? The one in the preceding pictures I managed to damage it beyond recovery... :doh: )
eccentric millionaire financed by 'er indoors
Location:  Backworth Newcastle

Skype: chippiejnr

Offline John Rudd

  • Hero Member
  • *****
  • Posts: 2526
  • Country: gb
Re: my compressor repair
« Reply #8 on: February 01, 2011, 10:24:55 AM »
Ok, more shop time and piccies...
Spent today machining the hex shoulder on the regulator bonnet and cutting the external thread...

Here's some blurring pictures, sorry for the quality but I'm no budding snapper...


Just for interest, here's all the parts that make up the regulator top works...Spring/piston/ bonnet the mainparts anyway..


eccentric millionaire financed by 'er indoors
Location:  Backworth Newcastle

Skype: chippiejnr

Offline John Rudd

  • Hero Member
  • *****
  • Posts: 2526
  • Country: gb
Re: my compressor repair
« Reply #9 on: February 01, 2011, 10:27:22 AM »
and finally all assembled and working...


another shot..


So there we are...would have a cost a fortune to repair in a workshop if I'd had to pay for making the part, but hey that's what we do isnt it, make or repair things?  :clap:

eccentric millionaire financed by 'er indoors
Location:  Backworth Newcastle

Skype: chippiejnr

Offline Trion

  • Full Member
  • ***
  • Posts: 239
Re: my compressor repair
« Reply #10 on: February 01, 2011, 11:54:04 AM »
I had a similar compressor problem before I owned any of my machinery. It was "repaired" by replacing the regulator with a steel plate that I ground round on the belt sander + a lot of silicone sealant. Now you have showed the proper way of doing it! :clap:

Offline bry1975

  • Sr. Member
  • ****
  • Posts: 417
  • Country: gb
    • http://www.satintime.co.uk
Re: my compressor repair
« Reply #11 on: February 09, 2011, 12:54:40 PM »
Impressive work John!  :thumbup:

Offline bigmini

  • Jr. Member
  • **
  • Posts: 66
Re: my compressor repair
« Reply #12 on: February 13, 2011, 05:39:01 PM »
I had a similar compressor problem before I owned any of my machinery. It was "repaired" by replacing the regulator with a steel plate that I ground round on the belt sander + a lot of silicone sealant. Now you have showed the proper way of doing it! :clap:

I have a compressor like yours. I did up the non regulated output too tight and cracked the housing which was wafer thin around the thread. I ended up replacing the whole assembly with a block of aluminium with holes drilled in it for a non-regulated output, a gauge, the pressure switch and a relief valve. I was nervous about whether my threads would hold, but I reckon it's stronger than the original - just no regulator. I think I see a way to modify it to take a regulator like the one you have made, so one more thing on the To Do list.

For now, I use a separate moisture trap and regulator in-line.

Offline krv3000

  • Hero Member
  • *****
  • Posts: 2183
  • Country: gb
Re: my compressor repair
« Reply #13 on: February 13, 2011, 06:18:38 PM »
o well thats me out of the red compressor club mines blue with a tuch of muck on it

Offline bigmini

  • Jr. Member
  • **
  • Posts: 66
Re: my compressor repair
« Reply #14 on: February 13, 2011, 06:29:49 PM »
o well thats me out of the red compressor club mines blue with a tuch of muck on it

Mine is blue as well, and it probably has a bit more muck on it I think :lol: