OK, so lets take a step back then.
Having purchased the original machine, we spent some time building things like vacuum tables.
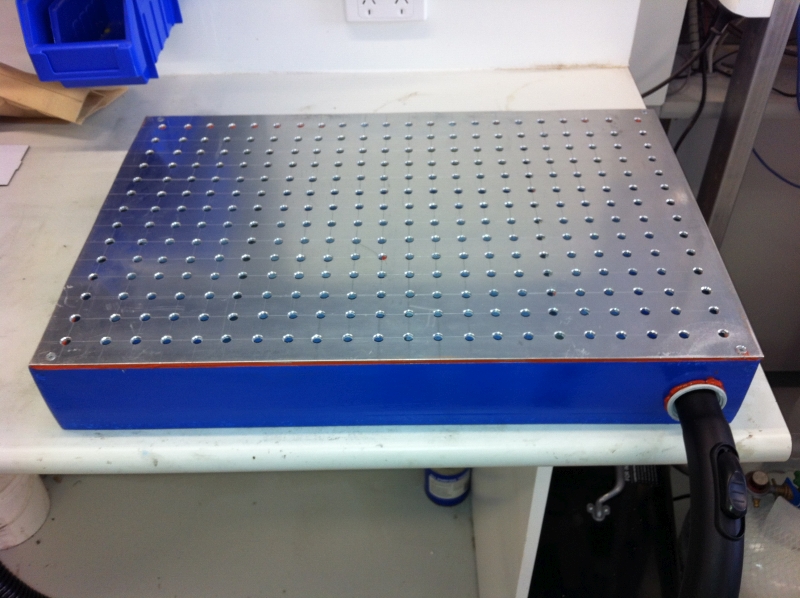
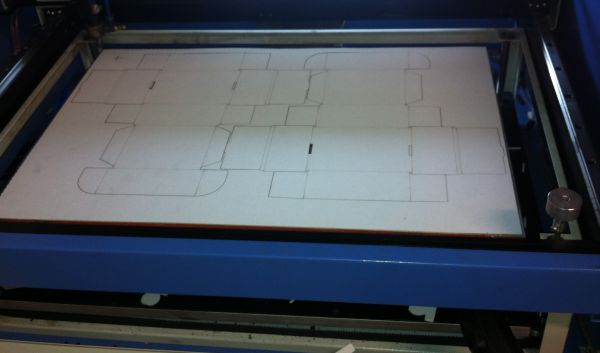
These come in handy when cutting stuff like cardboard
We also added a few extra sensors (which the control electronics had inputs for but didn't come with the machine). The most important one was an air flow sensor to the cutting air assist line. Why is this important you ask???
When cutting flammable materials (we make self adhesive foam gaskets on this machine) the flow of air through the nozzle blows out the flame, just like blowing on a candle. When it stops blowing out the flame....
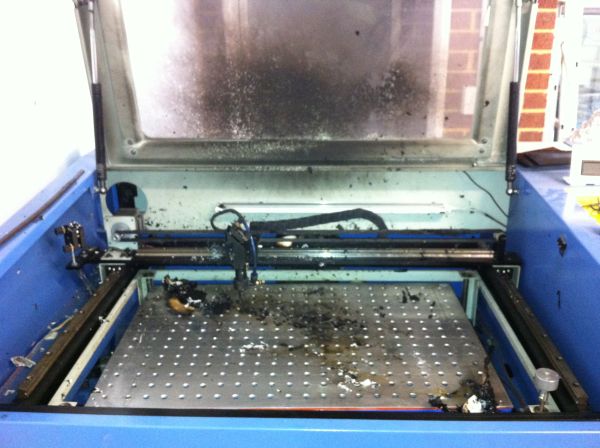
It wouldn't have been half as bad if the intern running the machine hadn't just stood there watching it burn with a fire extinguisher 2 feet away. I only got to it when the smell reached my desk!
In the end we just replaced the belts, cover window and mopped it out....
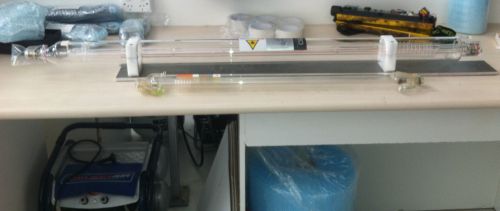
After about three years of daily hard use, the tube started to show a loss of power. A replacement tube was priced at AU$90+shipping, but these tubes are only of average power and quality. Besides, why buy a cheap 40W tube when you can buy and expensive 120W tube! Well, it made sense to me at the time.... You sort of had to be there I guess...
So the 120W tube and power supply arrive and we neatly fit them to the machine with some PE mounts we made on the router and little bit of Al plate. You can hardly notice the upgrade, she's a bit of a sleeper..

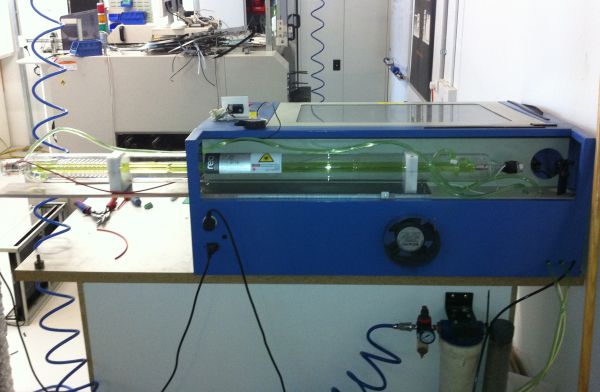
As I've mentioned elsewhere, once you clear about 100W, a CO2 laser will start to mark metals directly.
It's a little dependent on how shiny the surface is, so a bit of tape over the top, or a light spray with paint will often be required... it is quite slow though, so it does pump a bit of heat into the job..
We ran the unit in this trim for a few years, making minor mods along the way. The only significant one is the refrigerative water chiller put together from a portable air conditioner because I wasn't going to spend the AU$1500 everyone was asking for a 'laser' coolant chiller.
There was little more to this than bending the lines going to the condenser so that we could shove it in a plastic jerry can full of radiator coolant.
I should stress that the hobby user will NEVER need one of these. All the Chinese lasers come with a pond pump and instructions to sit it in a bucket of water. This is entirely adequate for cooling any sealed CO2 laser used for less than an hour at a time...
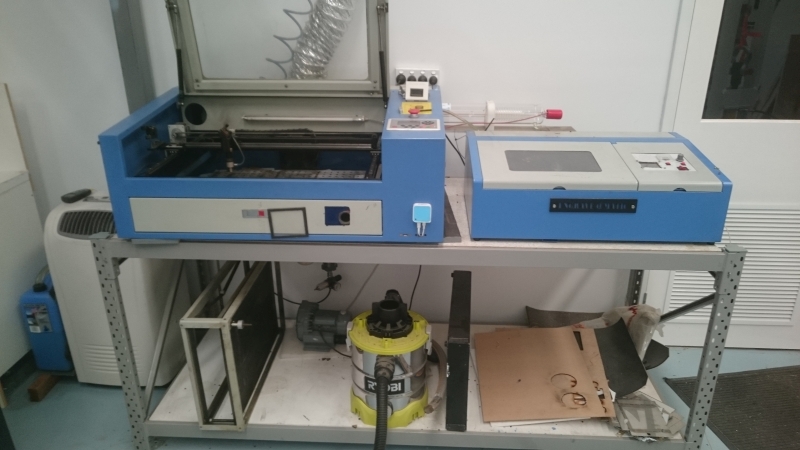
A side note, you may have noticed that we have two laser cutters on the bench there. We bought the second one because the software that came with the first didn't support engraving sequential serial numbers on successive jobs. We would have to put 10 parts into the laser, then sit at a computer and manually change 10 text fields, send the job to the machine, run it, rinse and repeat. This got old quickly. The fix was to buy a cheap little laser, IIRC I paid AU$699 landed for it, and give it a brain transplant.
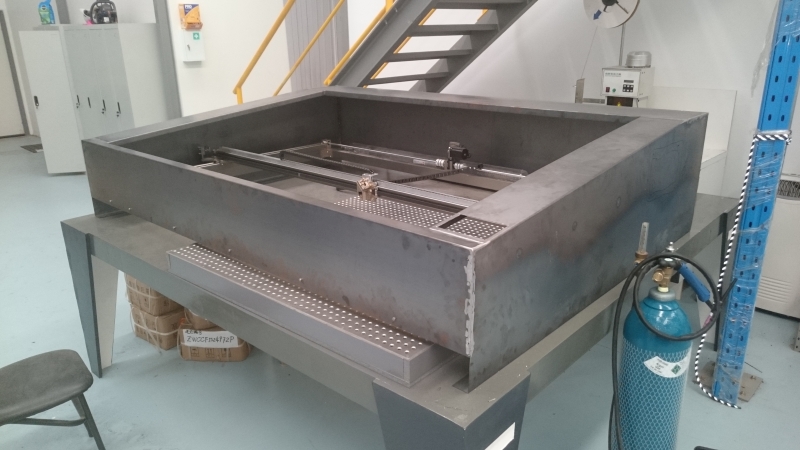
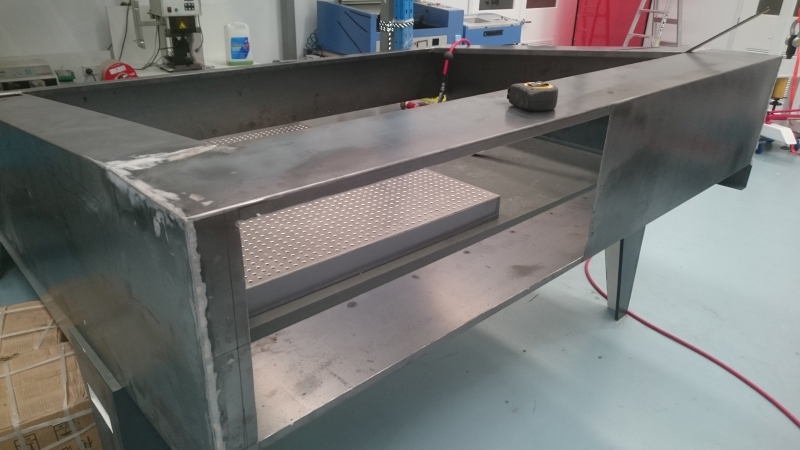
Back to the buildWe actually started out by making the vacuum table. We wanted to be able to process full sheets (1.2m, x 2.4m) without cutting them. The working envelope of the laser is 1.2m x 1.8m so we decided to flip the table around and make holes in half of it. That way we could cut half the sheet at a time, then just pull the whole sheet forward and do the other half.
Now the little vac table at the top of this post looks a bit dinky, but it has more than 300 drilled and countersunk holes in it, all marked out, punched, spot drilled then opened up with a step drill. No way was I doing that for over 2000 holes.. (yes, that's 2000 holes folks!).
So onto the CNC router it went:
With the counter sinking, it still took about 3 hours to run the job....
After that we just built a box frame for it and called it done.
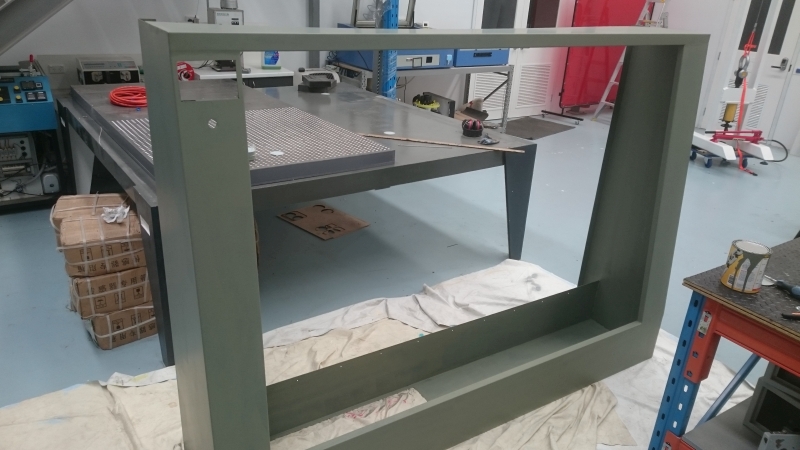
The next piece of the puzzle was a base for the machine. There was much head scratching before I read an article about IKEA making furniture out of cardboard.....
I don't have a lot of pics of this stage (the young bloke has some on his phone I think) but we went out and bought some 6mm plywood and cut this core on the router.
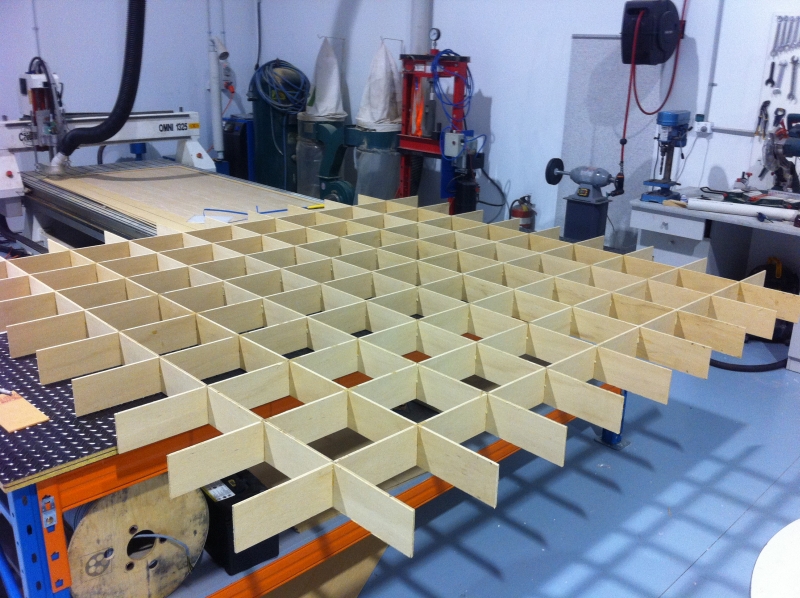
We put 2 sheets top and bottom and got it within 1mm with a laser level. The whole thing is held together without a single screw or nail. Just using polyurethane glue. I'm not a little guy and I can stand on this 2.4m x 2.4m table and it feels rock solid.
So that brings us, more or less up to date.
We cut a hole in the back so that we can mount the electronics on a removable plate.
and I got a coat of primer on the steel yesterday,
I'll put some more pics up when the paint is on.
Cheers
PK


