Using Faststone photo resizer : This is to help save valuable storage space on Madmodder!
This is a program used on Madmodder by a few of us.... It's simple and quick to set up and will make all your pictures more pleasant for
others to upload and view (will help them fit on smaller screens and easier for slower connections too).
This program not only allows you to shrink your photo's size. It allows you to add text and watermarks to your pic's to stop them being
used elsewhere without others knowing they are yours.
Well, on with the post.... the free programme can be downloaded here... http://www.faststone.org/FSResizerDetail.htm
You need to set the program up : Select advanced options and select the "resize" tab from the tabs at the top of the window. Set the size you want your pic's. Click the
"pick a standard size" button and select your size from the drop down menu. Most choose 600x800. Make sure you tick/check the little box
in the top left corner with "resize" next to it!
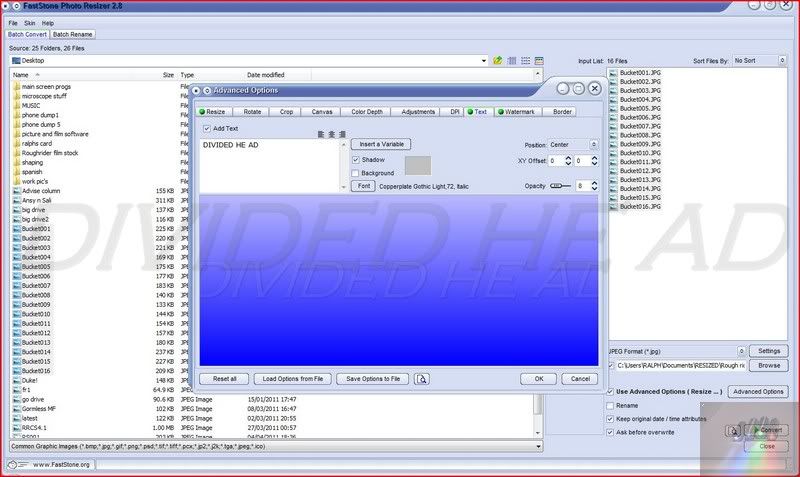
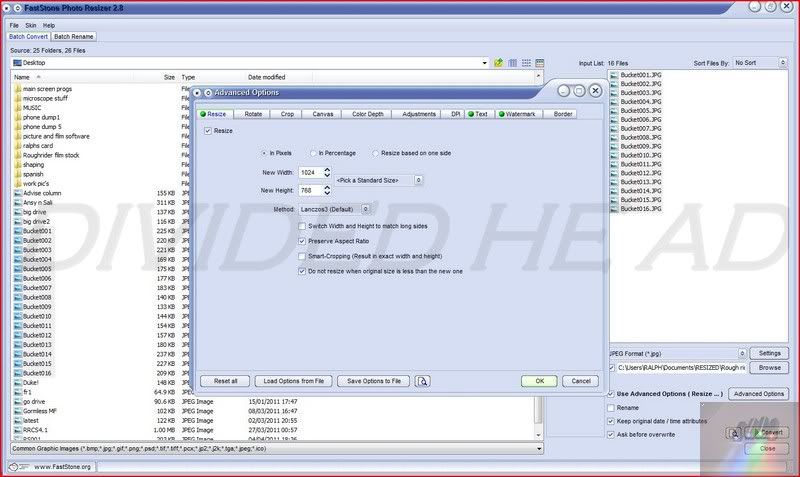 Now, if you want to add text and or a water mark then you must select the "text" or "Watermark" tabs at the the top of the advanced options screen. Text :
 Write your text. Change font size, and opacity. Make sure you tick/check the box in the top left.
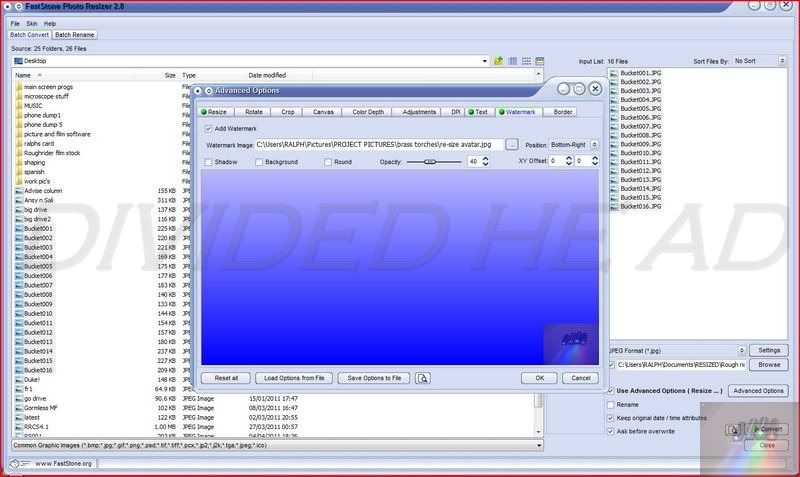
 Watermark :
 (I had to specially use this program to shrink my picture till I got my desired size)
Select the origin file of your picture using the box to the right of the words "watermark image"
Select the desired position of the mark. and then the opacity and anything else you would like from this screen.... Make sure you tick/check the box in the top left.
Once you have finished editing the advanced options make sure you click the "OK" box bottom right.
Adding the pic's you want to resizeYou can select the pictures you want to re-size from your computer hard drive using the left hand menu boxes.. select the pic's you want and then click "Add"
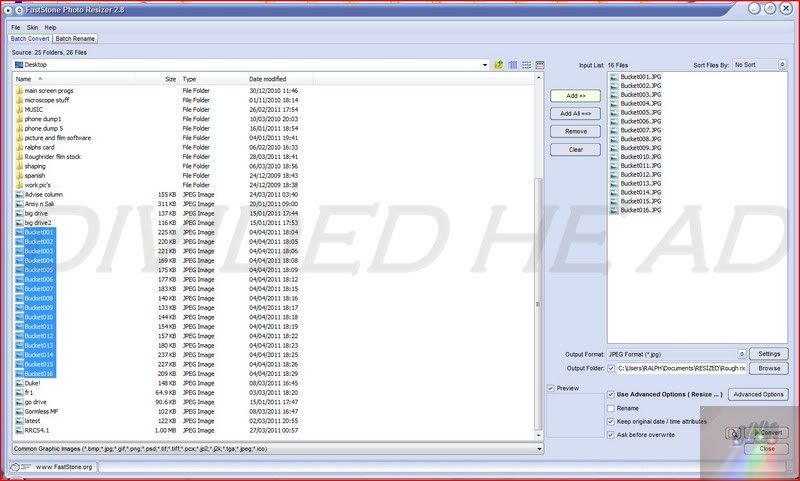
Select the "output folder" click browse and find the place you want them top appear..... I made a new folder in my "my documents" folder and called it "Resized" I find it easy to find (I even made sub-folders within the resized folder... But that's just me)
Make sure you have : The correct output folder (and have ticked/checked the box) And correct output type? (Jpeg for me.) and ticked/checked the "Use advanced options...." and "ask before overwrite" boxes too... And any others you think you might like?
Now you are ready to make your resized, watermarked images :They are already in the top right menu box above so click the "convert" button and watch as the file size and picture size are reduced by loads and the watermark(s) are added......
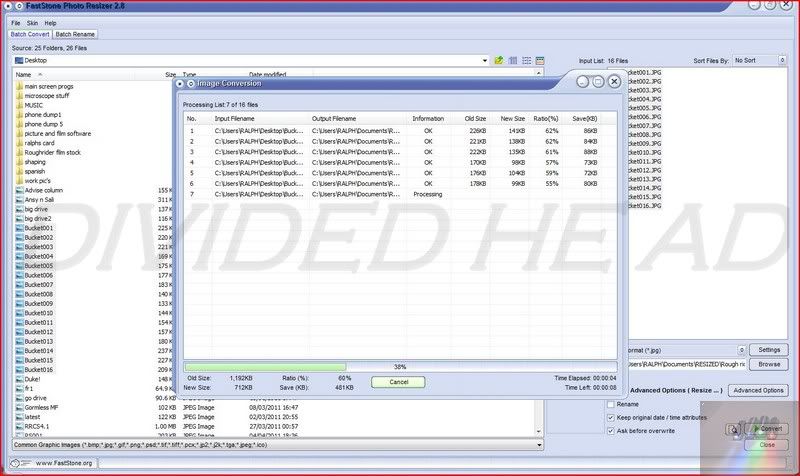
They then end up (in my case) in your resized file....
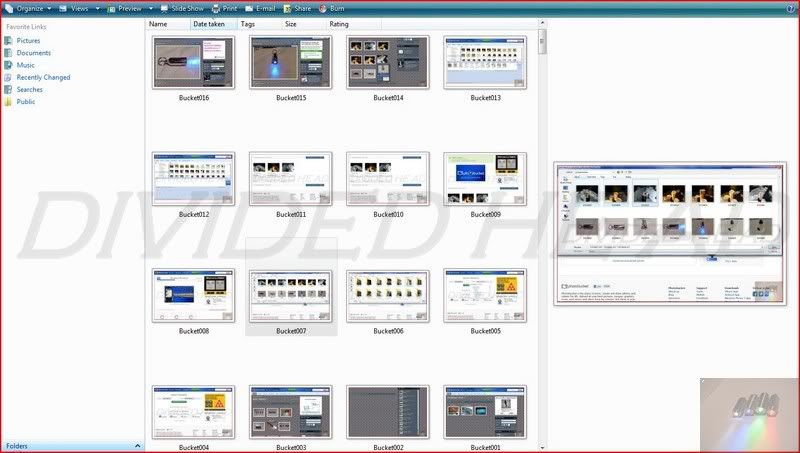
I use this resized file to hold the pic's ready for upload to my photobucket account (
http://madmodder.net/index.php?topic=607.0 ) and then once they are there I delete from this file (making sure I never touch the originals in my "my pictures" file.) Then as in the post linked to here I add them to Madmodder and don't fill the site with huge picture files

The beauty of this program.... You never have to play with the settings again unless you want to! as long as you "ok'd" them all then they are saved in the program!!!

If you ever want to just plain resize and not add water marks then simply enter "advanced options" and un-tick/check the boxes in the top left corners of the selected tabs.... then select the "OK" button. Carry out your non-marked re-sizing and then re-select them later.... They are still saved!!
As always, any questions, just ask.
Well, that's it for pic's etc for tonight... Edited at silly o'clock and I'm tired! any mistakes feel free to let me know

Ralph.