Hi all,
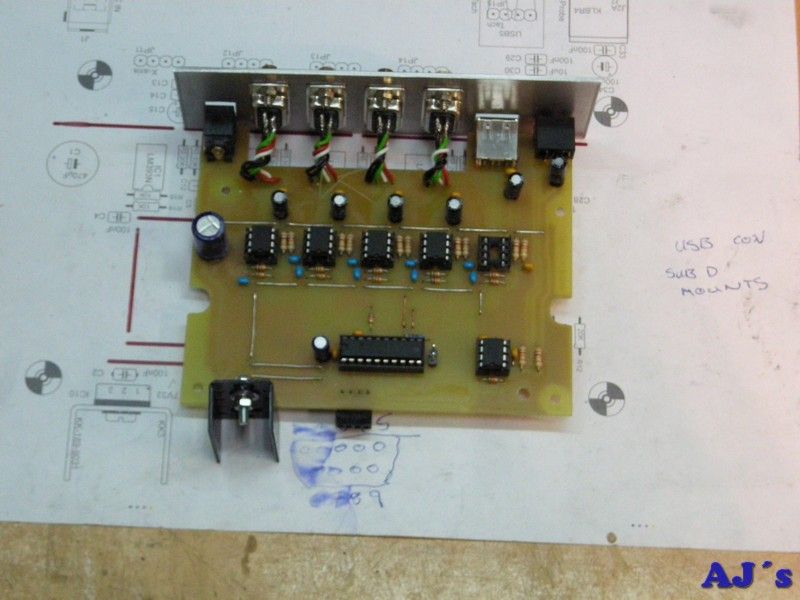
Finally go to install a DRO to my milling machine. The linear scales were a gift for Christmas of last year. Stared by building the electronic interface to work with the TouchDRO tablet app from Yuriy’s toys. Made a PCB for the voltage level shifters and MSP430 microcontroller, sorry forgot to take photos.
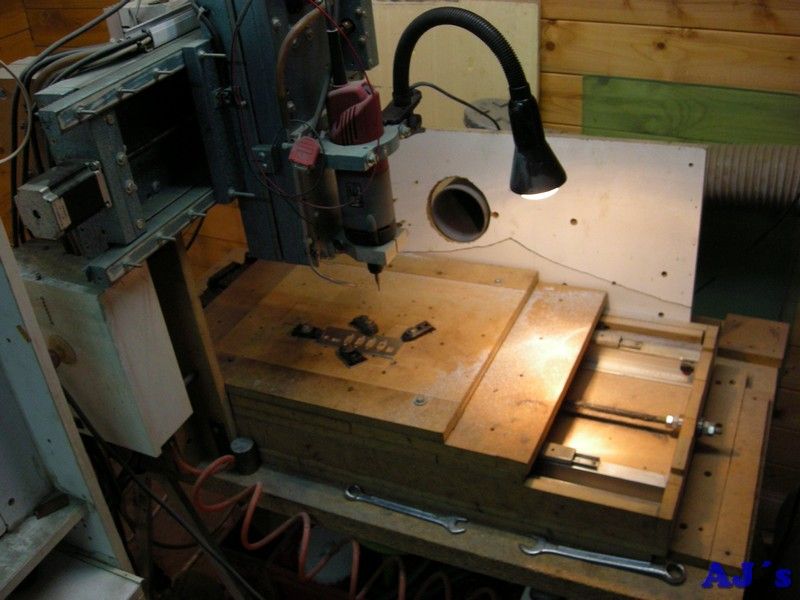
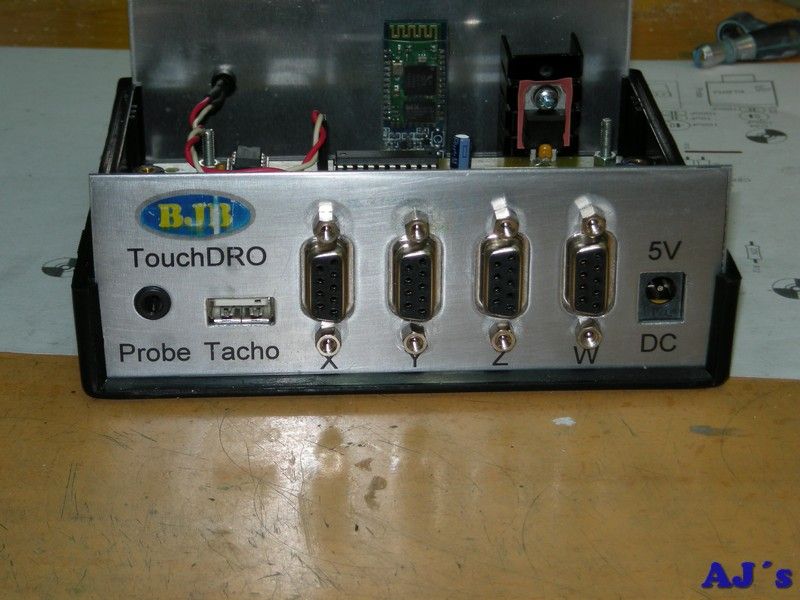
The rear panel was cut on the CNC router.
 Fitting a DRO to my Weiss WMD30LV mill.
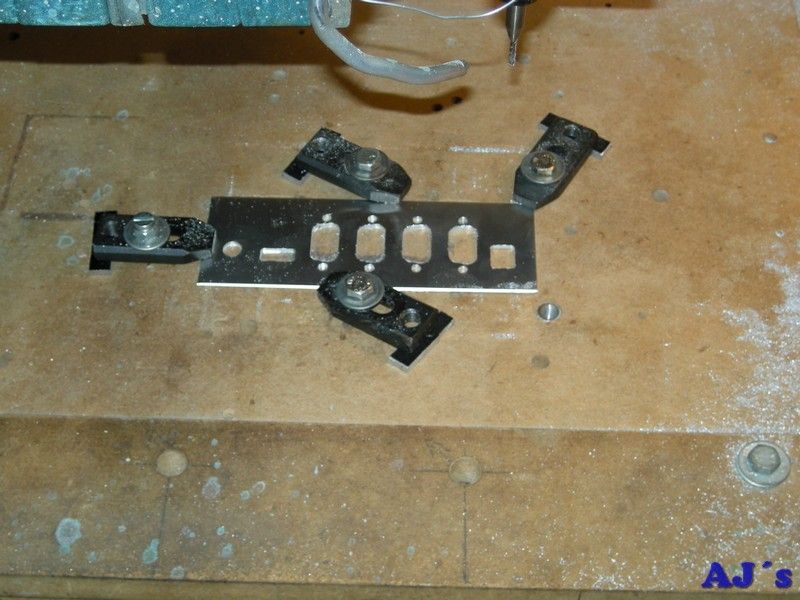 Fitting a DRO to my Weiss WMD30LV mill.
The board was built up.
 Fitting a DRO to my Weiss WMD30LV mill.
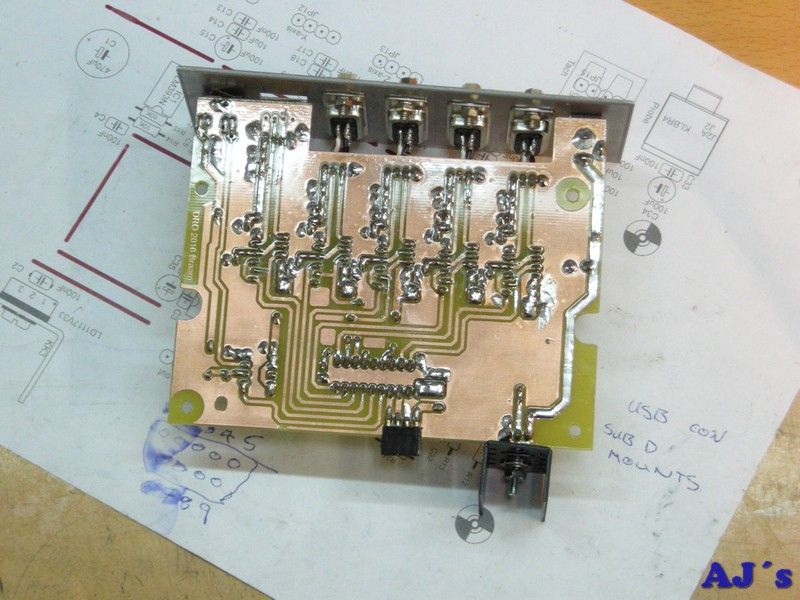 Fitting a DRO to my Weiss WMD30LV mill.
Fitted in a case.
 Fitting a DRO to my Weiss WMD30LV mill.
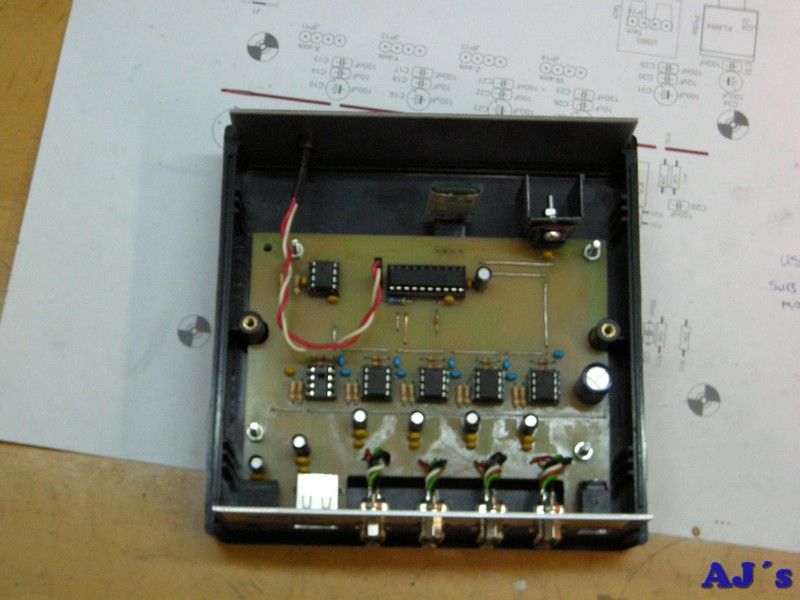 Fitting a DRO to my Weiss WMD30LV mill.
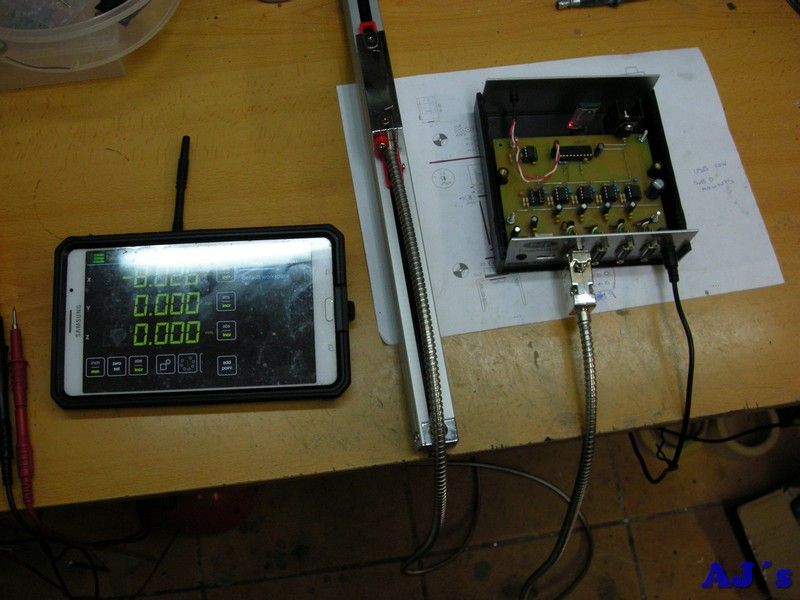
It was bench tested.
 Fitting a DRO to my Weiss WMD30LV mill.
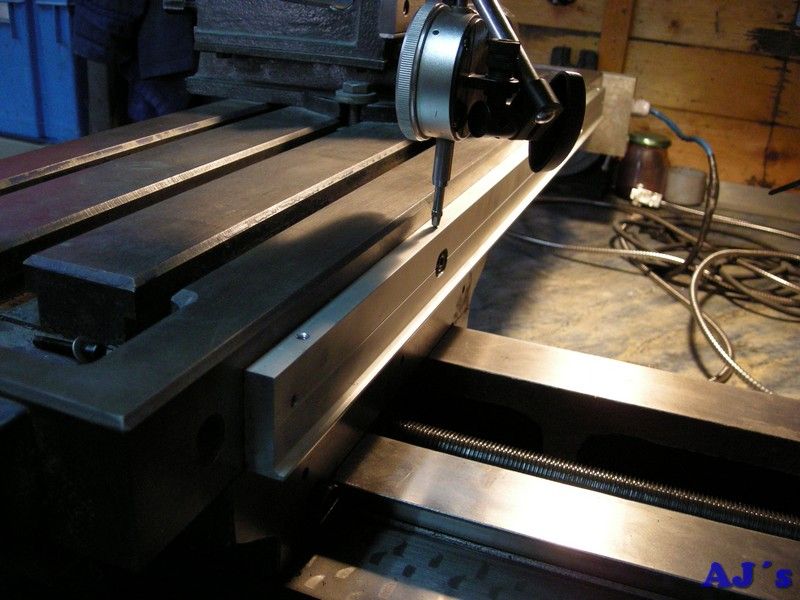
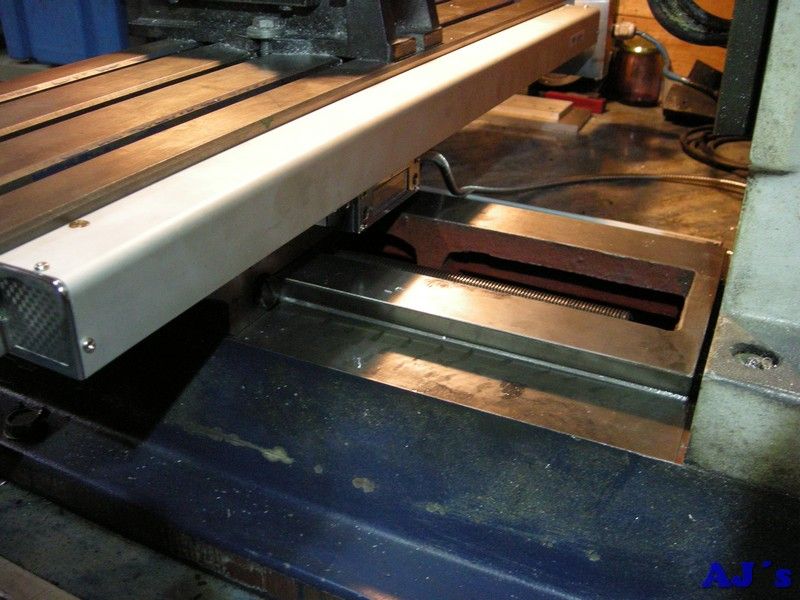
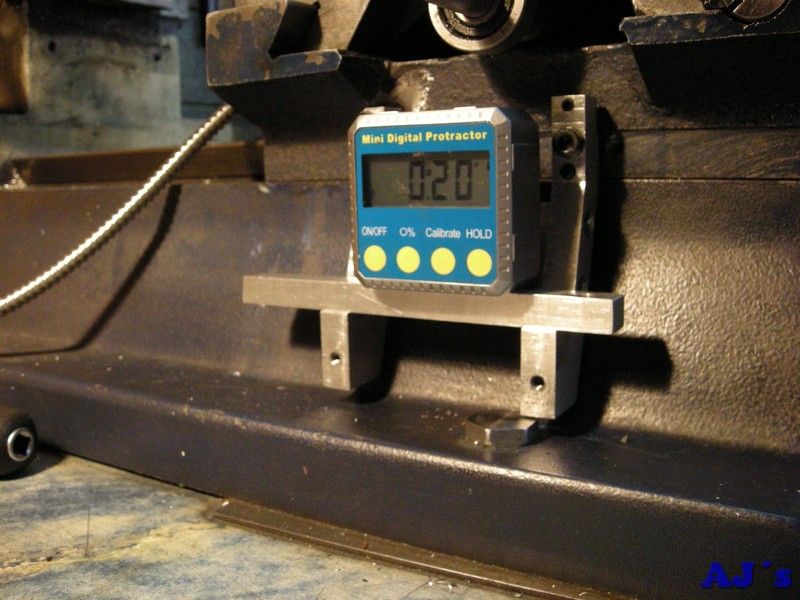
Have opted to mount the X-axis scale at the rear of the table. At the rear I am losing 20mm of Y travel but the scale is out of the way and I can still use the X travel stops at the front.
The scale support bracket was dialed in both vertically and horizontally.
 Fitting a DRO to my Weiss WMD30LV mill.
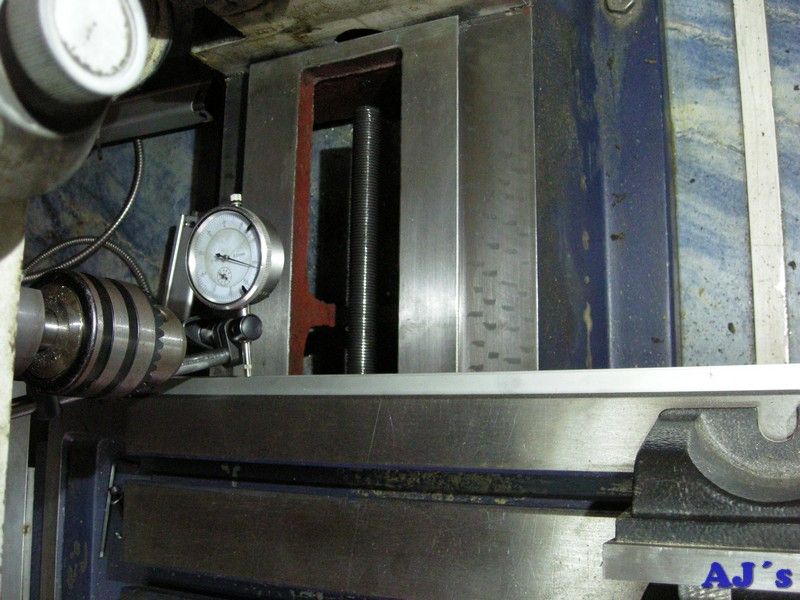 Fitting a DRO to my Weiss WMD30LV mill.
A strip was cut from a piece of 3/8” ally plate.
 Fitting a DRO to my Weiss WMD30LV mill.
And a spacer made for the read head. Had to make an additional shim piece from 2mm flat.
 Fitting a DRO to my Weiss WMD30LV mill.
Then had to remove the bed and saddle to drill and tap the mounting hole for the read head.
 Fitting a DRO to my Weiss WMD30LV mill.
The spacers bolted to the saddle.
 Fitting a DRO to my Weiss WMD30LV mill.
All fitted.
 Fitting a DRO to my Weiss WMD30LV mill.
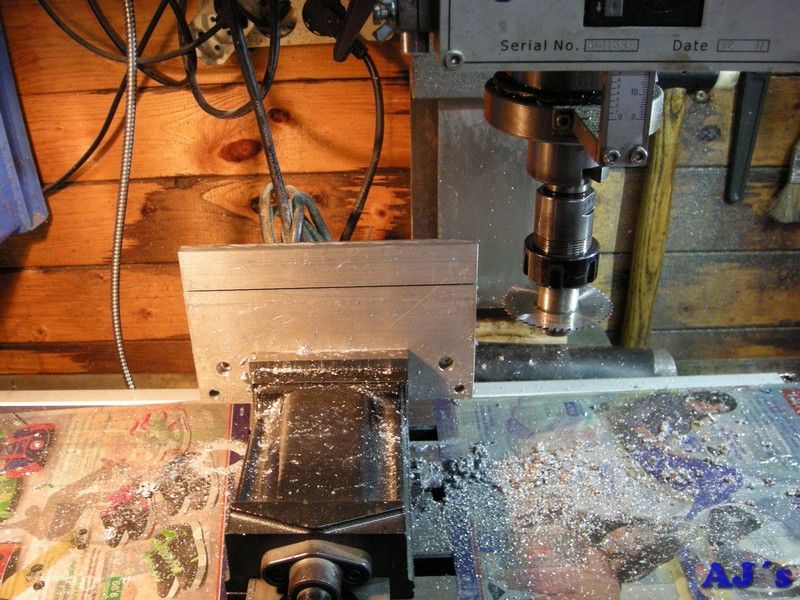
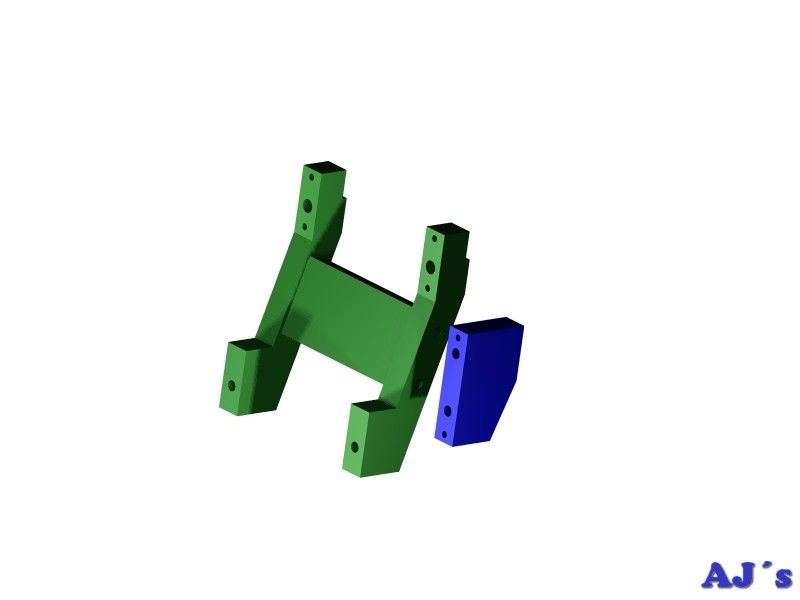
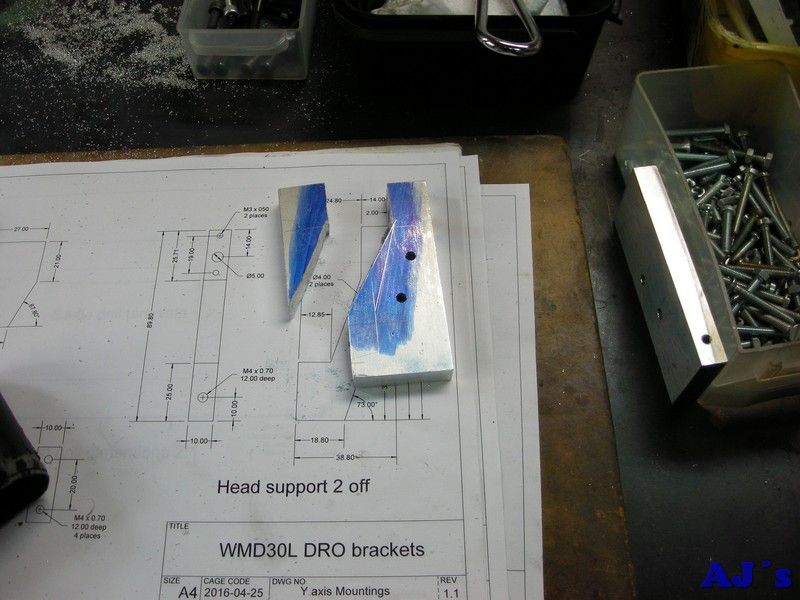
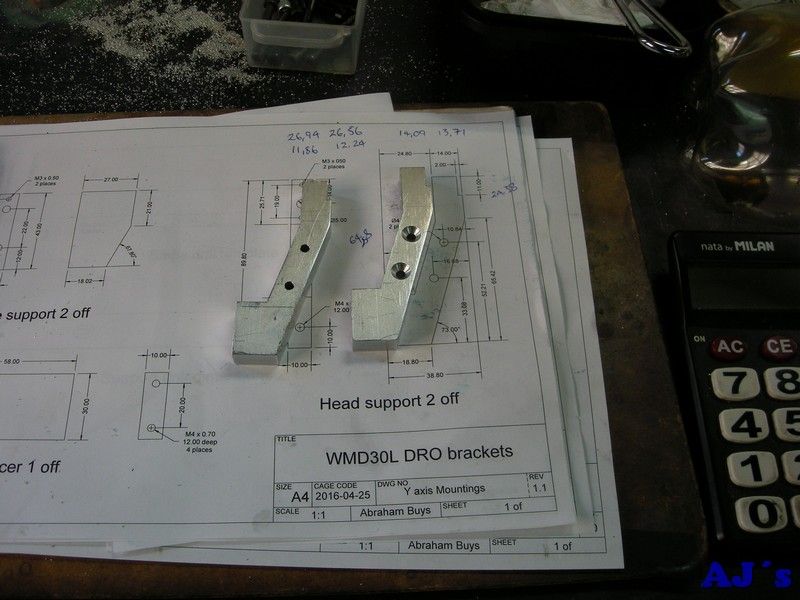
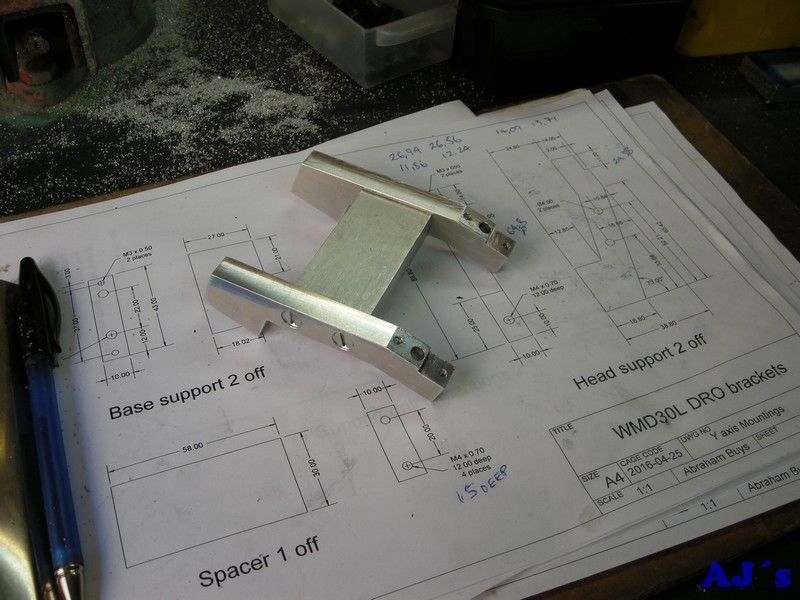
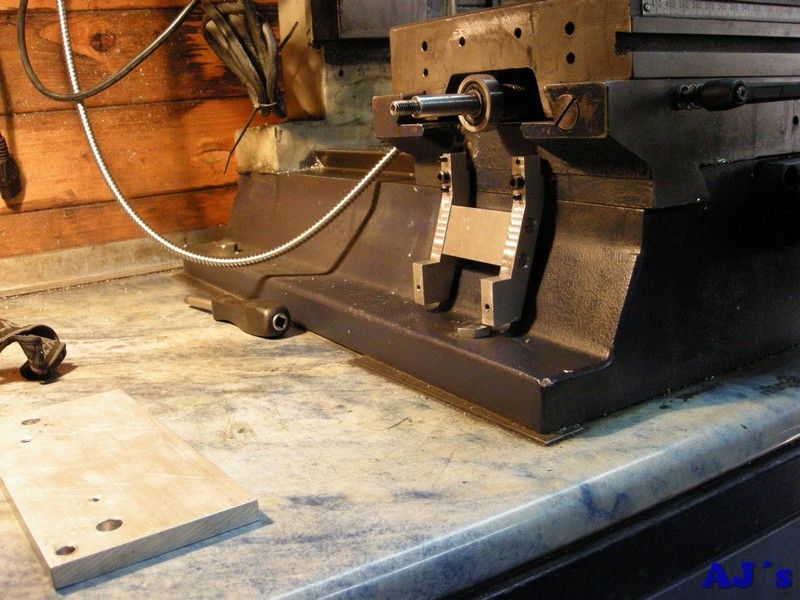
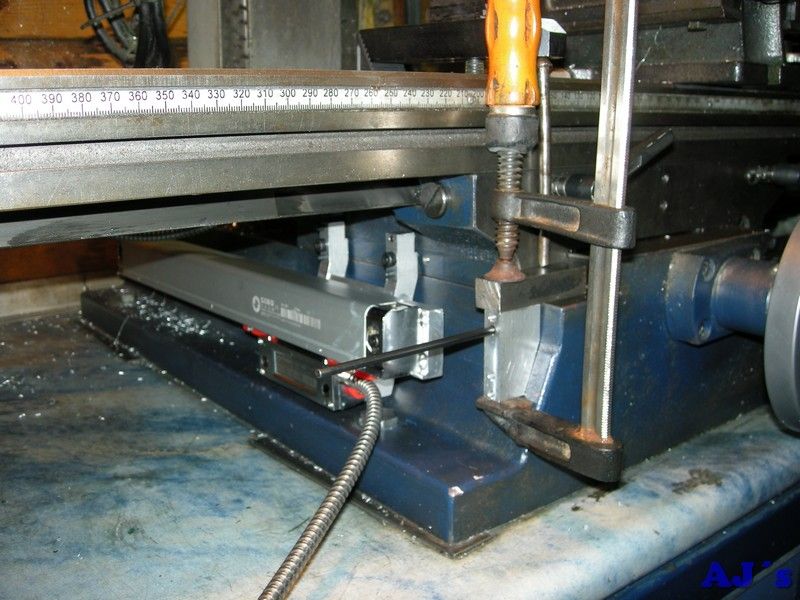
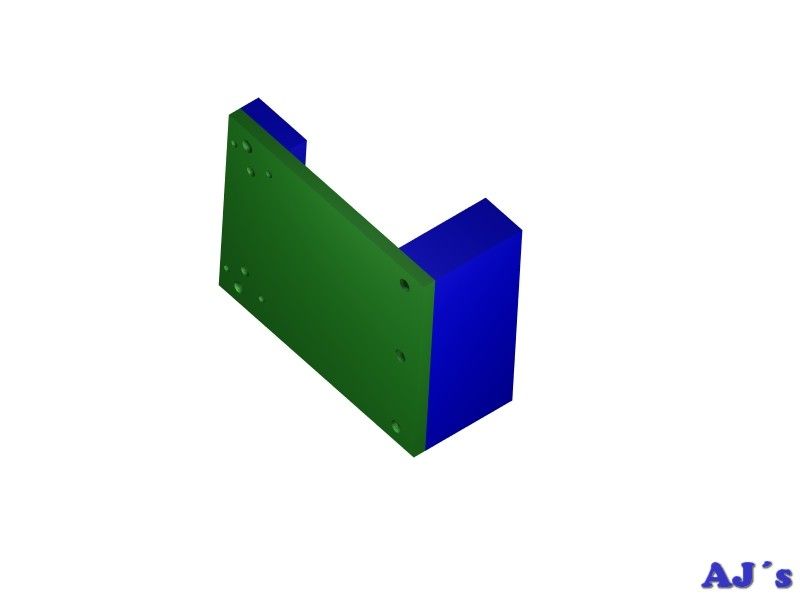
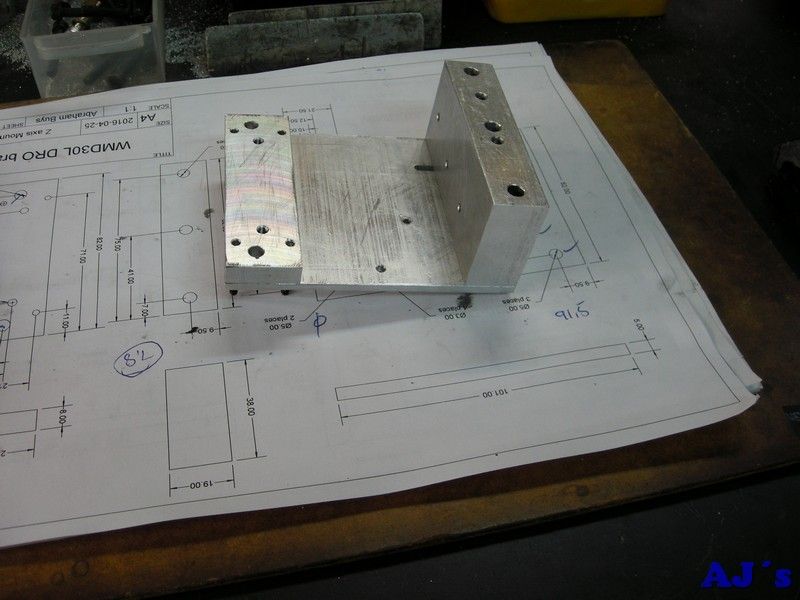
For the Y-axis, with the moving saddle on top had to design a couple of brackets to get things working and the scale protected. Because the mounting surfaces on the mill are not flat or square the brackets were designed to have jacking screws at the corners.
 Fitting a DRO to my Weiss WMD30LV mill.
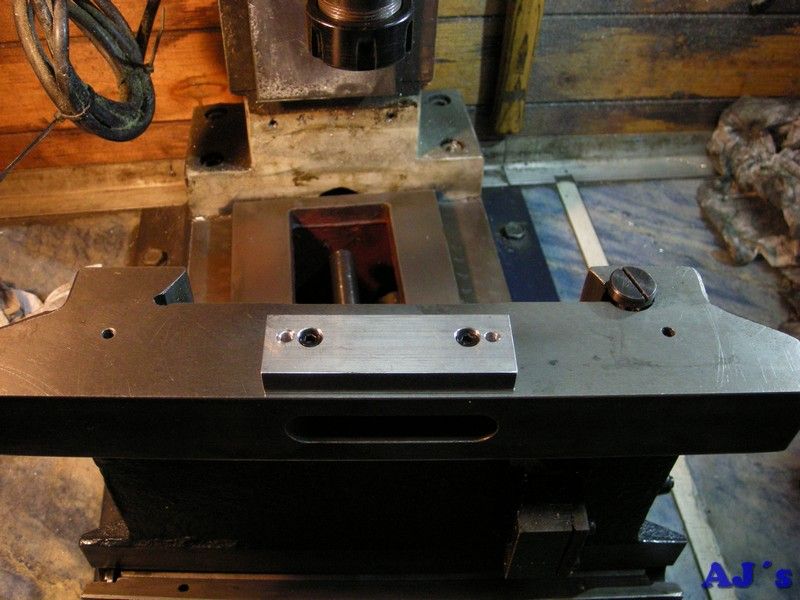
A couple of pieces of 10mm ally plate were milled square and to size.
 Fitting a DRO to my Weiss WMD30LV mill.
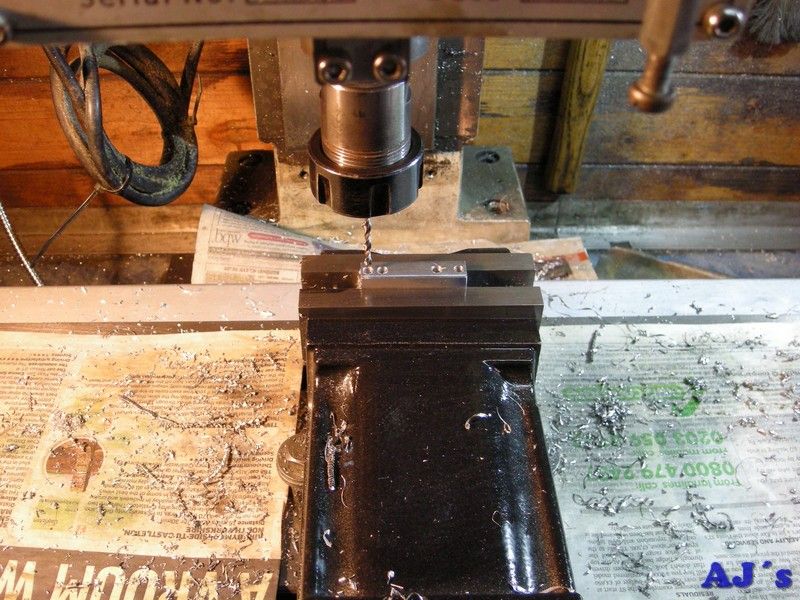
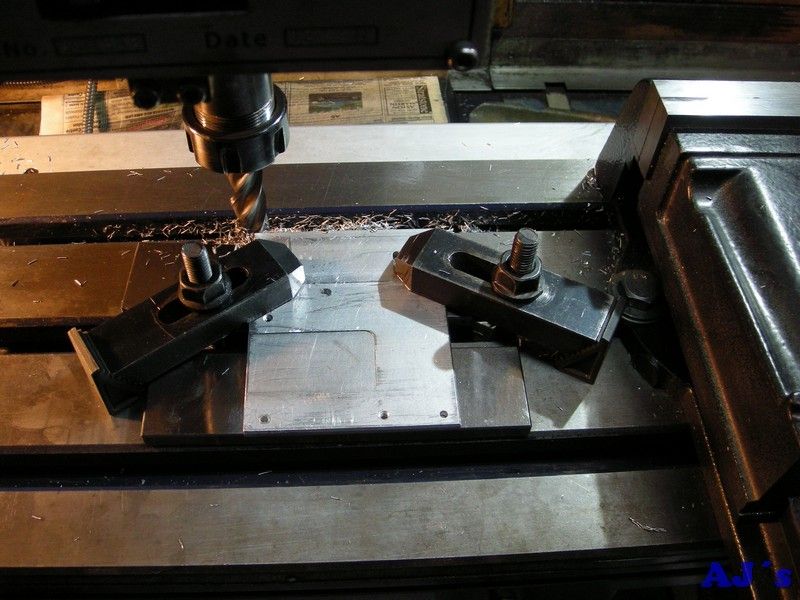
Holes were located and drilled.
 Fitting a DRO to my Weiss WMD30LV mill.
 Fitting a DRO to my Weiss WMD30LV mill.
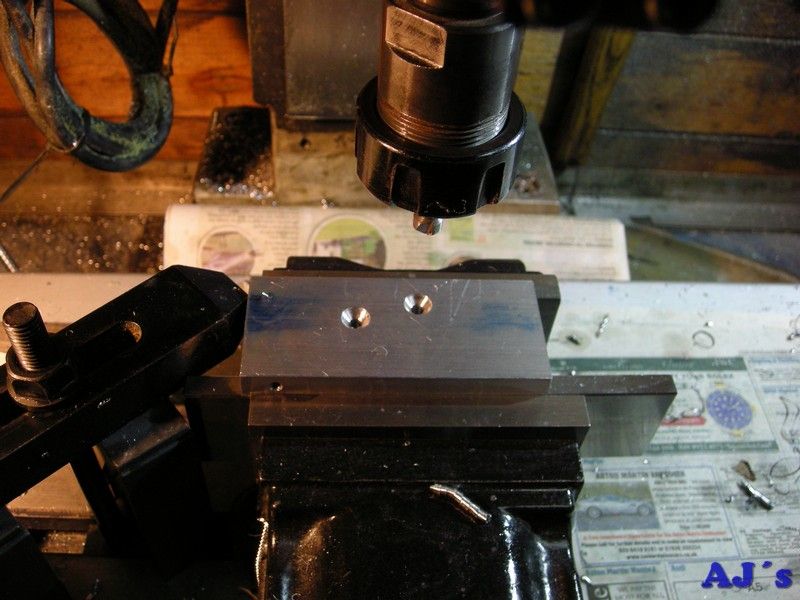 Fitting a DRO to my Weiss WMD30LV mill.
Excess material was roughly marked out and cut off with a hacksaw.
 Fitting a DRO to my Weiss WMD30LV mill.
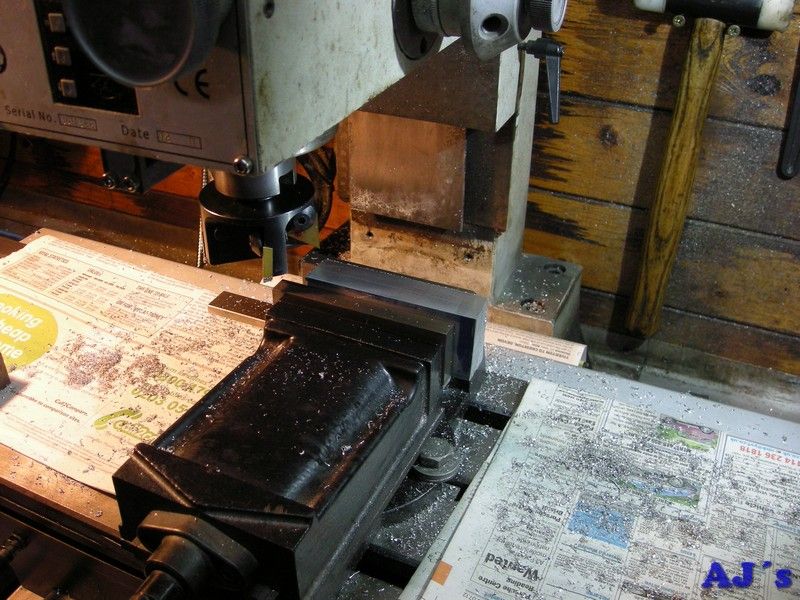
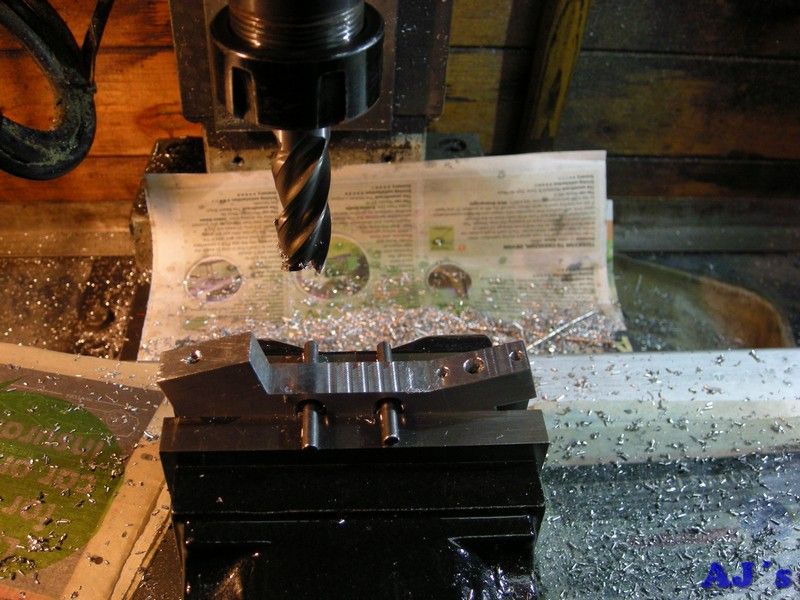
The square surfaces were milled.
 Fitting a DRO to my Weiss WMD30LV mill.
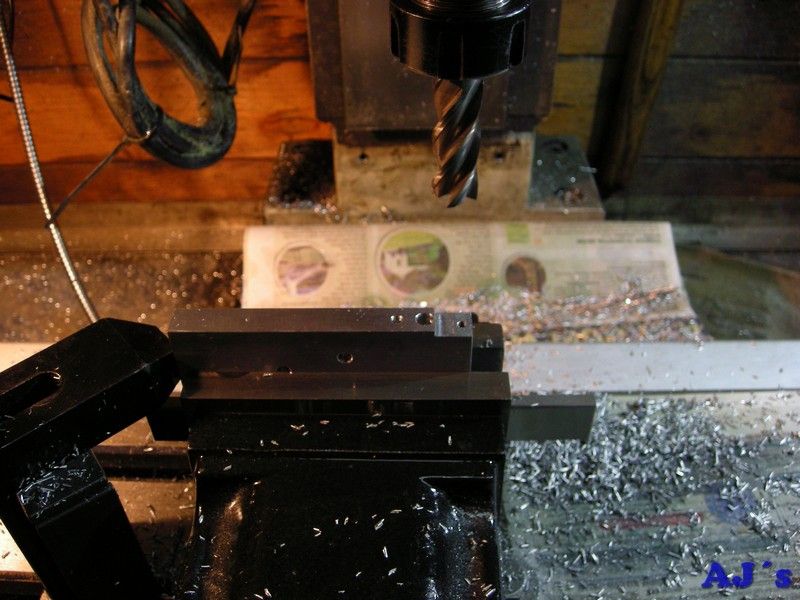 Fitting a DRO to my Weiss WMD30LV mill.
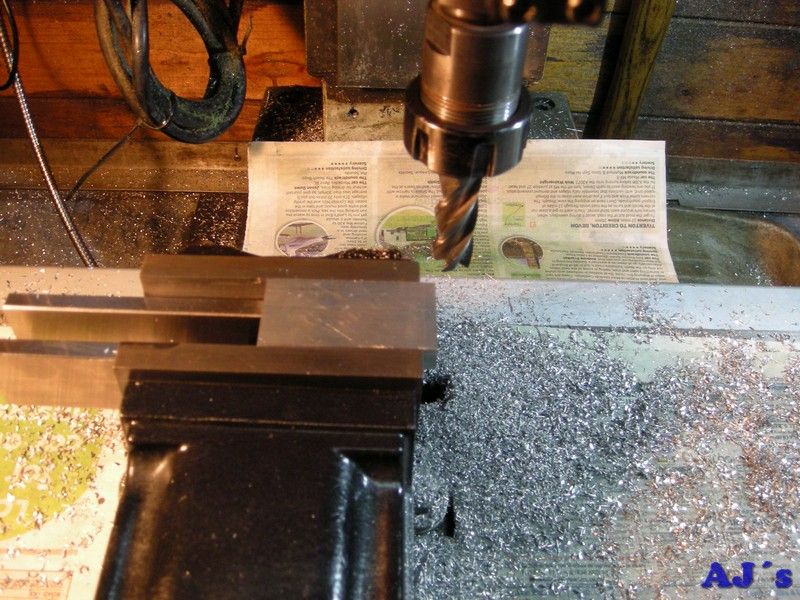
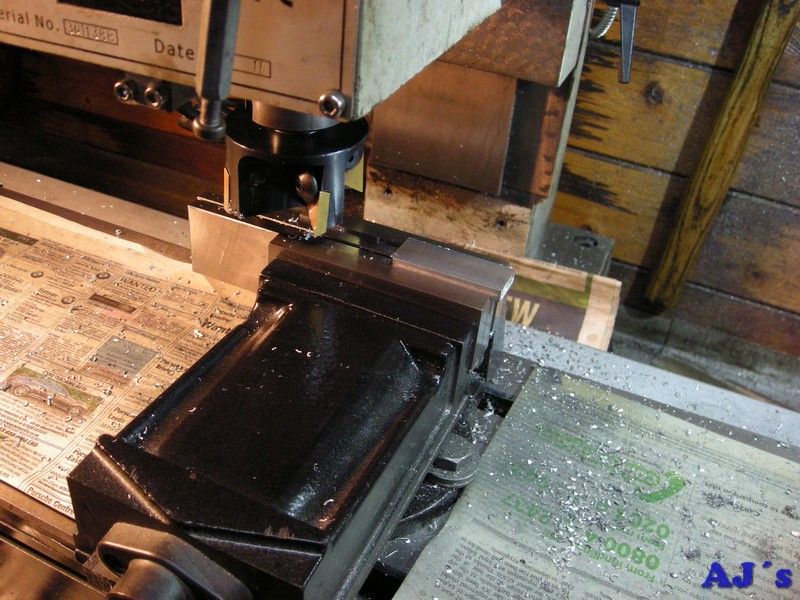
The brackets were then located with dowels through the side holes and the angled faces milled.
 Fitting a DRO to my Weiss WMD30LV mill.
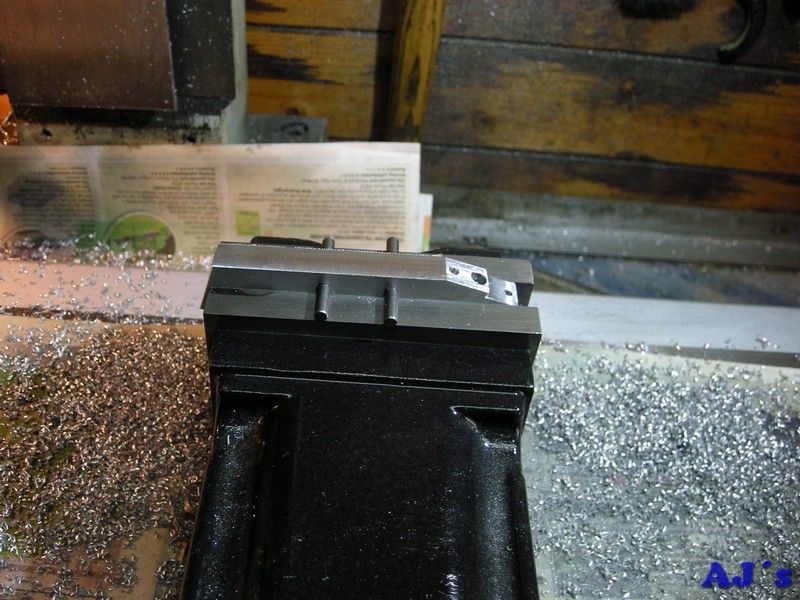 Fitting a DRO to my Weiss WMD30LV mill.
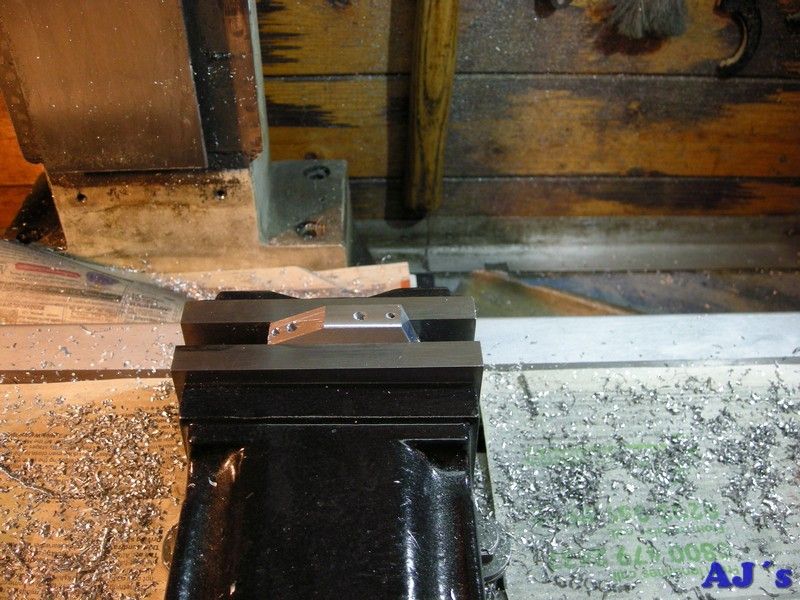
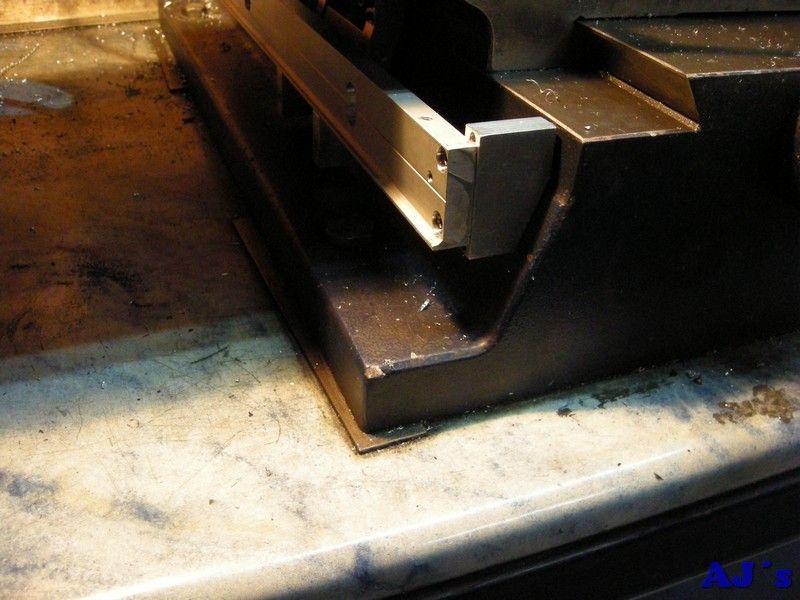
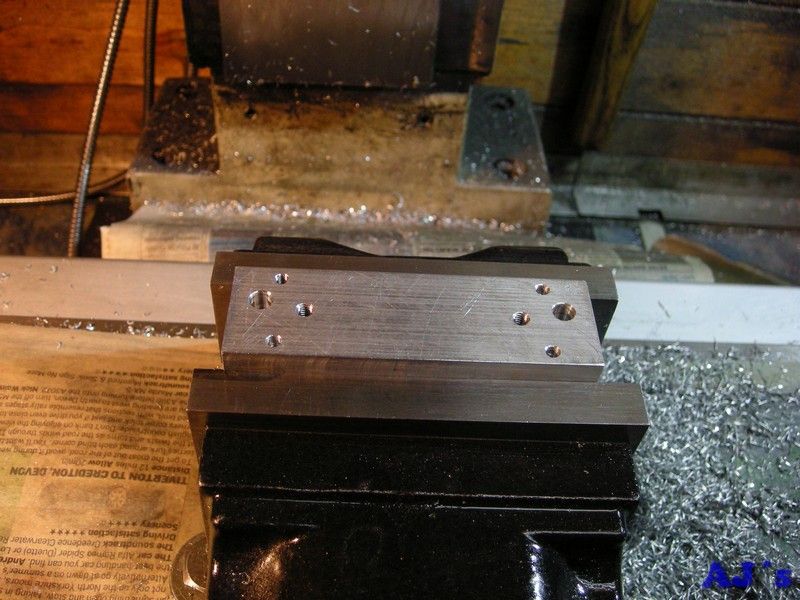
The finished brackets.
 Fitting a DRO to my Weiss WMD30LV mill.
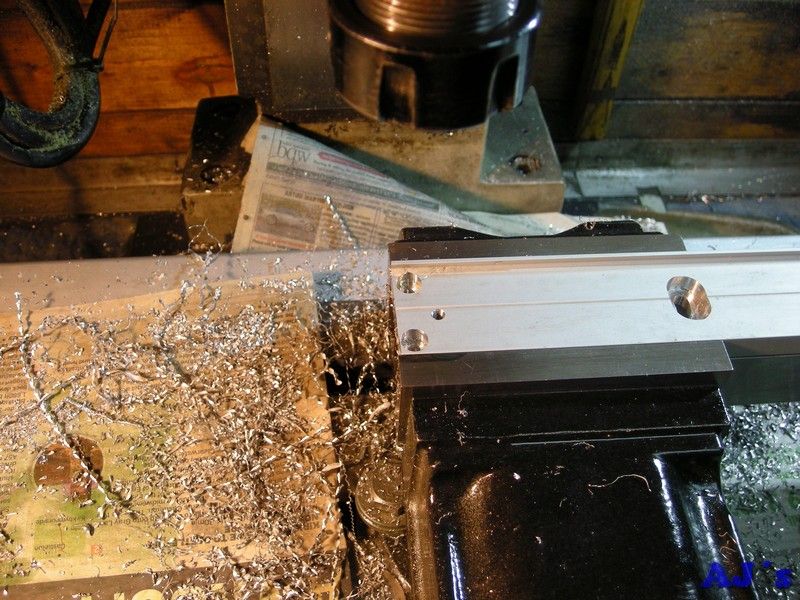
Another piece of ally was milled square and to size.
 Fitting a DRO to my Weiss WMD30LV mill.
After drilling and tapping holes in the ends the three pieces were bolted together.
 Fitting a DRO to my Weiss WMD30LV mill.
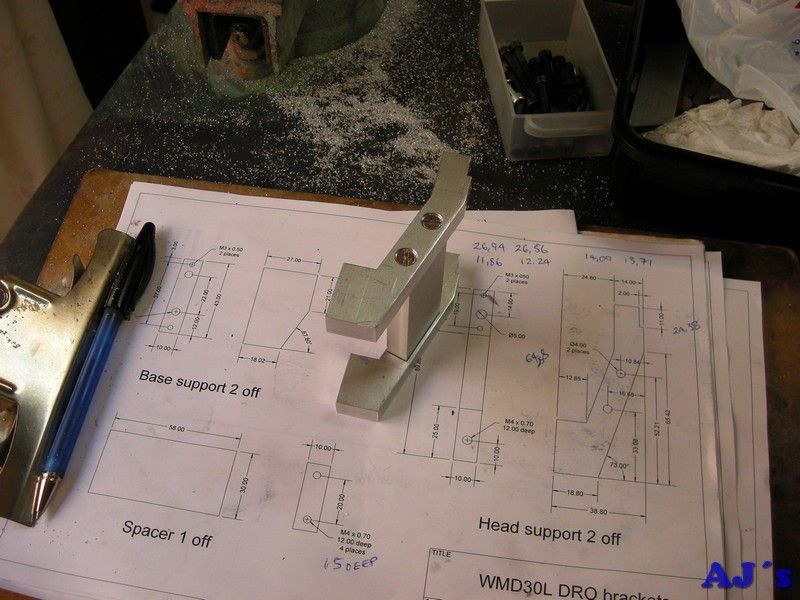 Fitting a DRO to my Weiss WMD30LV mill.
Mounting holes were drilled and tapped in the saddle and the bracket assembly fitted.
 Fitting a DRO to my Weiss WMD30LV mill.
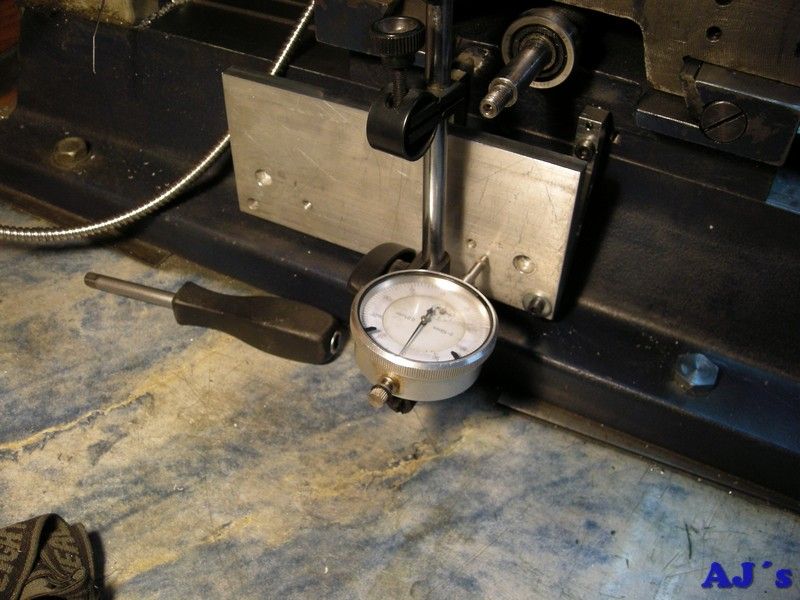
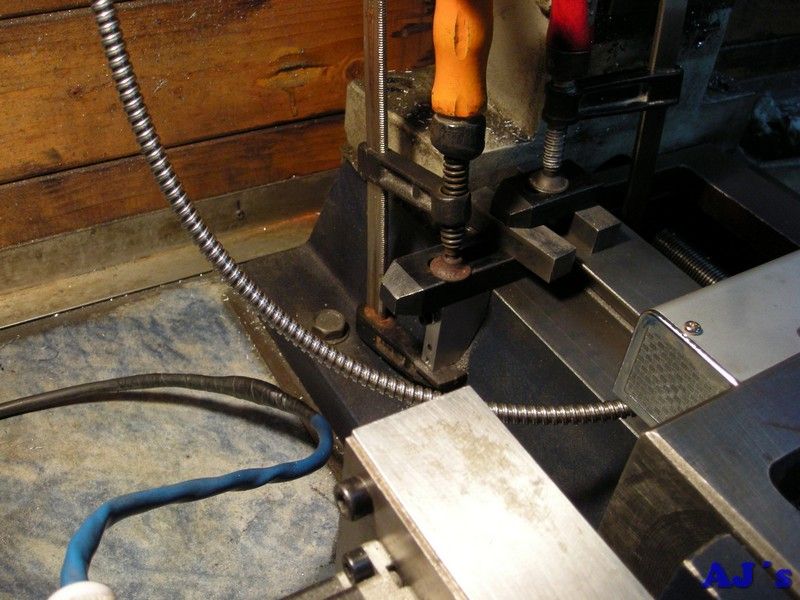
With a piece of ally plate bolted to the assembly the jacking screws were used to dial it in square and parallel to the axis travel.
 Fitting a DRO to my Weiss WMD30LV mill.
A view of the assembly in place.
 Fitting a DRO to my Weiss WMD30LV mill.
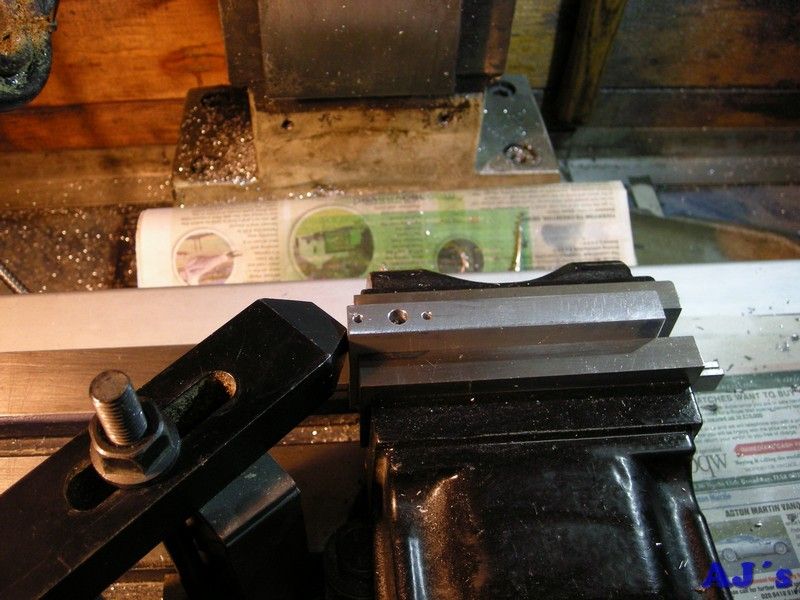
A couple of pieces of 10mm ally plate were milled square and to size and holes were drilled and taped to form the brackets for the scale support.
 Fitting a DRO to my Weiss WMD30LV mill.
A corner on each was milled at an angle to fit the mill base.
 Fitting a DRO to my Weiss WMD30LV mill.
Mounting holes were drilled and counter bored in the support.
 Fitting a DRO to my Weiss WMD30LV mill.
The front bracket was clamped to the base, the mounting holes were marked with a transfer punch and the hole drilled with the bracket still clamped to aid in drilling them square and straight.
 Fitting a DRO to my Weiss WMD30LV mill.
The scale support was bolted to the front and aligned with the jacking screws.
 Fitting a DRO to my Weiss WMD30LV mill.
The location of the rear bracket was determined and it was clamped to the bed, the same procedure was followed to drill the holes.
 Fitting a DRO to my Weiss WMD30LV mill.
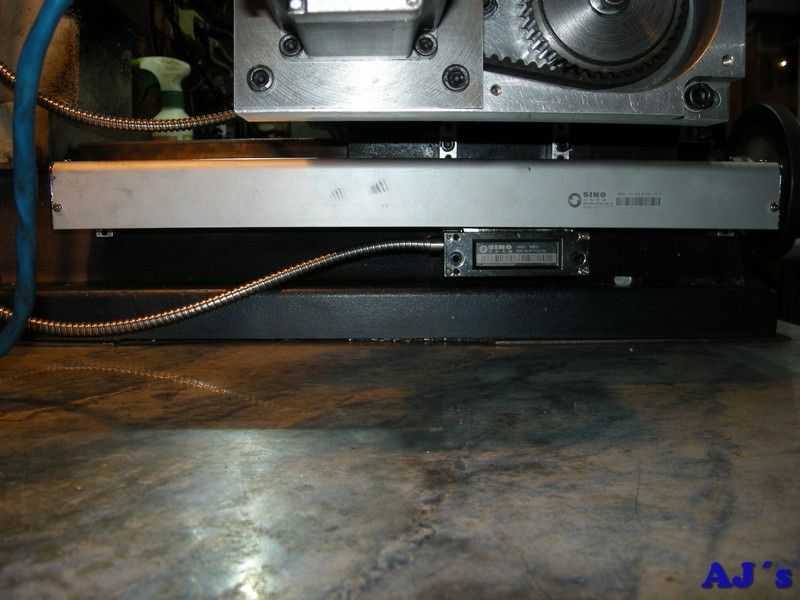
The brackets, support and scale were mounted and aligned with the axis travel.
 Fitting a DRO to my Weiss WMD30LV mill.
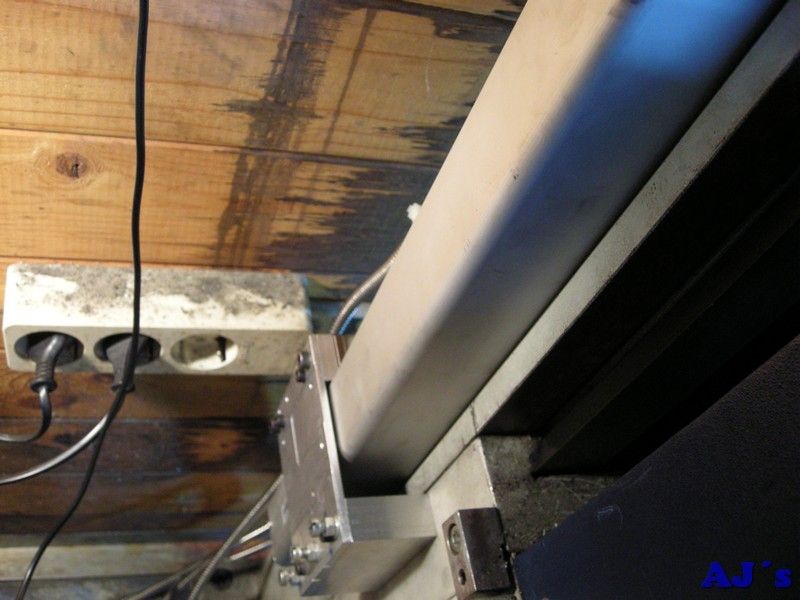
For the Z-axis I chose to mount the scale to the column with the head facing backwards, this meant a bracket for the head that cross over the scale to reach the mill head.
 Fitting a DRO to my Weiss WMD30LV mill.
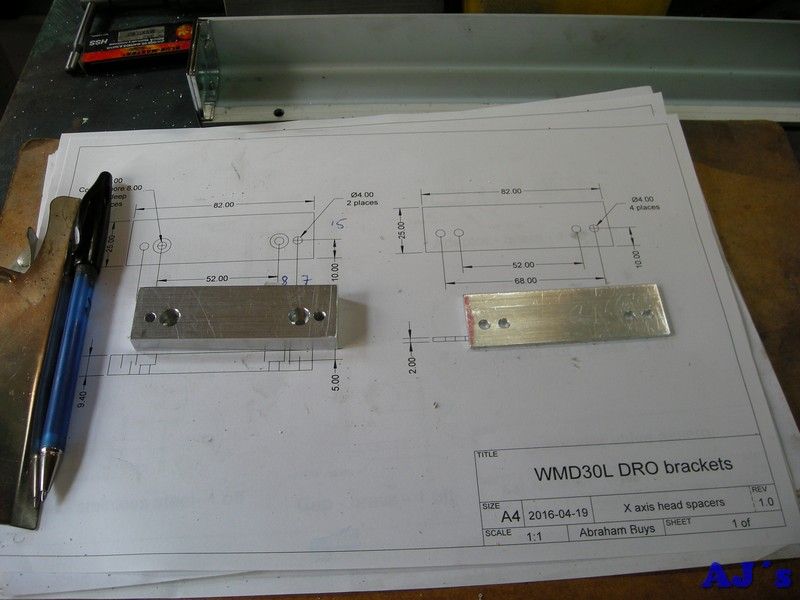
Because of the shape of the column the scale support was mounted using two 8mm spacers. Did not take many pictures of making them except one while facing a piece of ally down to 8mm thick and one after drilling holes. The piece was then cut in half to form two spacers.
 Fitting a DRO to my Weiss WMD30LV mill.
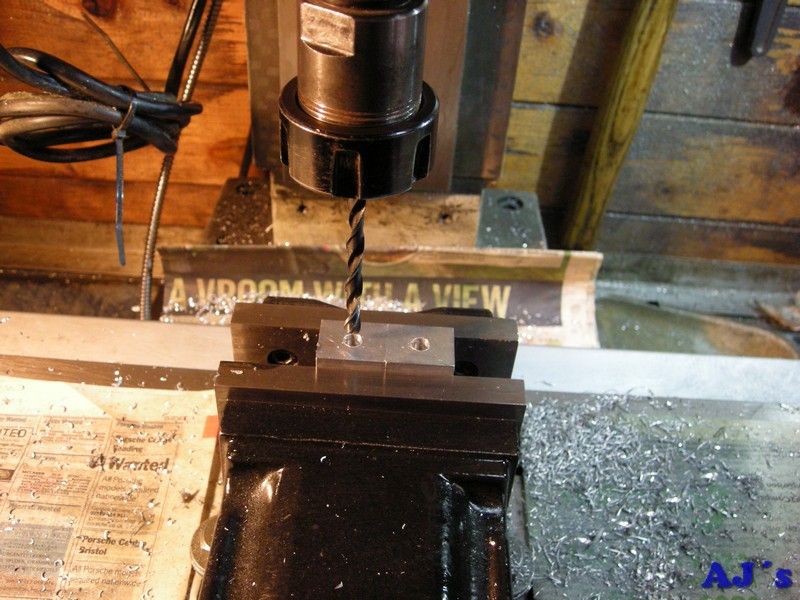 Fitting a DRO to my Weiss WMD30LV mill.
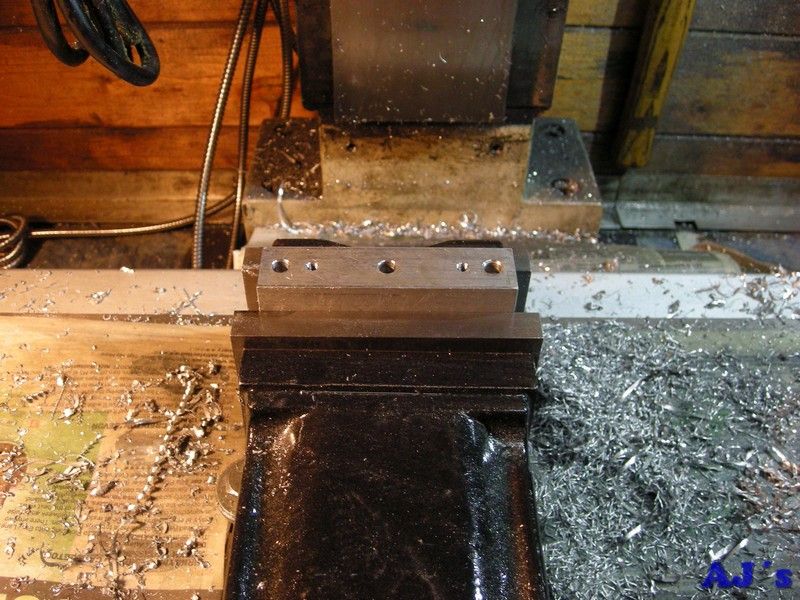
The read head side spacer after drilling and tapping all the holes. There are taped holes at each corner for jacking screws.
 Fitting a DRO to my Weiss WMD30LV mill.
The mill head spacer was made from a piece of ¾” ally bar.
 Fitting a DRO to my Weiss WMD30LV mill.
A piece of plate from a old computer heat sink was used to make the connecting plate between the spacers.
 Fitting a DRO to my Weiss WMD30LV mill.
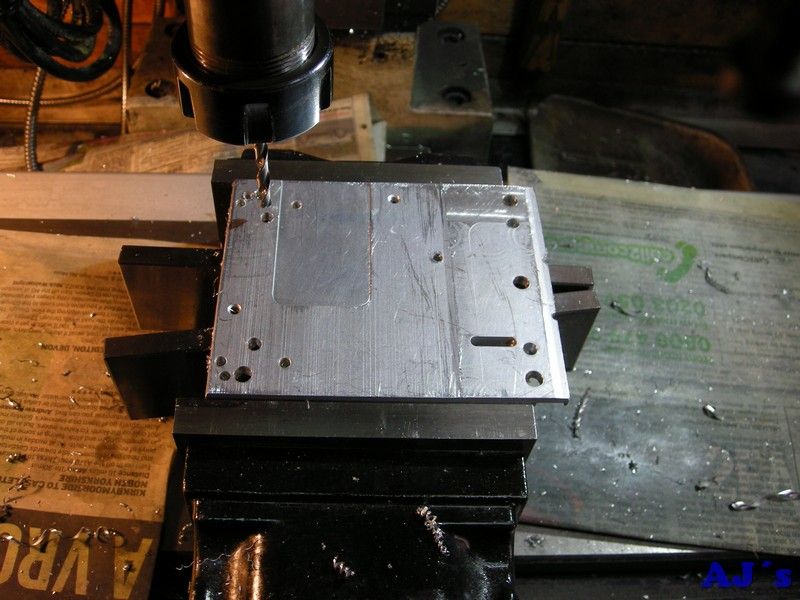 Fitting a DRO to my Weiss WMD30LV mill.
The spacers and plate were bolted together.
 Fitting a DRO to my Weiss WMD30LV mill.
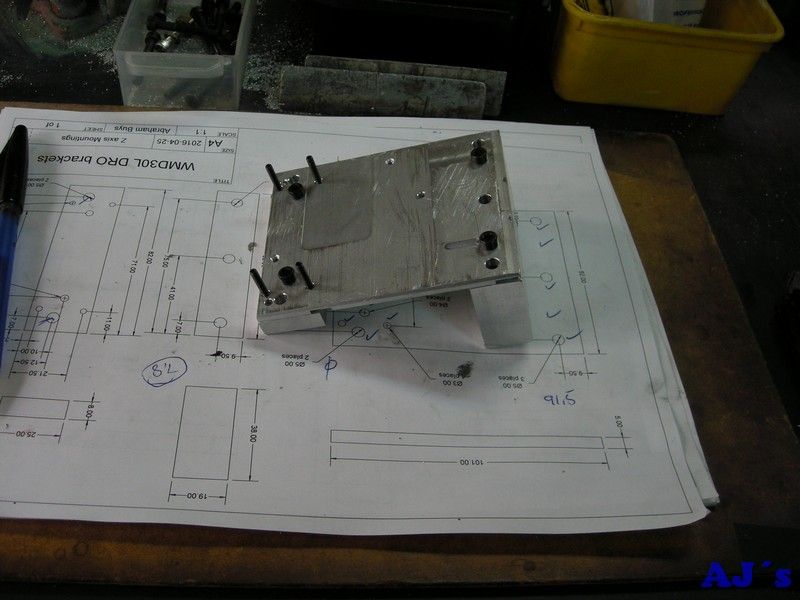 Fitting a DRO to my Weiss WMD30LV mill.
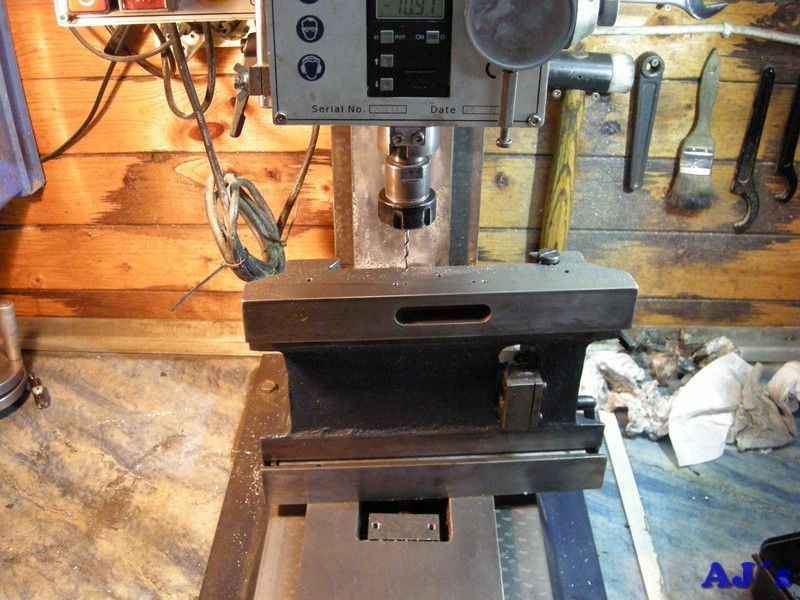
After drilling mounting holes in the mill head the bracket assembly was fitted and the scale aligned.
 Fitting a DRO to my Weiss WMD30LV mill.
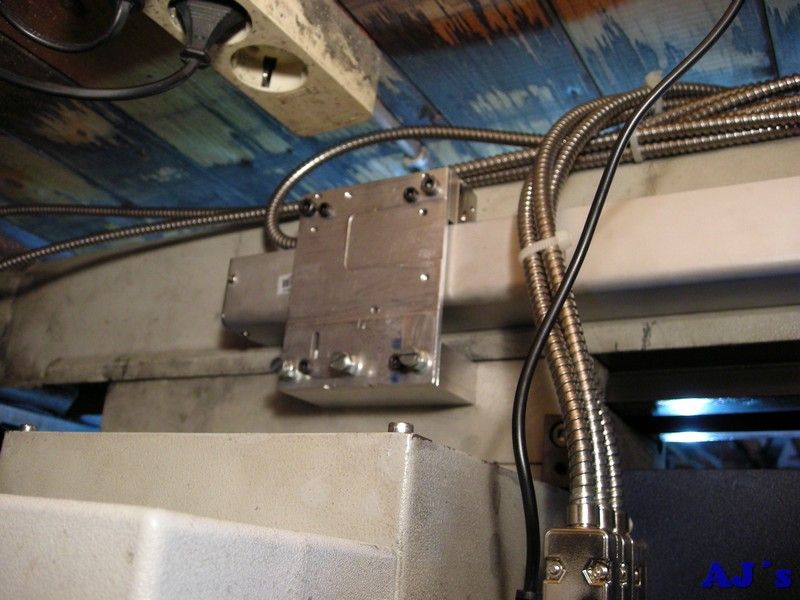 Fitting a DRO to my Weiss WMD30LV mill.
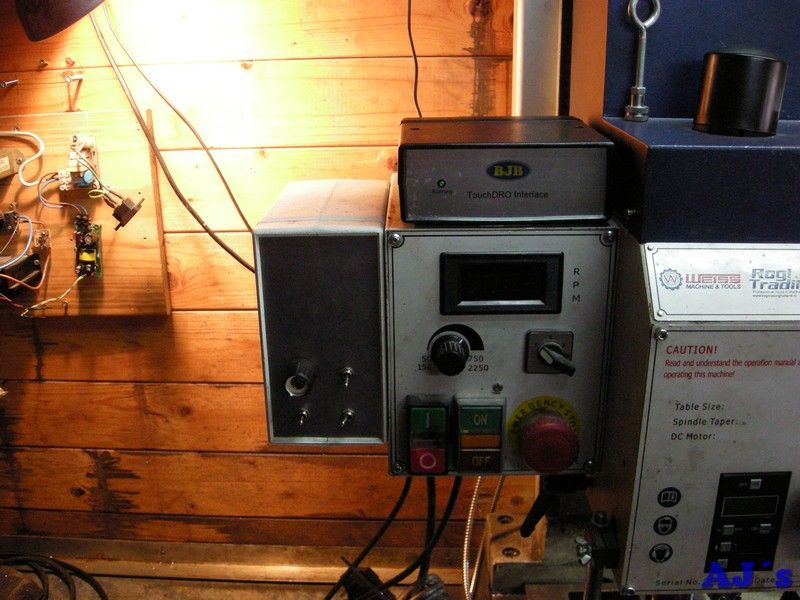
The interface was mounted on top of the mill’s control box.
 Fitting a DRO to my Weiss WMD30LV mill.
A new bracket was made from ally angle to secure the way guard to the back of the saddle.
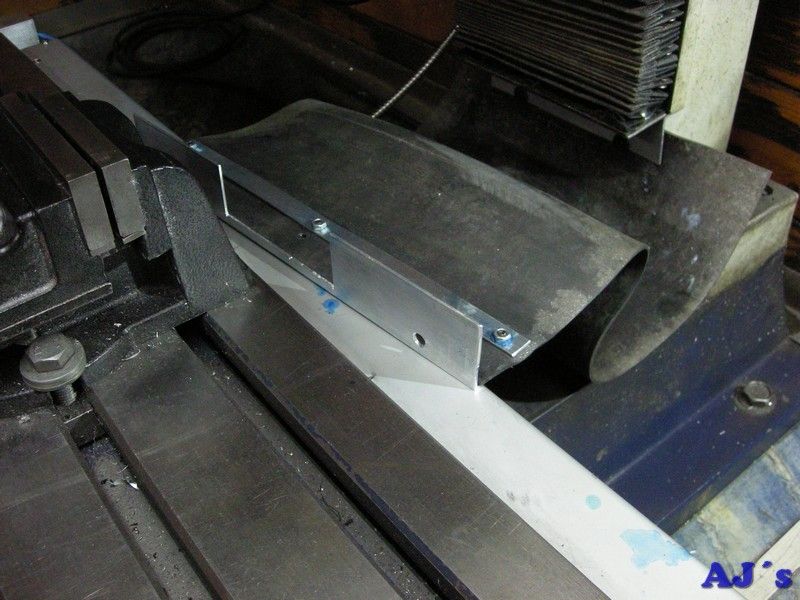 Fitting a DRO to my Weiss WMD30LV mill.
 Fitting a DRO to my Weiss WMD30LV mill.
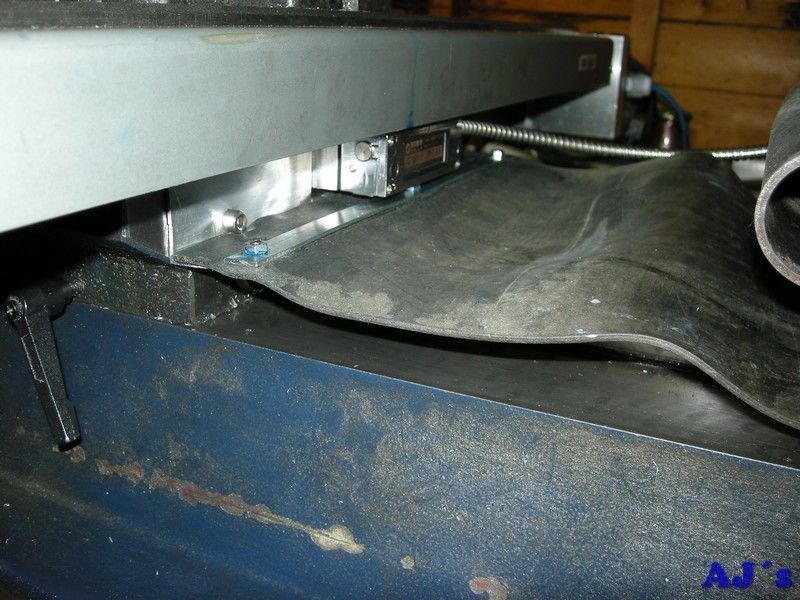 Fitting a DRO to my Weiss WMD30LV mill.
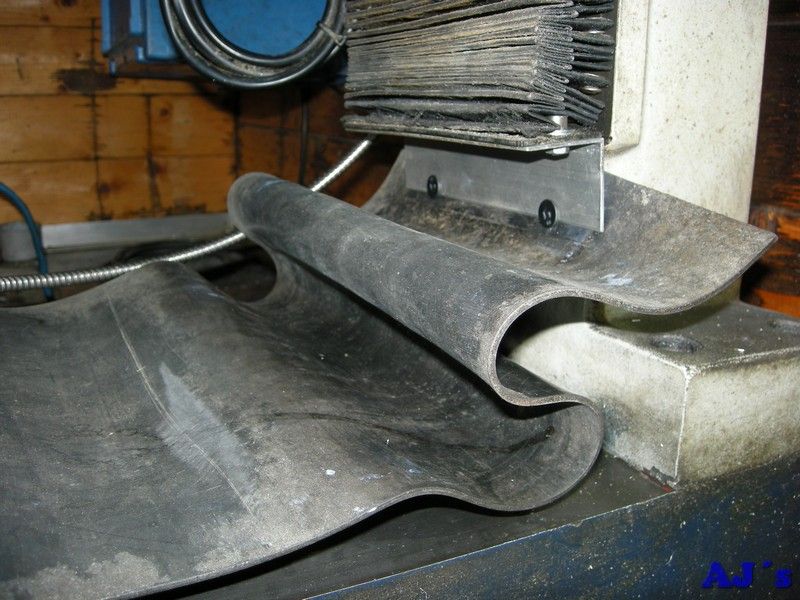 Fitting a DRO to my Weiss WMD30LV mill.
I have been using the DRO on a few jobs and it makes things a lot easier, no more counting turns of the hand wheels.
I will be looking for a way to mount a scale, that can connect to the system, on the quill.
Cheers.
Abraham


