This is an odd log, I built this engine when it was published in Projects in Metal in 92, spent a few months building it in between jobs, and being totally frustrated when it would not even attempt to run, when I "finished" it. Much of the original design was customised, I used a miniature ball bearing instead of a cut wheel for a cam follower, I put an identical bearing in the big end of the rod, rather than a sleeve and aluminum bearing on the steel sleeve, and I only noticed I had cut off the cylinder too short for head fins after it was cut off, but decided to go with it anyway.
For almost twenty years, I've fooled around with it on occasion, lost it, found it, played with it, yet never accomplished anything of note. When I started my build log on the radial engine I am building, I saw a number of "flame suckers" of varying design, built and running on this forum, and you have to go to Jim's build log to see my initial reaction and my determination to make this seemingly simple engine run. Then someone posted a very similar version to mine running on that log and further motivated me. I opened this log in order to stop stealing space on Jim's, because it ended up entailing a bit more work than I first supposed. I started with a complete dissassembly, and laying all the parts on the magazine, comparing outlines and profiles with the pictures, and noticed my cam profile was substantially different. I did not use a rotary table, as I didn't have one, to generate the cam, and in translating the work to a four jaw chuck, failed to properly assess the issue of radius versus diameter, and this was the reason for the vastly different cam shape
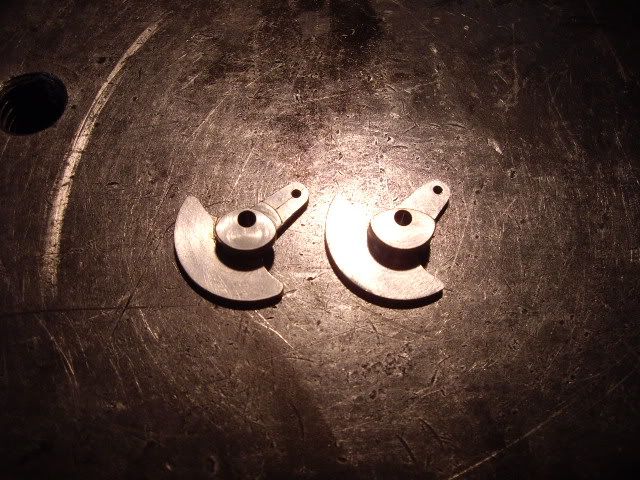
you can see the difference in the cam profiles here
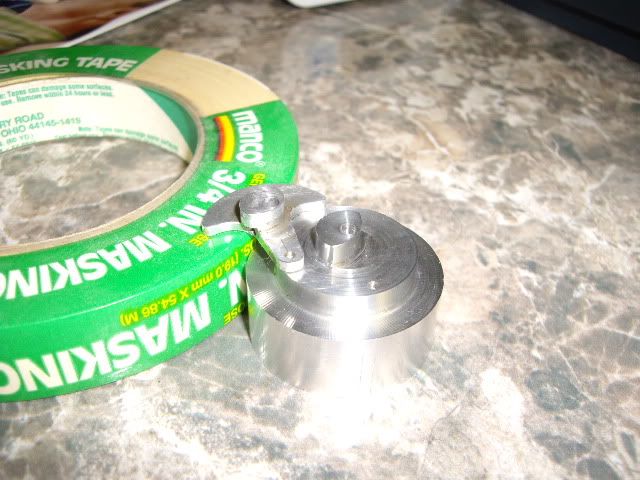
this is the old crank/cam set next to the blank new cam with the crank not yet cut and finished.
After finishing the crank/cam, and replacing the old one, I noted a distinct difference in tone and the feel of the engine, but it still would not even attempt to run, so I turned a new piston, better fit, better compression/vacuum, but still no life. I decided the cylinder should be right, head fins might well be "that little bit" which makes or breaks.
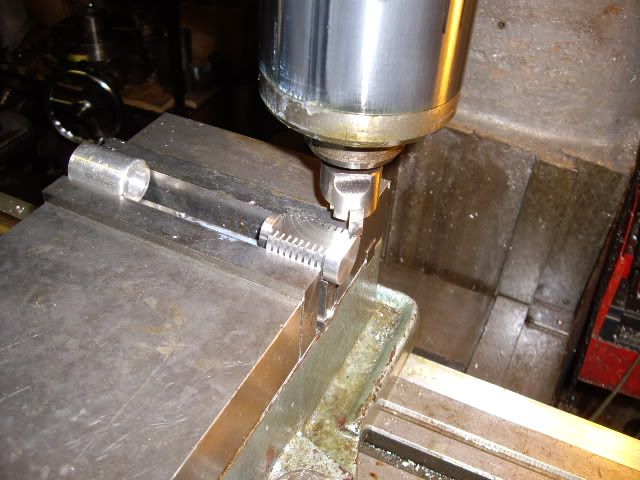
going back to the plans, the new cylinder was made and turned out a much better fit, tighter clearances, but still fully free movement with the new piston. I deliberately made the head fins longer than called for, figuring it couldn't hurt.
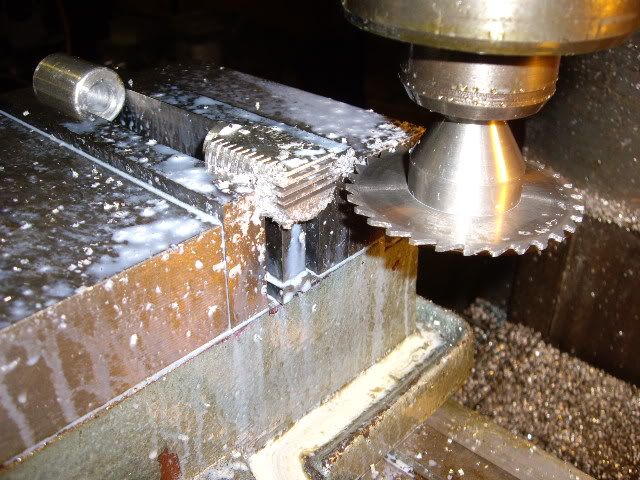
cutting the fins with a .062 slitting saw, 3/16ths deep, the fins about .055 thick
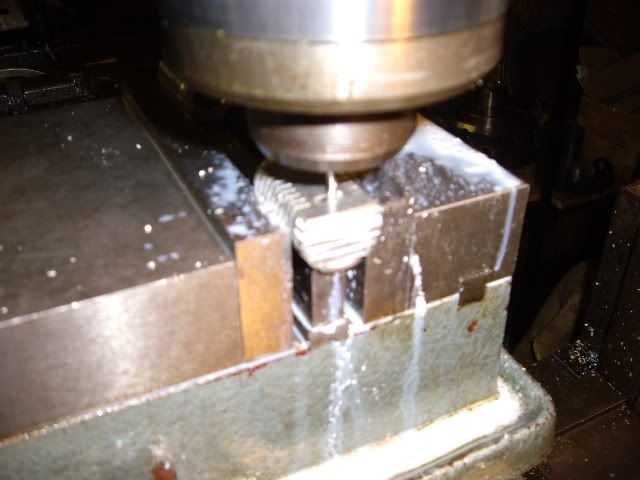
with an 1/8th in end mill, cutting the valve port in the side face of the cylinder, I didn't get it perfectly at the top of the bore, and used a second cutter, a ball mill same diameter, to provide a full opening which worked like a charm.
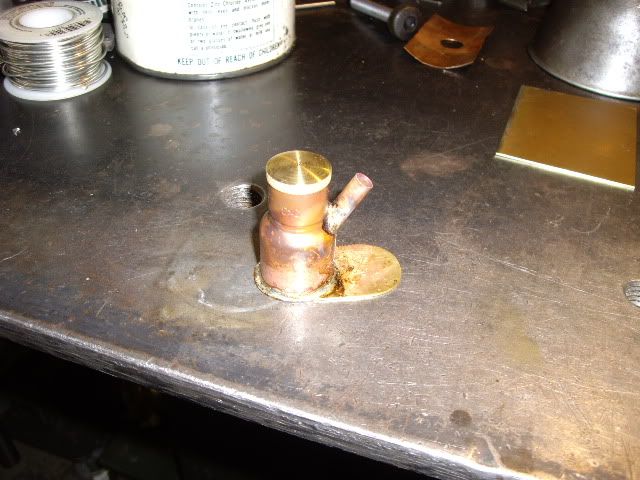
I made a burner pretty much exactly as shown in the original, and got the flame where it needed to be without blocking it up or holding it, neither of which were much fun.
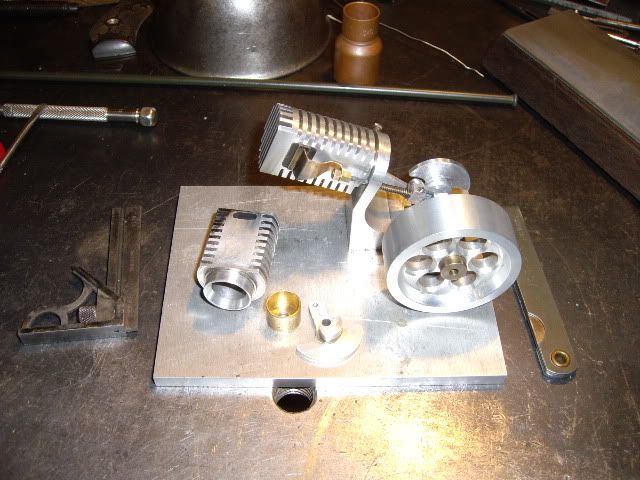
the old parts laid out, the new parts installed, this does not show milling off about fifty thousandths from the face of the brass valve plate, lightening the load considerably, unfortunately, that was about five thousands too much, as I slit from the opposite side for the valve spring to seat in, and milled into the cut. I fluxed and soldered the face of the valve, and then filed and sanded off all the solder except that which was in the tiny slit, and got a good sounding compression and firm "pop" from the suction, which had disappeared as the slit appeared. This only lasted for a short time, and I wore through the solder with the end of the spring, and suddenly lost compression and pop. I almost made a new valve, but ran across a piece of .012 brass sheet, a piece about ten percent bigger than the valve its self, and decided that was a sign, so I filed it flat on both sides, tinned one side, put flux on the valve, and laid it in the center of the piece of sheet with a tiny bit of tinning showing on all sides, and put the torch flame to it for just a few seconds, getting a visible drop in the valve as it cleaved right up to the sheet. The edges were filed to match the original valve, the face was filed almost flat, and then it was sanded on a piece of 600 grit wet or dry, on a surface plate until flat. The compression and resounding pop were back, and spring pressure was just right. Putting the burner in front of the port, and spinning the engine over got the first visible response I ever had, and by moving the flame around, got the engine running fifty or sixty cycles instead of just five or so. Some adjusting of the valve, some tightening of all the grub screws and a few pulls on the flywheel and the engine was actually running, immediately showing interesting aspects of where the flame should be to start it cold, warming it up, and finally moving it to a point which brought the engine up to an estimated two or three thousand rpm, which will be determined today, when I put my digital tachometer aimed at it.
This is a very short video, I have a longer one which must be chopped if I am going to fit it in this build log in a reasonable amount of time. The first engine I ever built in my life which did not run when I was "finished" with it, now is a runner, and I can hold my head up again, without self-doubt and wondering what went wrong. To say I am stoked, would be a vast understatement. I hope all of you get as much satisfaction from your builds as I received last night. I will have a good solid video of this engine running posted tonight, after I tighten up everything and get it as it deserves to be, on a walnut board with the burner secured in place and everything properly polished and clean.


mad jack