Apart from my normal tinkering I have a passion for micro sized helicopters. The kind you can fly in your lounge these days, even includes flybarless collective pitch beasties. I am no hotdog pilot I like to just fly them in a scale like manner. Now having recently had a birthday, I thought I would treat myself to a new helicopter, one of the afore mentioned flybarless. As soon as it arrived I unpacked and charged the battery for its maiden flight. Sure this was a bit hairy as I set it up according to the manual (they assume hotdog, I class myself more a cheese sandwich). So dialed it down to super docile. During the flight I could hear a buzzing that didn't seem to be right, yeah on a little machine thrashing its guts out. Second flight still the buzz, having checked it out before, during and after the first flight. Finished the second flight then found the problem.

What... where are me balls

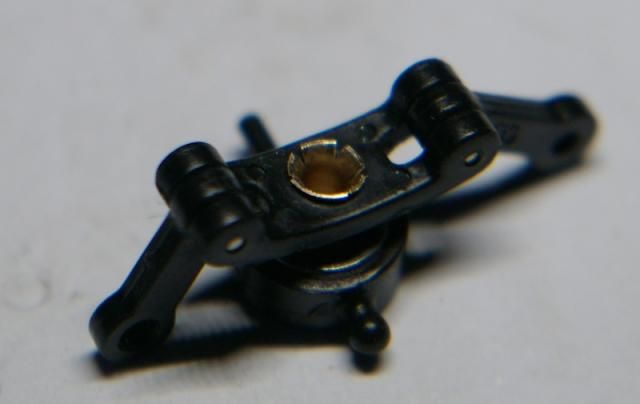
You can see from the picture the bearing cage hanging on the tail rotor shaft. When I first check it over everything seemed to be working fine, so I can only assume what grease may have been present in the race had kept the tail parts together. That and the fact the tail blades push against the bearing so it appeared to fly normally, whilst grinding away the control arm.
I contacted the supplier and they sorted me a replacement part the next day, couldn't complain about the service. Now I had replaced the faulty item I had the bits left over. Hmmm, challenge time. Can I repair the ball raced slider.
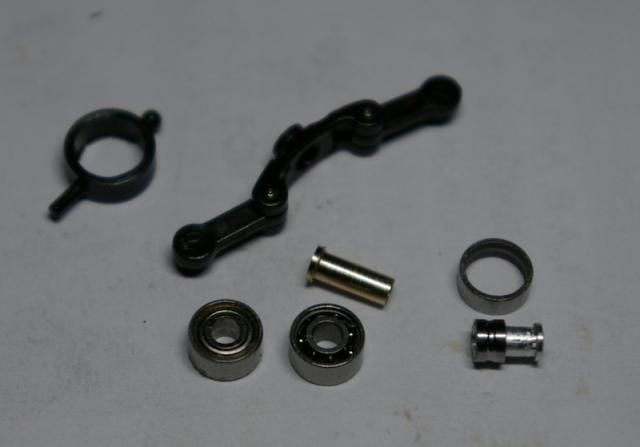
On the right is the old bearing shell and center. I unriveted the alloy tube with a sharp drill and pulled apart the plastic components. Next go looking for some old bearings that might fit. I have built up quite a collection over the years from helicopters that.... Lets say they got retired... So set about making the brass flanged tube you see in the middle of the photo. This thing measures about 5mm long, 2.5mm across the flange and bored out to 1.5mm, so the wall is pretty thin. I picked the bearing shield out of the tiny race and rinsed it in white spirit to clear out the grease and debris. A tiny dot of gun oil was applied to the race and pressed back into the plastic carrier. My bearing being a tad longer than the original, but having looked up the price for a single bearing (£5.00+vat) I will live with it.
The stack of parts was assembled making note of the correct orientation for each part and then the precision bit... I hit it gently with a centre punch to swage the tube end. As it happened the tube end split but the job was accomplished. I now have a spare unit ready for when my current replacement wears out or gets taken out in some unplanned manoeuvre.
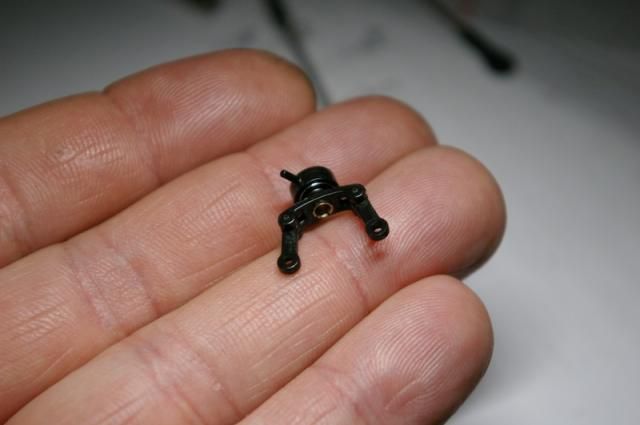
This last photo just gives you an idea of scale for the part itself. Just a nice little challenge for a rainy afternoon, that fortunately resulted in me having a working spare for the future.
At some point I would really like to get hold of a watch makers lathe as I find making these small components very rewarding. Save old bearing shells as they make good gauges for future work, likewise the bearings if you have them come in handy for making tools.
Joules


