Author Topic: Home Anodizing Bench  (Read 98143 times)

Offline TLGriff

  • Jr. Member
  • **
  • Posts: 89
  • Country: us
Home Anodizing Bench
« on: October 01, 2013, 01:47:53 PM »
A few months ago I decided that I've had enough of bare aluminum parts. I knew that anodizing wasn't that complicated, but the problem is that it's only used occasionally and when it's not being used, what the heck do you do with the stuff? So I devised an anodizing set-up that is ready at a moments notice (well, within the hour) and can be converted to a bench when not in use.


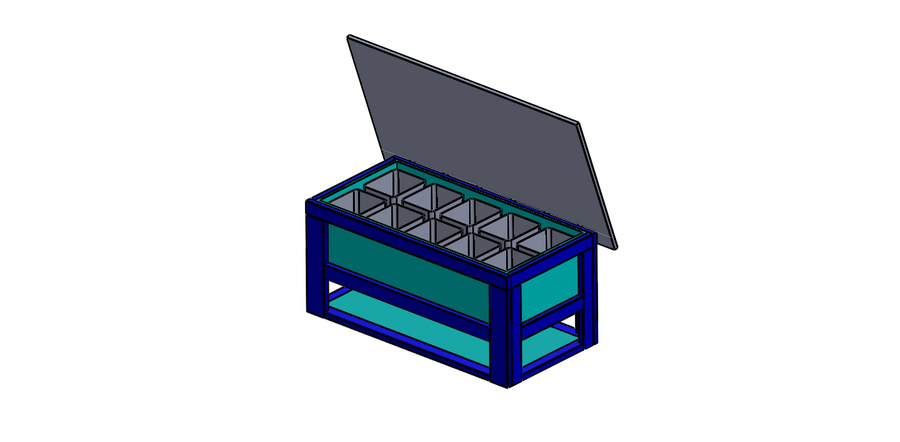
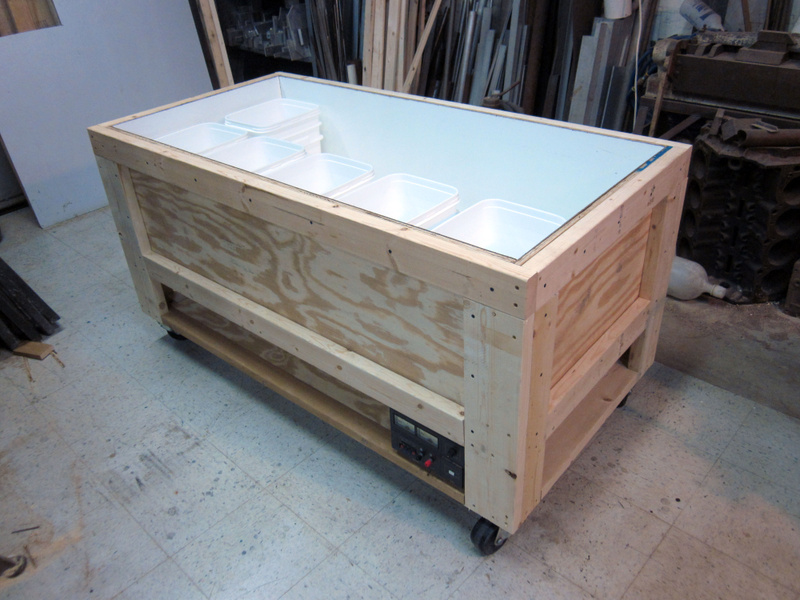
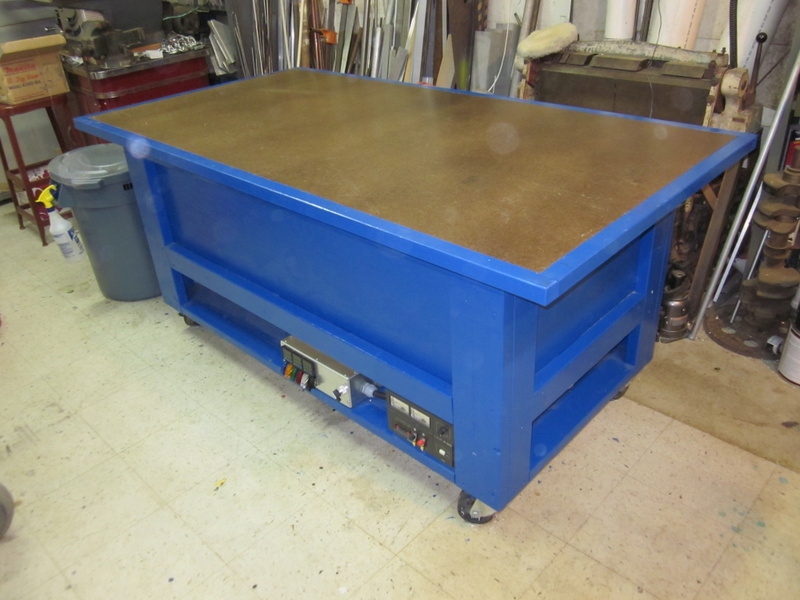
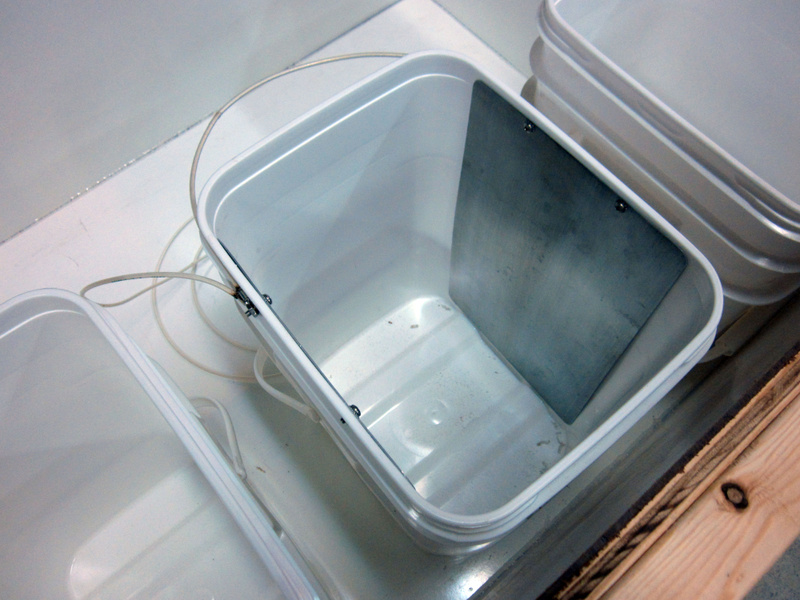
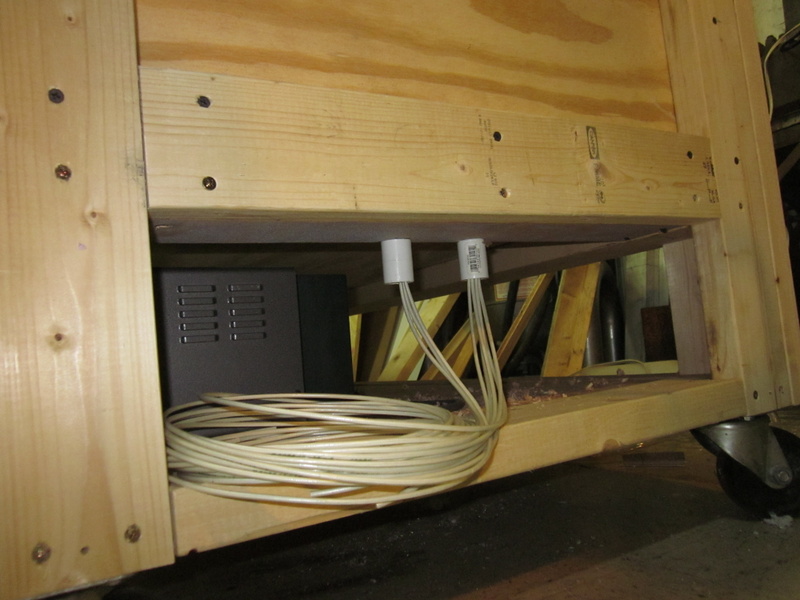
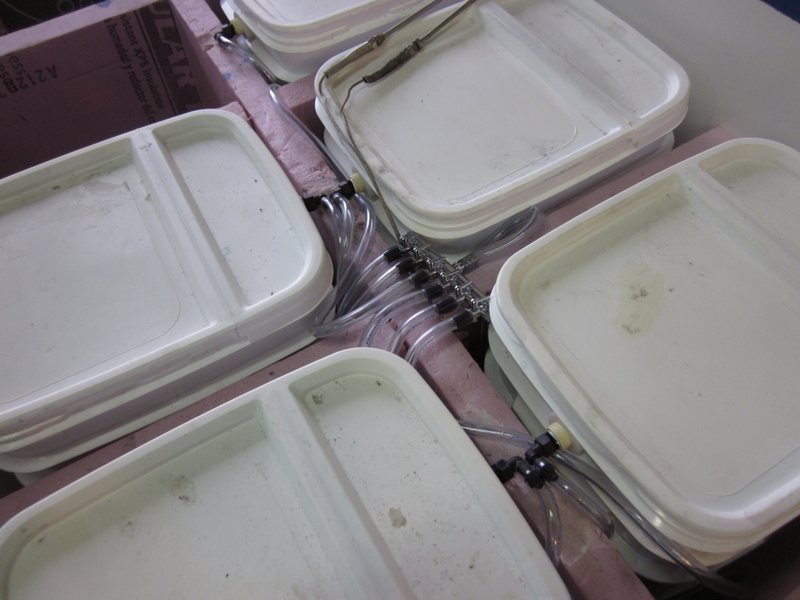
The key to getting the set-up compact enough is the use of rectangular 5.3 gallon buckets. At 10"x12"x15", they allow good capacity, but pack tightly so I was able to get ten of them inside the bench. That is enough to do clear and five different colors. They also have snap on lids that are hinged, so they can be closed up tightly when not in use. Once I had the buckets specked out, I proceeded to design a bench around it. The bench is basically a Melamine lined tub, with a shelf underneath for the power supply, controller and air supply, and a heavy duty hinged top with gas spring assist. The top is 34" off the floor, so it should make a good assembly area when not being used for anodizing.


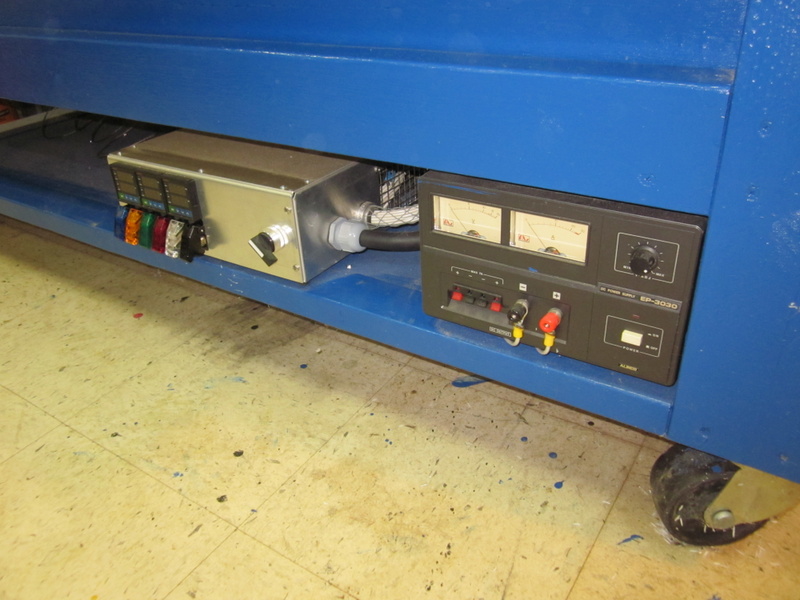
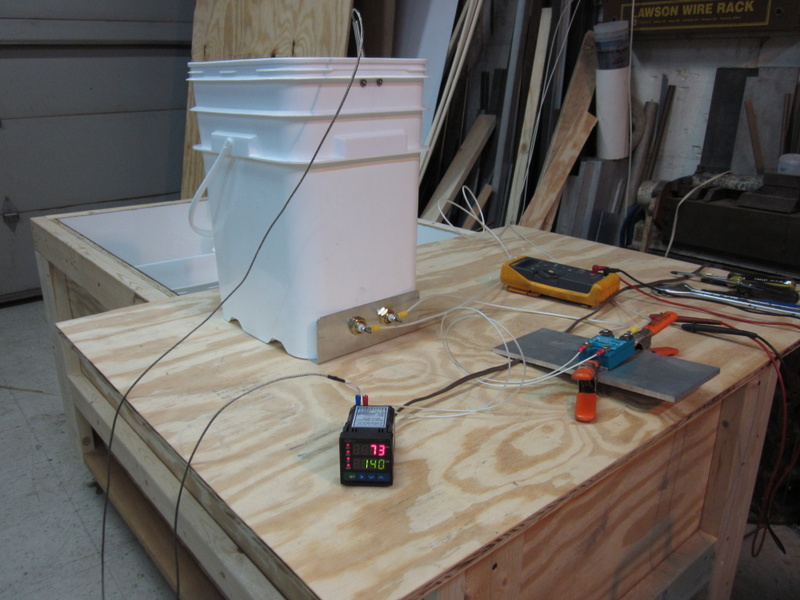
Anodizing requires around 15VDC and up to 25A for a five gallon tank. I had an old DC supply on hand so that's what I used for power. I still had to build a controller to measure and control the temperatures of the various processes and that proved to be the biggest challenge of the project. I'm pretty good at machining and woodworking, but basically suck in electronics. I know just enough to get myself in trouble, but not really enough to get myself out. It did turn out pretty well, but not without issue and I think I actually learned some stuff solving the issues which is a good thing.


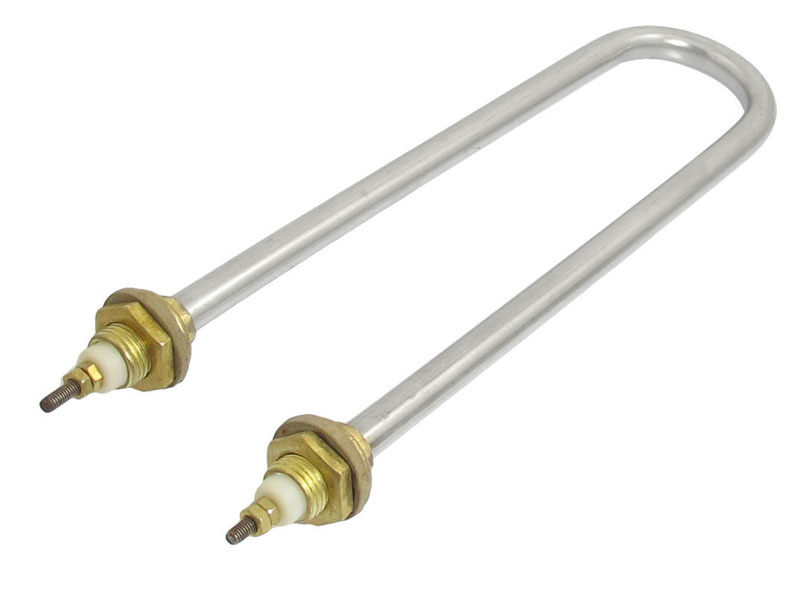
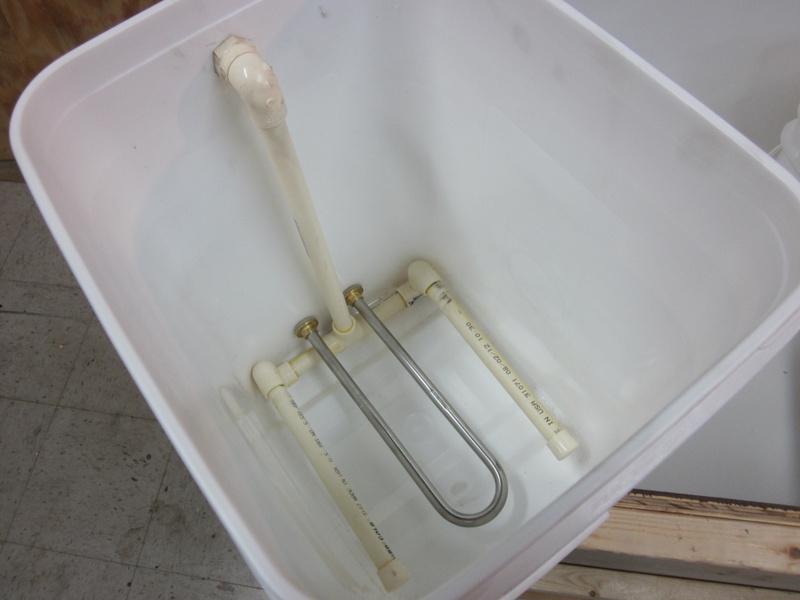
There are three different temperatures required in anodizing. The anodizing tank itself must be kept between 70ºF and 75ºF. Most of the time, room temp is close enough so I made provisions to control it, but haven't had to heat or cool it yet. The dye tanks operate at 140ºF, so they require a heating coil. I found some nice SS ones on ebay that are 2000W at 220VAC. The sealer tank operates at 170ºF. That's a bit marginal for the polyethylene tanks, but I reinforced the sides and it seems to be working well so far. I may eventually go to a SS tank instead.


The immersion heaters are controlled by solid state relays which in turn are controlled bu a PID process controller and a thermocouple. The anodizing tank and the sealer tanks have their own controller, but I slaved the other tanks together to a single controller since they all operate at the same temperature. The concept is a bit "out there", but it seems to be working well.


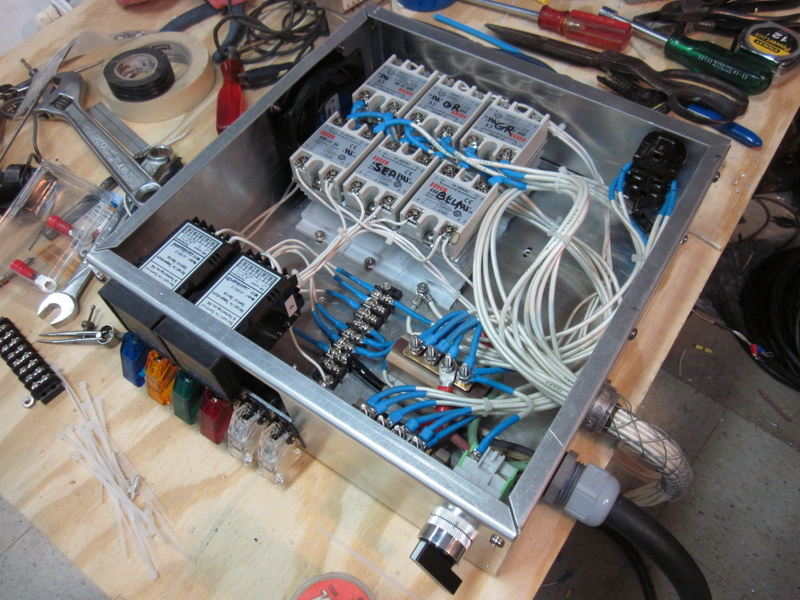
The controller circuitry is enclosed in an aluminum box and includes all of the relays, process controllers, and dye tank selector switches (I only turn on the colors I'm using to keep from drawing too much current from the 2000W heaters). It also contains a fan and heat sinks for the relays, a power switch, a 110VAC outlet for the air pump and power supply and terminal blocks for the massive bundle of wiring.


Most of the processes require agitation so I made air manifolds out of CPVC that set in the bottom of the tanks and used a pond aeration pump to provide the bubbles. Each tank has a valve so I can balance the system or shut off tanks I'm not using.


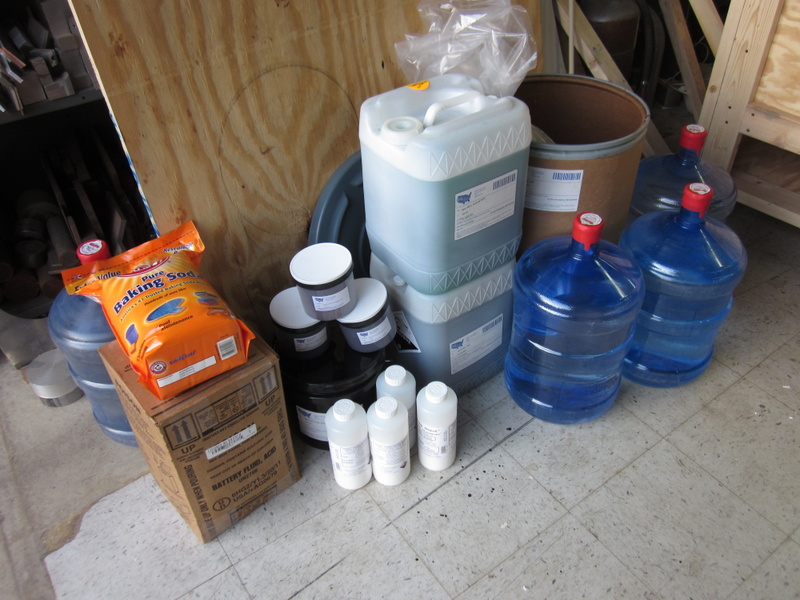
The cleaner, dyes, desmutting solution, and sealer came from U.S.Specialty Color Corporation, the battery acid from NAPA, the caustic etch (lye) from an online place called Essential Depot and the distilled water and soda (battery acid neutralizer) came form Home Depot and Sam's Club.


When I want to anodize something it takes about 45 minutes to get the system heated up and stabilized. Then the process itself, cleaning, etching, desmutting if necessary, anodizing, dyeing if necessary and sealing takes about another hour and a half. So far, everything I've anodized has turned out flawless, so it must be a pretty simple process if I can handle it.

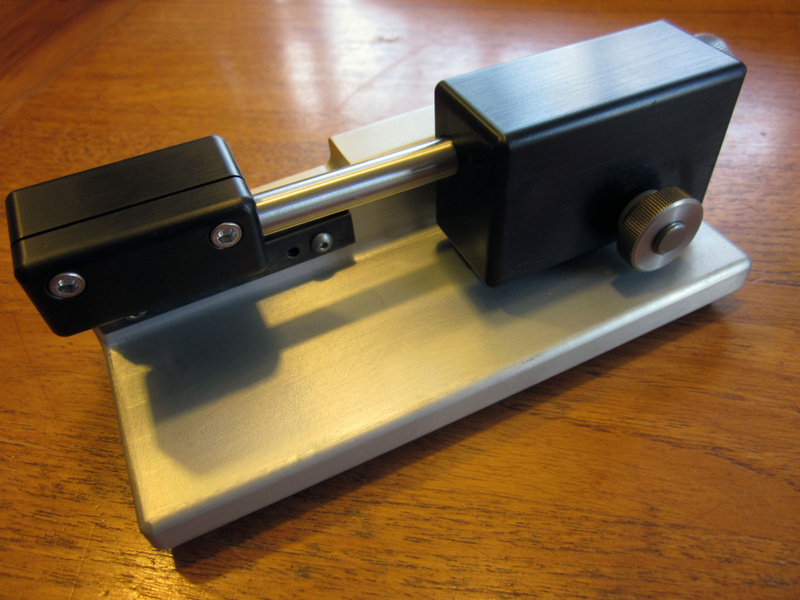
Here's a device that I built for work that I anodized clear and black.


So that's about it. The system probably could have been simpler, but then it wouldn't have been as much fun. About all that's left to do is make a removable  trim panel to fill in between the tanks and build a cooling system for the anodizing tank for those hot summer day anodizing sessions. I also need to eliminate the SS hardware in the anodizing tank because the battery acid is consuming it and growing some amazing crystal. I think titanium or aluminum hardware will work much better.

Questions? Concerns? Laughter?

Tom


« Last Edit: October 01, 2013, 05:11:59 PM by TLGriff »

Offline mattinker

  • Hero Member
  • *****
  • Posts: 1316
  • Country: fr
Re: Home Anodizing Bench
« Reply #1 on: October 01, 2013, 02:17:19 PM »
Top,

very interesting, good to see the results! Anodising is something I've got in the back of my mind.

Regards, Matthew

Offline Sid_Vicious

  • Full Member
  • ***
  • Posts: 103
  • Country: no
Re: Home Anodizing Bench
« Reply #2 on: October 01, 2013, 02:21:13 PM »
That setup looked really impressive and the result on the thing you built for the office came out nice.
Nothing is impossible, it just take more time to figure out.

Offline dsquire

  • In Memoriam
  • Hero Member
  • *****
  • Posts: 2275
  • Country: ca
  • Kitchener, Ontario, Canada
Re: Home Anodizing Bench
« Reply #3 on: October 01, 2013, 02:44:03 PM »
Tom

That's kind of thinking outside inside the box but it looks like it should work real good.

I think for anyone with a limited amount of space that this would be the ideal answer if they wished to do anodizing in their shop. Kind of a have your cake and eat it too thing.  :D :D

Cheers  :beer:

Don
Good, better, best.
Never let it rest,
'til your good is better,
and your better best

Offline tom osselton

  • Hero Member
  • *****
  • Posts: 1255
  • Country: ca
Re: Home Anodizing Bench
« Reply #4 on: October 01, 2013, 03:31:07 PM »
Another one to put on the list thanks for showing!

Offline TLGriff

  • Jr. Member
  • **
  • Posts: 89
  • Country: us
Re: Home Anodizing Bench
« Reply #5 on: October 01, 2013, 03:35:27 PM »
Thanks guys.

I just noticed that the last pic is not current. I'll see if I can get a more recent photo of the bench with its finished top.

Tom

Offline NeoTech

  • Hero Member
  • *****
  • Posts: 826
  • Country: se
    • Roughedge Hobbyworks
Re: Home Anodizing Bench
« Reply #6 on: October 01, 2013, 04:30:50 PM »
So far, everything I've anodized has turned out flawless, so it must be a pretty simple process if I can handle it.

Or you have just some  :proj:

And this effin rocks..  :mmr:
Machinery: Optimum D320x920, Optimum BF20L, Aciera F3. -- I have not failed. I've just found 10,000 ways that won't work. http://www.roughedge.se/blogg/

Offline sparky961

  • Hero Member
  • *****
  • Posts: 844
  • Country: ca
Re: Home Anodizing Bench
« Reply #7 on: October 01, 2013, 05:59:22 PM »
I was thoroughly impressed.  Especially by your finished product.  It does seem like quite a bit of work for just the occasional part though - do you have plans do go larger scale and maybe do stuff for others?  Or maybe you do enough yourself to justify it?

Offline TLGriff

  • Jr. Member
  • **
  • Posts: 89
  • Country: us
Re: Home Anodizing Bench
« Reply #8 on: October 01, 2013, 06:04:53 PM »
I was thoroughly impressed.  Especially by your finished product.  It does seem like quite a bit of work for just the occasional part though - do you have plans do go larger scale and maybe do stuff for others?  Or maybe you do enough yourself to justify it?

Oh, we are justifying projects now?   :bugeye:

I actually built it for a product I'm developing but even so, I do make enough stuff to justify the effort.

Thanks,

Tom

Offline AussieJimG

  • In Memoriam
  • Sr. Member
  • *****
  • Posts: 381
  • Country: au
Re: Home Anodizing Bench
« Reply #9 on: October 01, 2013, 06:06:01 PM »
A thoroughly professional job. Very impressive.

Jim

Offline TLGriff

  • Jr. Member
  • **
  • Posts: 89
  • Country: us
Re: Home Anodizing Bench
« Reply #10 on: October 01, 2013, 06:06:49 PM »
Thanks Jim.

tumutbound

  • Guest
Re: Home Anodizing Bench
« Reply #11 on: October 01, 2013, 09:26:00 PM »
Like your videos too, very professional.
Picked up a few tricks to try out later.

Offline TLGriff

  • Jr. Member
  • **
  • Posts: 89
  • Country: us
Re: Home Anodizing Bench
« Reply #12 on: October 01, 2013, 09:42:54 PM »
Thanks Geoff, glad you liked them.

Tom

Offline Brass_Machine

  • Administrator
  • Hero Member
  • *****
  • Posts: 5504
  • Country: us
Re: Home Anodizing Bench
« Reply #13 on: October 01, 2013, 11:21:43 PM »
Nice job Tom,

I am thinking of doing a smaller version of that now. OFC, as soon as I learn a bit more about anodizing.

Eric
Science is fun.

We're all mad here. I'm mad. You're mad.

Offline TLGriff

  • Jr. Member
  • **
  • Posts: 89
  • Country: us
Re: Home Anodizing Bench
« Reply #14 on: October 02, 2013, 12:24:57 AM »
Thanks Eric.

You should grab a copy of Ron Newman's book from focuser.com. There is a ton of good information in it.

Tom

Offline NeoTech

  • Hero Member
  • *****
  • Posts: 826
  • Country: se
    • Roughedge Hobbyworks
Re: Home Anodizing Bench
« Reply #15 on: October 02, 2013, 02:43:22 AM »
Oh.. its that Tom.. *been following that channel for a while now* =)
Machinery: Optimum D320x920, Optimum BF20L, Aciera F3. -- I have not failed. I've just found 10,000 ways that won't work. http://www.roughedge.se/blogg/

Offline TLGriff

  • Jr. Member
  • **
  • Posts: 89
  • Country: us
Re: Home Anodizing Bench
« Reply #16 on: October 02, 2013, 08:20:14 AM »
Come on now, there can't be that many Tom's on the internet. Can there?

Offline NeoTech

  • Hero Member
  • *****
  • Posts: 826
  • Country: se
    • Roughedge Hobbyworks
Re: Home Anodizing Bench
« Reply #17 on: October 02, 2013, 10:36:10 AM »
Its not that uncommon name..  :poke:

Question, why not make the bench out of alu or steel angle ?? that wooden construction must weigh a crapton..
Machinery: Optimum D320x920, Optimum BF20L, Aciera F3. -- I have not failed. I've just found 10,000 ways that won't work. http://www.roughedge.se/blogg/

Offline TLGriff

  • Jr. Member
  • **
  • Posts: 89
  • Country: us
Re: Home Anodizing Bench
« Reply #18 on: October 02, 2013, 10:53:30 AM »
It's holding 450 pounds of water so saving weight on the structure wasn't high on my list of priorities. It's also on wheels so it's easily moved.

Tom

Offline Bishop

  • Jr. Member
  • **
  • Posts: 35
Re: Home Anodizing Bench
« Reply #19 on: January 18, 2014, 11:24:29 AM »
I love that setup Tom, but I do think you need to re-assess your electronics ability... It would seem to me that you have a pretty good handle on things. Me on the other hand  :zap:

I was planning to give anodizing a try but couldn't find the room to setup the tanks etc and decided to buy a powder coating gun and toaster oven instead, still waiting on the mail for the gun and powder I ordered.

Shawn

Offline TLGriff

  • Jr. Member
  • **
  • Posts: 89
  • Country: us
Re: Home Anodizing Bench
« Reply #20 on: January 18, 2014, 12:26:21 PM »
Thanks Shawn.

I managed to stumble through it, but it took quite a while and required some serious troubleshooting to make it work. Electronics just doesn't come easy to me.  :doh:

Tom

Offline Fredbare

  • Full Member
  • ***
  • Posts: 169
  • Country: gb
  • Fakenham, Norfolk
Re: Home Anodizing Bench
« Reply #21 on: January 18, 2014, 04:47:52 PM »
Excellent setup Tom, thanks for sharing.

John

Offline TLGriff

  • Jr. Member
  • **
  • Posts: 89
  • Country: us
Re: Home Anodizing Bench
« Reply #22 on: January 18, 2014, 04:55:21 PM »
Thanks John.

Offline Doc

  • Jr. Member
  • **
  • Posts: 98
  • Country: us
  • Old but still usefull (I hope) ?
    • My Youtube Channel
Re: Home Anodizing Bench
« Reply #23 on: January 18, 2014, 08:28:18 PM »
 :jaw: WOW that is a nice set up it looks super  :thumbup: :thumbup:

Offline TLGriff

  • Jr. Member
  • **
  • Posts: 89
  • Country: us
Re: Home Anodizing Bench
« Reply #24 on: January 18, 2014, 08:31:56 PM »
Thanks George.

Now I just need to make more stuff so I can get some use out of it.

Tom