Author Topic: Fobco drill table repaired  (Read 8720 times)

Offline Jonfb64

  • Jr. Member
  • **
  • Posts: 80
  • Country: england
Fobco drill table repaired
« on: January 01, 2013, 02:50:26 PM »
Hi Guys,

Some of you may remember this from early last year.


Well after a lot of prevarication and research on YouTube decided to have a go at welding cast iron. Bought some welding rods of e-bay and got to work.


Forgot to take a photo of the initial grind out of the damage but you get the idea.


This is a shot of the edge where I had to let a piece of cast iron in to fill the void.


Final filling welds before mounting on my vertical mill.


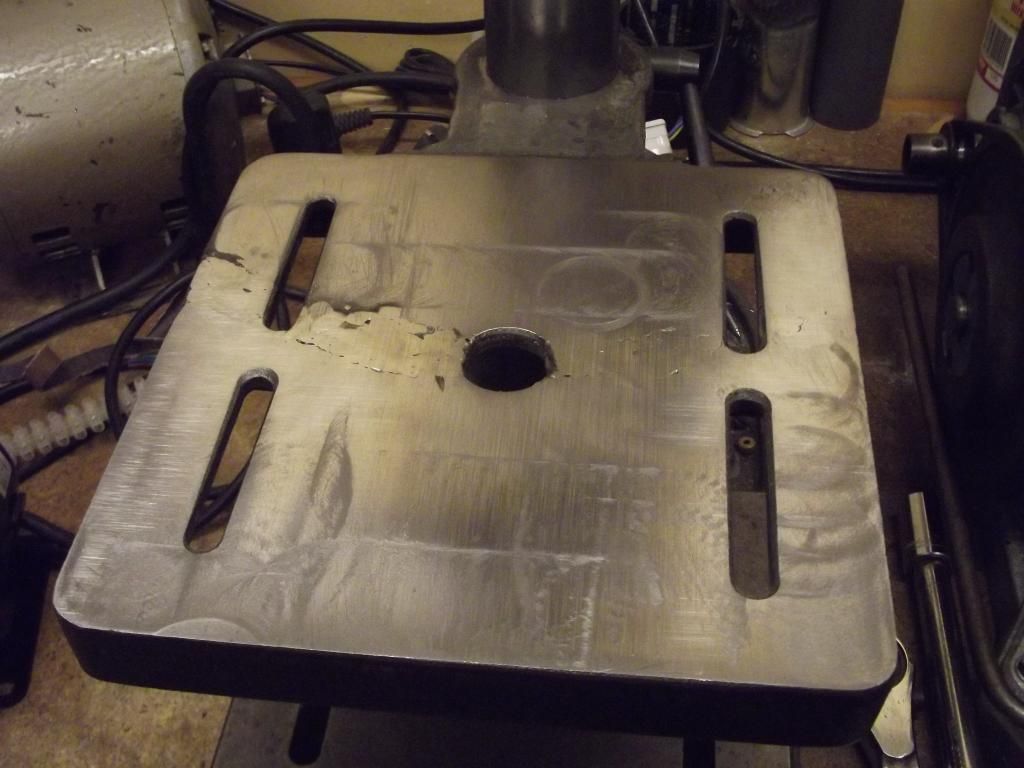
And fitted back on the pillar drill. I had to take nearly 2mm off the front to get the table at right angles to the quill!.
Overall I am very happy with the result and the table has a nice ring when struck showing that it no longer has a crack. :D

Offline DavidA

  • Hero Member
  • *****
  • Posts: 1219
  • Country: gb
Re: Fobco drill table repaired
« Reply #1 on: January 02, 2013, 06:55:21 AM »
Nice job.
The big question is 'How can someone make such a mess of the table in the firsrt place ?'
There should be a law against them touching any kind of tool.

Dave.

Offline krv3000

  • Hero Member
  • *****
  • Posts: 2183
  • Country: gb
Re: Fobco drill table repaired
« Reply #2 on: January 03, 2013, 08:01:50 PM »
a job well dun

Offline awemawson

  • Global Moderator
  • Hero Member
  • *****
  • Posts: 8970
  • Country: gb
  • East Sussex, UK
Re: Fobco drill table repaired
« Reply #3 on: January 04, 2013, 05:02:18 AM »
Andrew Mawson
East Sussex

Offline saw

  • Hero Member
  • *****
  • Posts: 1003
  • Country: se
  • lucky amateur
    • Svenssons AckordsWerkstad
Re: Fobco drill table repaired
« Reply #4 on: January 04, 2013, 08:57:31 AM »
Nice jobb  :clap: :clap:
_________________________
Greetings / Benni
http://myprojecty.wordpress.com/category/steam-engine/

Offline Pete.

  • Hero Member
  • *****
  • Posts: 1075
  • Country: gb
Re: Fobco drill table repaired
« Reply #5 on: January 04, 2013, 09:05:01 AM »
Nice job. My table has similar damage - I was going to sink a ring of cast iron into the centre of it and leave the rest, but now I might weld the other holes up like you have.

Did you pre-heat the table or just clean it and weld it cold?

Offline Jonfb64

  • Jr. Member
  • **
  • Posts: 80
  • Country: england
Re: Fobco drill table repaired
« Reply #6 on: January 04, 2013, 03:40:41 PM »
Thanks for the comments guys.

The bench drill came from a factory closure and I guess the damage was careless employees.  I found that the mounting collar would not lock onto the pillar tight enough and could twist from side to side, hence the nice radial hole pattern. That was easily fixed by splitting the collar all the way through instead of 3 quarters.

Pete.

I cleaned the damage with a small angle grinder to get down to nice clean cast iron, second and third photos. The chap I got the welding rods from on ebay said they could be used cold or with preheat. I went for cold welding and laid short beads of about half an inch at a time down the sides of the channel working from alternate ends and taking regular breaks to avoid too much heat build up. At no time did it get too hot to handle with bare hands, just uncomfortable. Once I had reduced the gap enough I welded down the middle to join the new welds together and then carried on building up till it was proud enough of the table surface for filing and then milling with a fly cutter. I used an old arc welder that I had converted to DC in the past for the welding and my new solar powered automatic welding mask which I can't recommend enough, it has improved my welding considerably. I am no welder so just watched lots of YouTube for tips. The welding rods I used were nickel cast iron "CAST IRON WELDING RODS. 5 pcs. 2.5mm X 300mm Esab OK 92.18". Hope you have success with your repair and don't forget to post pics.

Offline Fredbare

  • Full Member
  • ***
  • Posts: 169
  • Country: gb
  • Fakenham, Norfolk
Re: Fobco drill table repaired
« Reply #7 on: January 04, 2013, 04:27:48 PM »
Well done and thanks for showing.

John