Author Topic: ER25 collet chuck for my mill  (Read 9365 times)

Offline arnoldb

  • Hero Member
  • *****
  • Posts: 515
  • Country: na
  • Windhoek, Namibia
ER25 collet chuck for my mill
« on: March 11, 2012, 05:07:09 PM »
I've ordered some  ER25 collets and a bearing based closer nut to make a new collet chuck for the mill quite a while ago.  A couple of months ago I picked up two offcut pieces of 40mm EN8 steel from a local supplier for a very good price - the good price was mostly because they neglected to order some hex brass I'd ordered from them and wanted to pacify me  ;D

So this afternoon I did a quick C-o-C of what I wanted; I took some measurements off my boring head MT4 shank, as I want this new chuck to share a draw-bar with it:


Off to the bandsaw to get a bit of appropriate length sawn off:


On to the lathe and chucked up.  I used some emery to clean up the tailstock end of the workpiece - there were some dings and high spots on it that needed smoothing off.  Then I mounted the fixed steady close to the chuck, and set it's fingers to just touch the workpiece:


Then I moved the steady over to the end onto the bit I cleaned up, and added a good dollop of oil:

Now, I may be completely wrong about the way I'm thinking here, but, by setting the steady to size close to the chuck with the steady fingers touching the workpiece, and then moving it to the end that I cleaned up with emery, that end is very slightly smaller, and adding some thickish oil there, it produces a nice running fit.

Next I faced off the end:


And center drilled for tailstock support:


Then I made some chips  :) - after the delicate work on the Kimble engine, it was nice to just hog at things a bit:


I'm still struggling to get a good finish on lower-grade steel; I can turn aluminium and brass to a near-mirror surface, and the same for silver steel, but this stuff still needed some work with a file and emery where it was needed:


Some taper turning is required for MT4, and I set up for that.  The last time I turned an MT4 taper I took great pains to set the taper turning attachment to a good degree of accuracy and it's still at the same setting, so this will be a doddle:

 :palm: :Doh: - No doddle today; it's the wrong way around   :lol: - the last setting on the TTA was from the headstock out  :Doh:

I left things there for today; there was a right big thunderstorm pouring down and there was a bit of a lull, so I dashed for the  house from the shop.  Hopefully more to follow next weekend  :)

 :beer: ,  Arnold

Offline doubleboost

  • Madmodder Committee
  • Hero Member
  • *****
  • Posts: 1619
  • Country: gb
  • Newcastle Upon Tyne
Re: ER25 collet chuck for my mill
« Reply #1 on: March 11, 2012, 06:26:09 PM »
Off to a good start Arnold :thumbup: :thumbup: :thumbup:
I do like turning propper steel
John

Offline arnoldb

  • Hero Member
  • *****
  • Posts: 515
  • Country: na
  • Windhoek, Namibia
Re: ER25 collet chuck for my mill
« Reply #2 on: March 18, 2012, 12:51:59 PM »
 :beer: Thanks John.  I'm still struggling a bit with steel, but it's growing on me; just some more practice needed  :dremel:

After the "Homer Simpson" moment last weekend, I picked up where I left off this morning.

First I set the fixed steady to size on the thickest bit of the workpiece close to the chuck:


Then I mounted the 4-jaw chuck, moved the fixed steady toward the tailstock, flipped the workpiece end-over-end and carefully and accurately clocked it up in the 4-jaw - leaving a bit of run-out space for the taper next to the chuck:


The end of the workpiece had been cut with an abrasive cut-off wheel, and silly me; I'd forgotten this is higher carbon steel than the normal crud I work with.  There was a HARD spot on the end which promptly took off the cutting edge of my favourite HSS cutting bit:


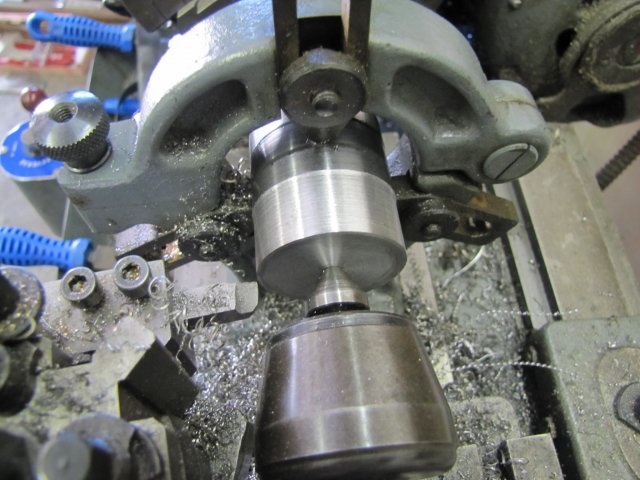
I could have tried brute force with one of my seldom-used carbide bits to take off the hard section, but I didn't want to get things out of kilter, and I didn't want to put too much of a load on the steady.  So I attacked the hard bit by making an under-cut on the face - trying to get "behind" it:


The under-cut worked  :) , and I got the hard section off, so was able to get it properly faced and center drilled for tailstock support.  I also had to skim off the thicker section protruding between the steady and the tailstock, so that I could get the steady out without changing it's setting:


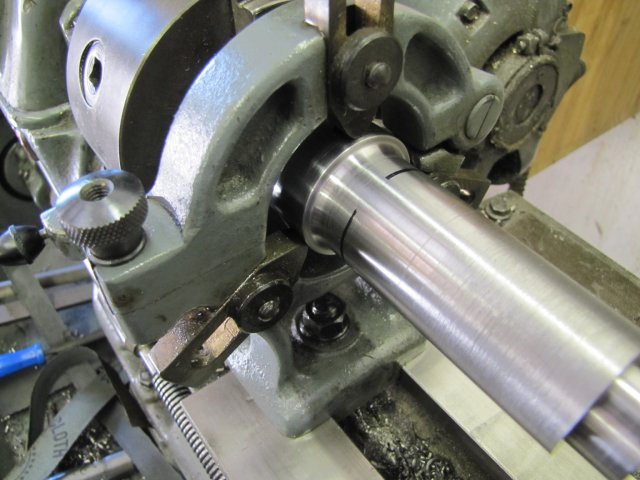
With the steady out of the way, and proper tailstock support, I could turn the taper:


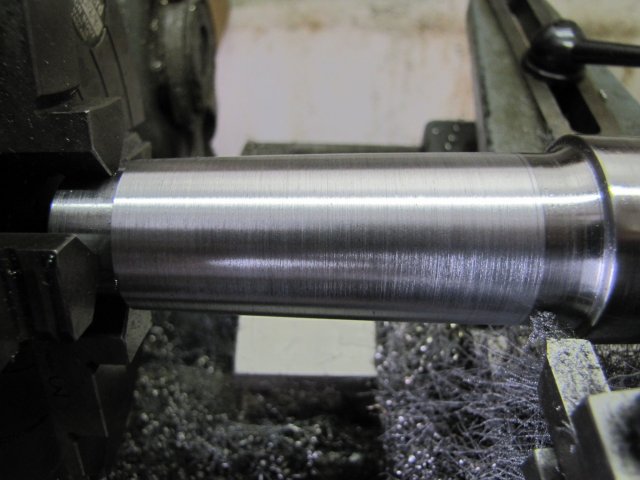
It looks like a dog's breakfast in the previous photo, but a very light rub with some scotch-brite had it looking OK - far from perfect, but good enough for here:


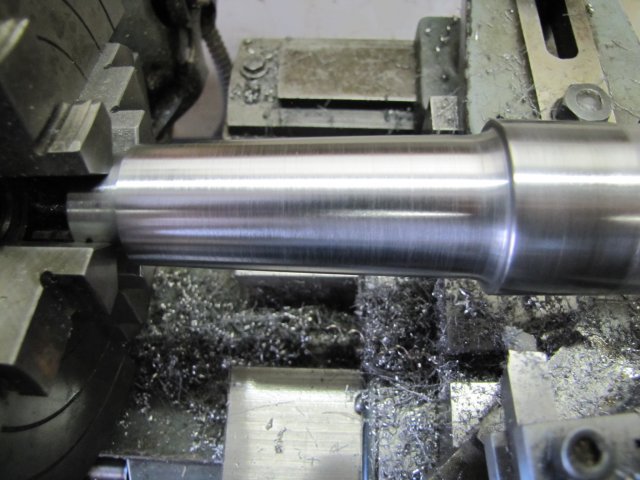
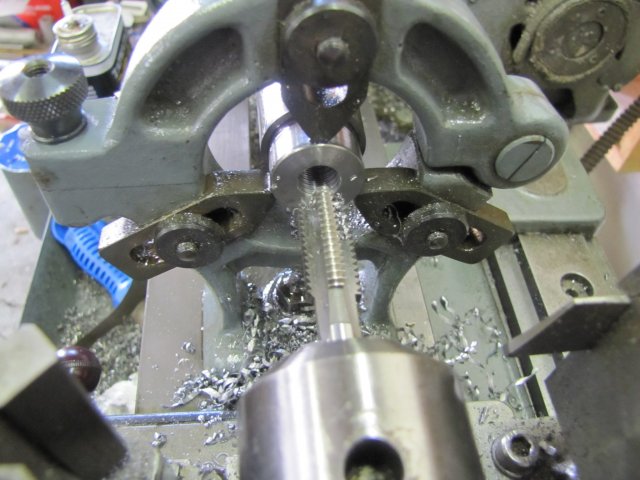
Next I turned the end down to 32mm and put in a thread run-out groove with the parting tool:


A quick hone of a 60o threading tool, and set up using a thread gauge:


Next a couple of minutes setting up the change wheels for 1.5mm pitch and a very light test pass - checked with a tread pitch gauge:


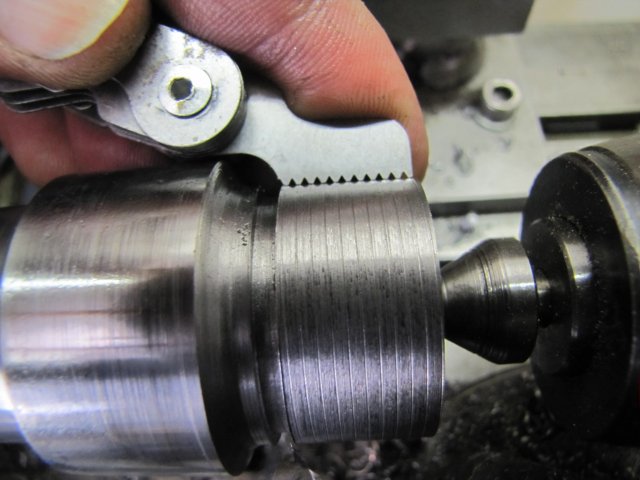
One of my favourite pastimes on the lathe - screw cutting - over much too quickly - but on size and smooth.  The gritty bits in the threads are just some swarf:


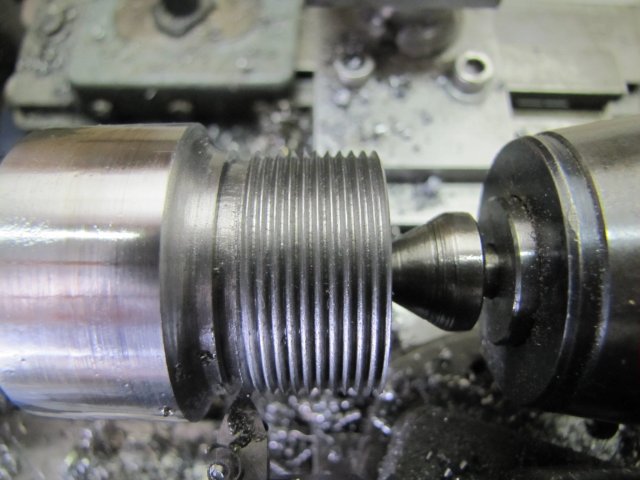
The closer nut spins on easily and smoothly, with virtually nil free play in the threads:


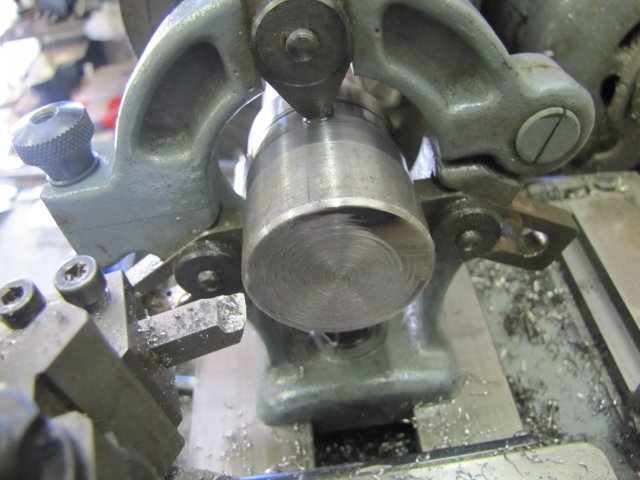
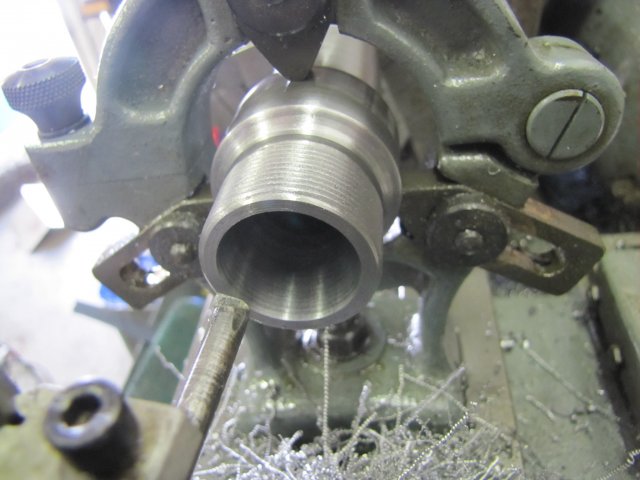
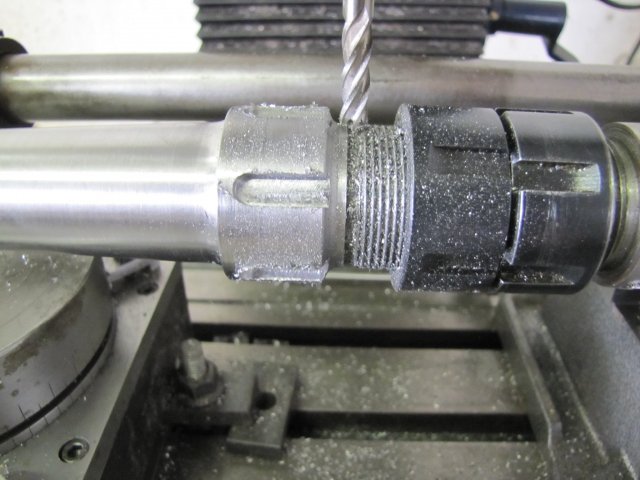
Next, the steady back on, and some drilling - about 90mm deep, and 16mm diameter; it should have been 18mm diameter, but I don't have an 18mm drill:


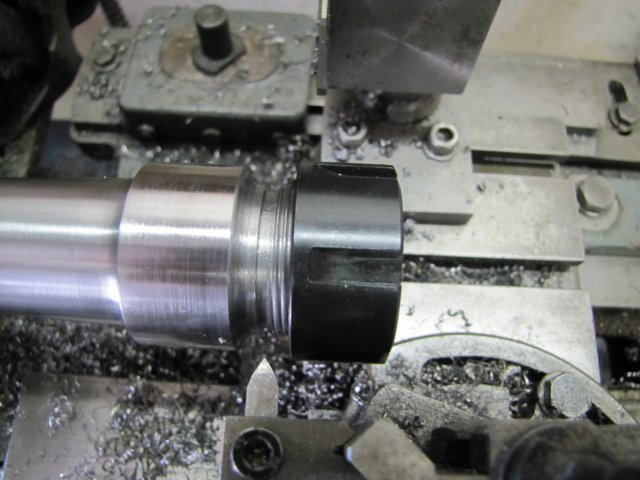
On previous ER chuck builds, I'd simply set my lathe's top slide to 8
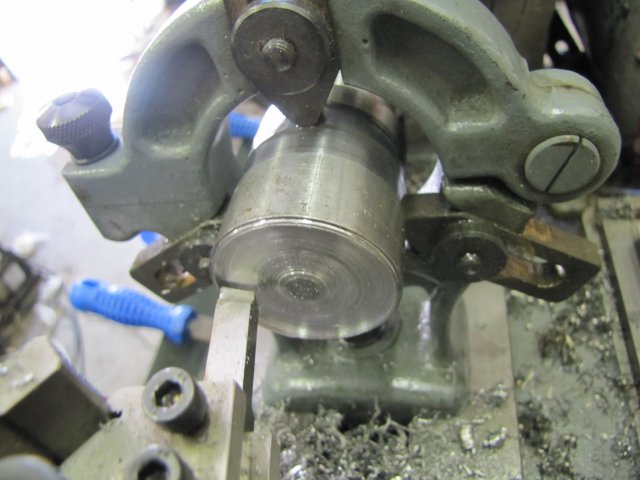
o with the cutting bit spot-on on center line, and have not had any problems, so that's exactly what I did next, and then bored out the taper:

The finish looks a bit rough, but it is in fact very smooth; the banding that's visible is streaks of cutting fluid.

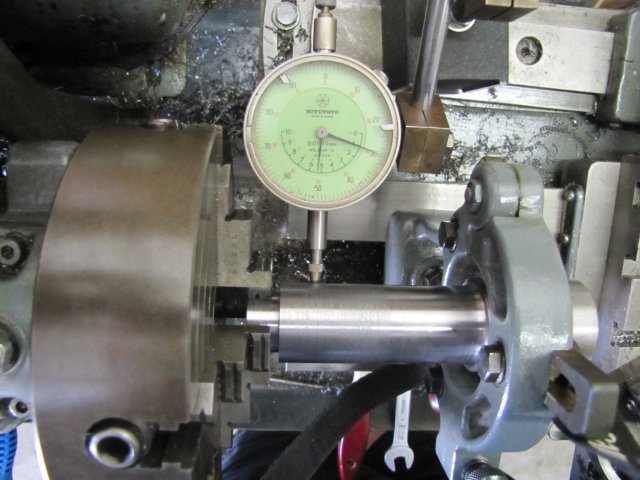
A quick test with a bit of 16mm silver steel chucked up in the 16mm collet, and there's less than 0.005mm of run-out; plenty good enough for me  :dremel: :


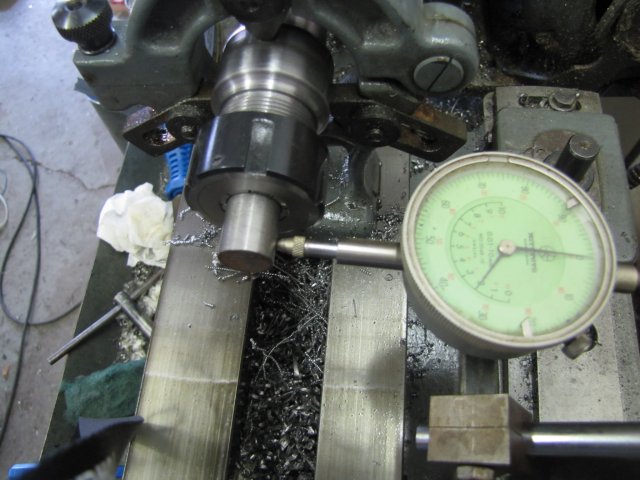
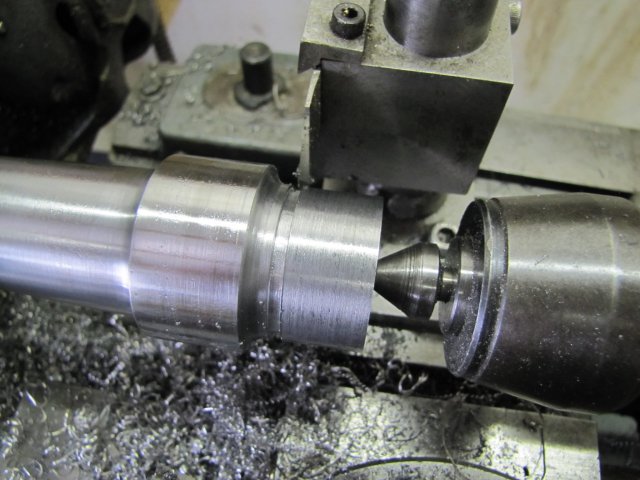
I still had to drill and tap the end for the M12 draw-bar - so I just chucked the new collet chuck end-to end on the lathe's collet chuck using that same bit of 16mm silver steel, then set the fixed steady to size to run on the short thin section I'd left at the end:


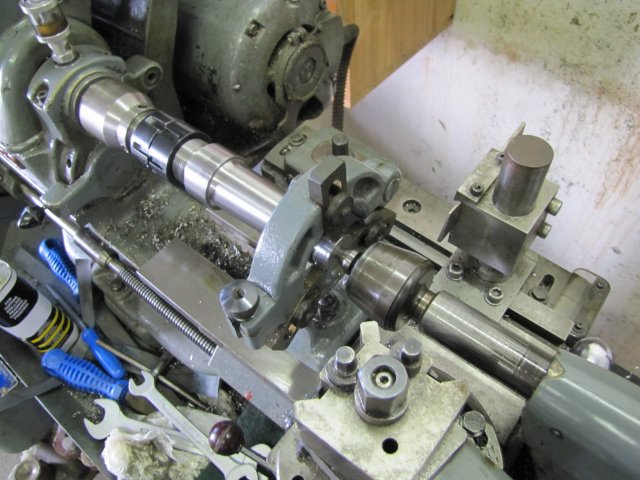
Then I had a thought; I'd obviously need a way to hold the chuck with a spanner/wrench! - So I took the lot off the lathe, set the dividing head with it's tailstock support up on the mill, and plonked the lot in there:


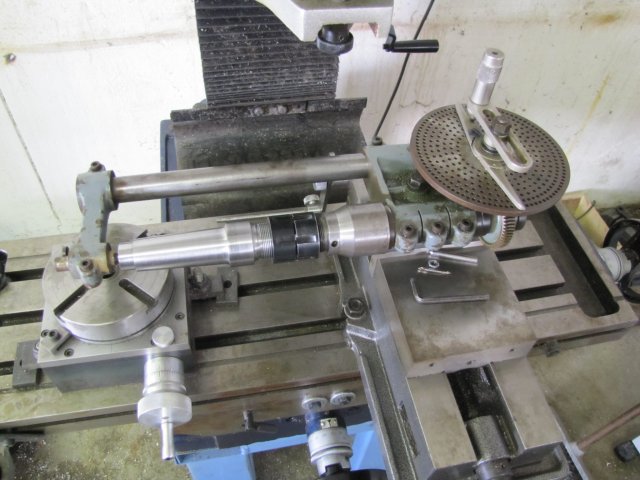
Then milled out six 2.6mm deep grooves for C-spanner use:


Back to the lathe and set up as shown in the third last photo, and drilled and tapped for the M12 draw bar:


A bit of deburring, and the chuck's done:


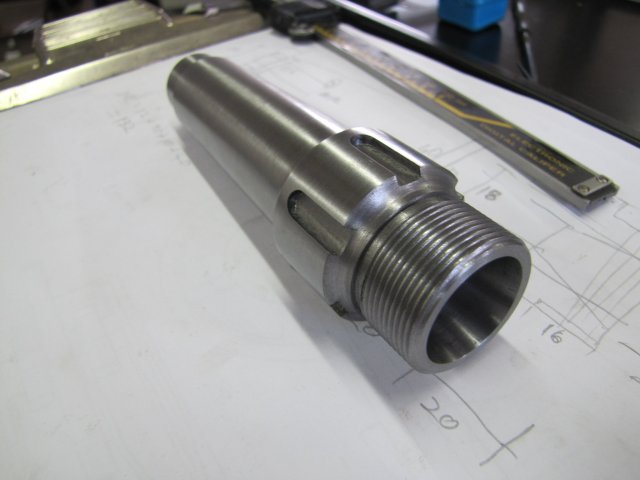
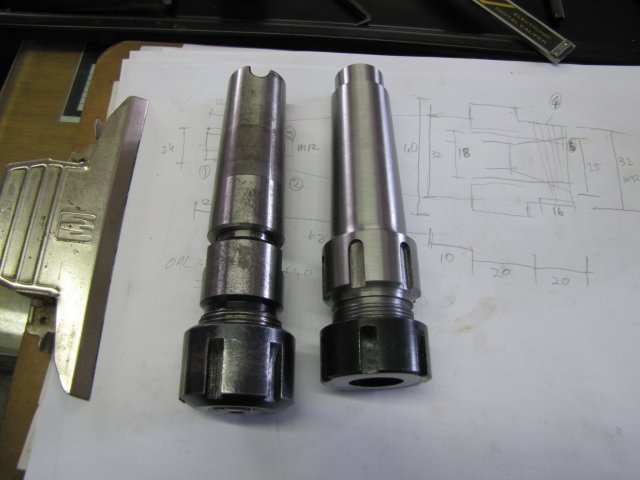
Compared to the "non-ER" Eastern chuck I've been using till now (on the left in the photo) - it gives me about 25mm more headroom, and as it's not using a MT reducer sleeve like the old chuck, a bit more rigidity and hopefully some more accuracy as well:


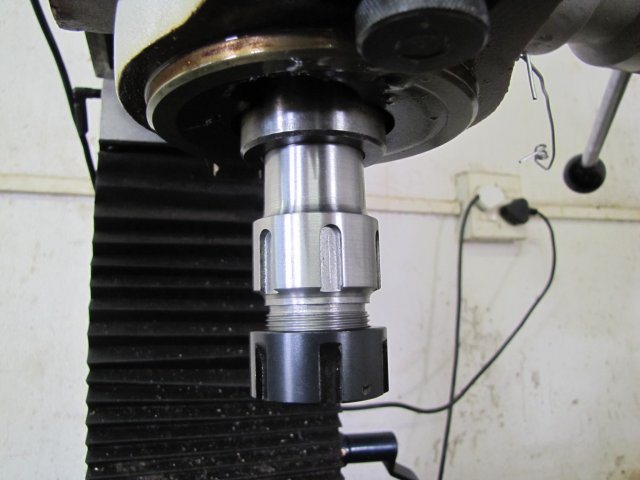
Installed in the mill spindle - the taper fits a treat:


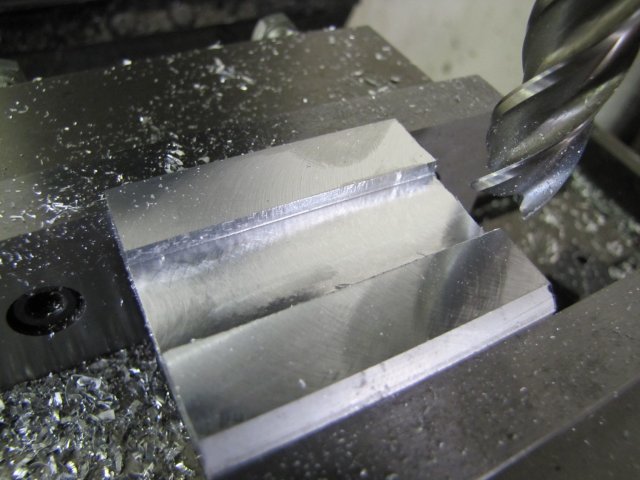
A quick try-out in some aluminium; I'd used the flycutter to face the lot, and then ran the 16mm mill 4mm deep through there at a good clip; the finish is OK - definitely better than what I'd been able to get with the other chuck:


And the best part - no heavy-handed hanging on to spanners to tighten or loosen the closer nut; it works a HECK of a lot better   :ddb: :ddb:

 :beer: , Arnold

Offline DaveH

  • Hero Member
  • *****
  • Posts: 1413
  • Country: za
  • Kempton Park, South Africa
Re: ER25 collet chuck for my mill
« Reply #3 on: March 18, 2012, 02:47:34 PM »
Brilliant Arnold,  just brilliant.  :bow:

Nicely described and shown.  :thumbup: :clap:

Your normal excellent standard of posting  :clap: :thumbup:

 :beer:
DaveH
(Ex Leicester, Thurmaston, Ashby De La Zouch.)

Offline crankshafter

  • Jr. Member
  • **
  • Posts: 59
Re: ER25 collet chuck for my mill
« Reply #4 on: March 18, 2012, 05:49:35 PM »
Hi Arnold
Great work and nice wrigth-up. I willy use it as a guide when I start on making  a er-collet for my Aciera mill with W20 spindlecone.
CS.

Offline doubleboost

  • Madmodder Committee
  • Hero Member
  • *****
  • Posts: 1619
  • Country: gb
  • Newcastle Upon Tyne
Re: ER25 collet chuck for my mill
« Reply #5 on: March 18, 2012, 05:52:38 PM »
Hi
Arnold
Very nice
Great pictures & well explained :thumbup: :thumbup: :thumbup:
Thanks for sharing
John

Offline Stilldrillin

  • Global Moderator
  • Hero Member
  • *****
  • Posts: 4972
  • Country: gb
  • Staveley, Derbyshire. England.
Re: ER25 collet chuck for my mill
« Reply #6 on: March 19, 2012, 03:26:17 AM »
That's really nice Arnold!   :thumbup:

Very well done, shown, and explained. :clap: :clap: :clap:

David D

David.

Still drilling holes... Sometimes, in the right place!

Still modifying bits of metal... Occasionally, making an improvement!

Offline arnoldb

  • Hero Member
  • *****
  • Posts: 515
  • Country: na
  • Windhoek, Namibia
Re: ER25 collet chuck for my mill
« Reply #7 on: March 19, 2012, 11:52:18 AM »
Many thanks Gents  :beer: :beer:

CS, Remember - We want pictures; Please show your build too!

 :beer:, Arnold

Offline crankshafter

  • Jr. Member
  • **
  • Posts: 59
Re: ER25 collet chuck for my mill
« Reply #8 on: March 19, 2012, 12:25:38 PM »
Arnold.
Sure I will but it will take some time.have to cleen up the mill and repaint it before bringing it home to my shop.( have it in a corner at the shipyard where I work). going to fix the motor bearings to night :beer:.
CS

Rob.Wilson

  • Guest
Re: ER25 collet chuck for my mill
« Reply #9 on: March 19, 2012, 02:24:58 PM »
 :clap: :clap: :clap: :clap: Very nicely done Arnold  :clap: :clap: :clap: :clap: :clap: :)

The dogs bollocks  :dremel:


Rob

Offline AndyB

  • Full Member
  • ***
  • Posts: 192
  • Country: england
  • Cry 'god for Harry, England, and Drummond lathes'
Re: ER25 collet chuck for my mill
« Reply #10 on: March 19, 2012, 05:19:26 PM »
Cracking build thread Arnold! :bow:

Andy
Waveney Valley, Suffolk/Norfolk Border

Offline Topos

  • Jr. Member
  • **
  • Posts: 41
Re: ER25 collet chuck for my mill
« Reply #11 on: March 20, 2012, 11:38:44 AM »
All the words used to compliment you above and include mine: outstanding, Sir.

Your pictorial tutorial was inspirational, informative, and just shear enjoyment.
Thank you for sharing your talent.

In particular I was intrigued with the dividing unit you set up on your lathe.
Please tell us about who makes it, or what plans are available for copying.

I am methodically designing a similar structure for my Atlas 618 lathe.

Again,  :clap:

Offline Topos

  • Jr. Member
  • **
  • Posts: 41
Re: ER25 collet chuck for my mill
« Reply #12 on: March 20, 2012, 11:50:05 AM »
For my ER-25 set up I purchased a set of high quality coarse and fine MT-2 reamers.
Not having the talent of the folks here I must compensate with beginning rough tapering
and then use the two reamers to converge to a nearly perfect taper.

In particular, I recently acquired a pair of 618 head stocks [ for back up and to create
a perfect 618 out of parts, starting with a NOS lathe bed ]. As expected the MT-2 head stock
spindles were clearly used.

Following the advice on this and a sister site I carefully, using oil & rotating the reamers in just one direction,
honed them back to their original and shiny youth. The run out was in the  ~.0005 or better  ( still learning to use DTI ).

Hope this is useful to those with tyro talent as I.

Best.

Offline arnoldb

  • Hero Member
  • *****
  • Posts: 515
  • Country: na
  • Windhoek, Namibia
Re: ER25 collet chuck for my mill
« Reply #13 on: March 21, 2012, 06:45:00 AM »
Rob, Thanks mate  :beer:

Thanks Andy  :beer:

Topos, thanks  :beer:  The dividing unit shown was actually set up on my milling machine, though I originally got it with my lathe.  There's more information about it here on MadModder.
If you've got a bit of a budget, Hemmingway Kits have both E.T. Westbury and G.H. Thomas designed kits.
There are also various designs in the Workshop Practice Series book #37: Dividing - well worth getting.
I've not yet tried to turn an internal Morse taper - but I do envy you having those reamers!

 :beer:, Arnold