I have a couple of days off, and actually wanted to carry on with my experimental locomotive today, but there's going to be a lot of small bits that will need holding down for the next machining operations, so I decided to detour a little and make a tooling plate that will make life easier. Besides, I also wanted to give the milling cutters I received from Richon Tools a go.
I dug a well-weathered bit of 65 x 12mm mild steel flat bar from my scrap:
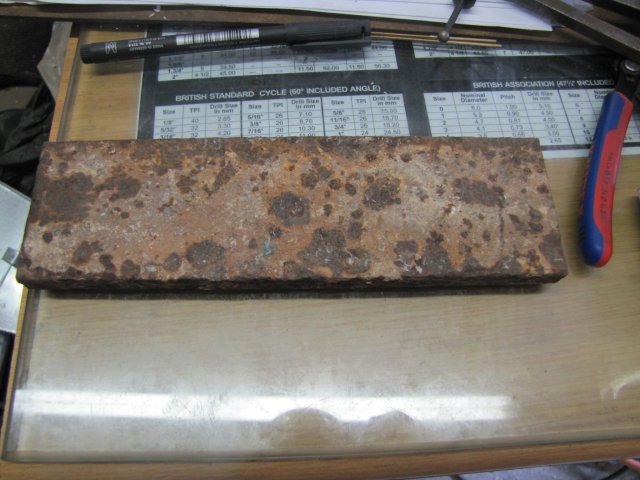
Did say "well weathered"

- I have used bits of this in the past, and while it machines fairly easily, it is a right bummer to try and get any kind of even half-decent finish on.
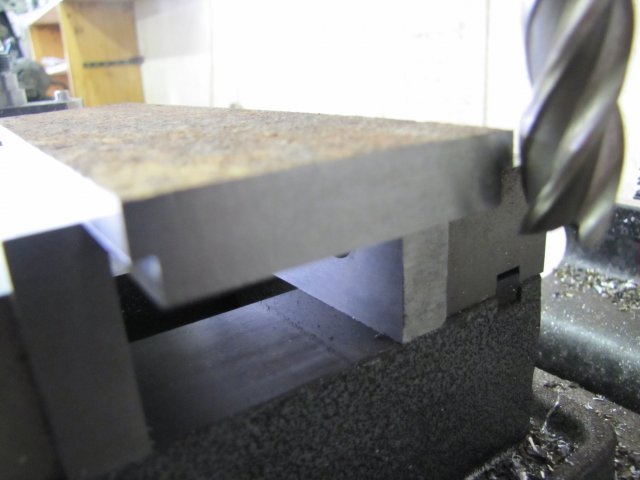
There is no way I was going to introduce new toolbits to that lot; there is all kinds of crud embedded in that rust, so I first brought out the flycutter with a right-hand turning tungsten tipped lathe tool in it, and started by cleaning off both long edges of the workpiece:
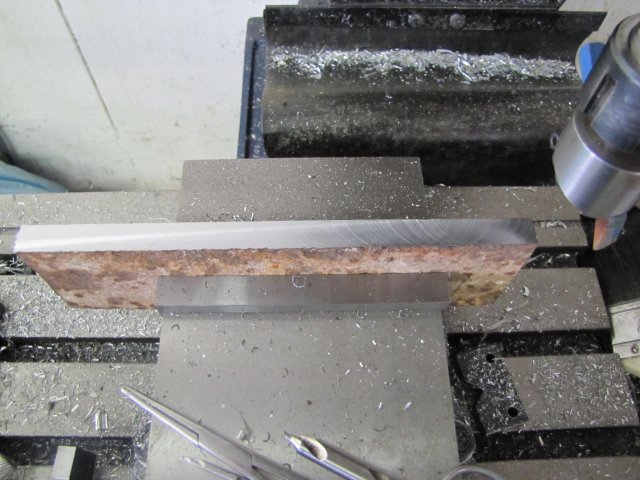
Then started facing off the rust and crud from one face; nothing very accurate here; I merely aligned things by eye and had at it with a couple of 0.5mm deep passes. This is after the first pass:
There was some funny crud amongst that rust... Left a constant shower of sparks going. And HOT chips; I was doing a silly dance in between brushing those off

But then, I was cranking along at about 6mm per second; I've found my mill has no complaints when getting pushed along a bit.
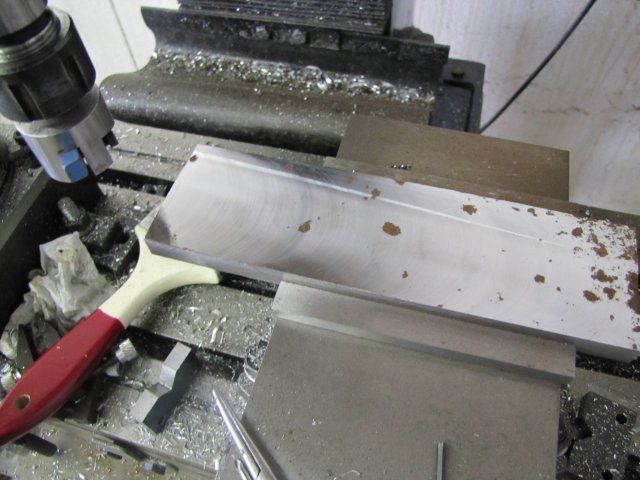
Then I tried the 12mm carbide mill I got... Decided I'd be bold and go for it. With the cleaned workpiece face against the fixed jaw, and the mill running at its max 1200rpm, I took out a 5mm wide x 4mm deep edge cut in one pass. Started with a slowish feed rate, and increased it; that carbide mill just took away metal happily at up to 6mm per second

:
Left some nice golden-coloured and equally sized chips... I think it could be pushed even harder... I LIKE it

With the milling spindle left locked in the same setting, I removed the workpiece, de-burred the slight burr raised (visible in the previous photo), flipped the piece end over end, and milled the other edge off as well. The carbide mill's cutting flutes are a bit short, which is a pity, so I swapped it for one of the new 16mm HSS 4-flute end mills, slowed the mill down - it is HSS after all - and faced the ends. I took two photos, and neither was in focus where they needed to be
- so a bit of a fuzzy pic:
That end mill left a really nice finish
With the workpiece clamped on the steps and tapped down on top of the mill vise, I started facing off the top with the flycutter. After a couple of passes with the tungsten cutter:
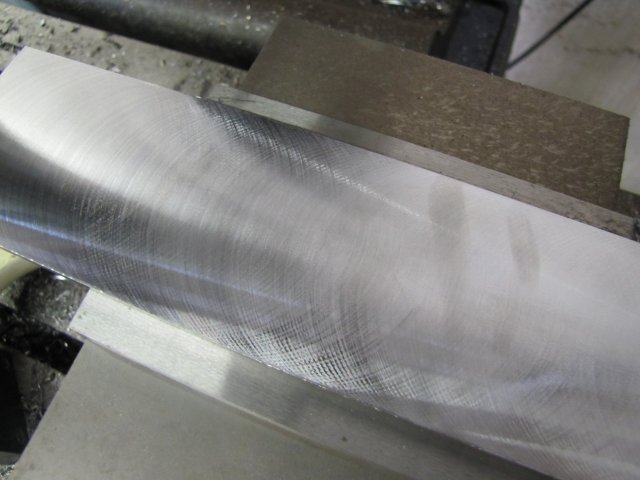
And a finishing pass with the HSS flycutting tool - I left some finger prints on there "testing" the surface:
There's still some cutting marks visible - as you'll see more clearly in further photos. If this was aluminium or brass, I'd be looking at my ugly mug on that surface; like I said earlier in the post, this steel is horrible to get a good finish on.
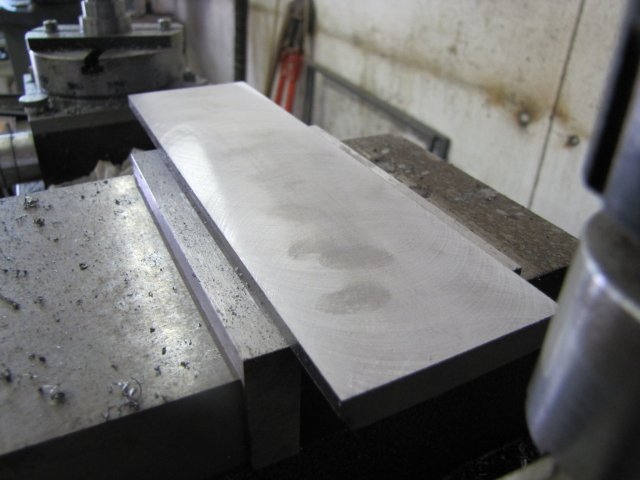
When I removed the workpiece from the vise, I was careful to mark the left side, and after de-burring, I stamped an "L" on the left side:
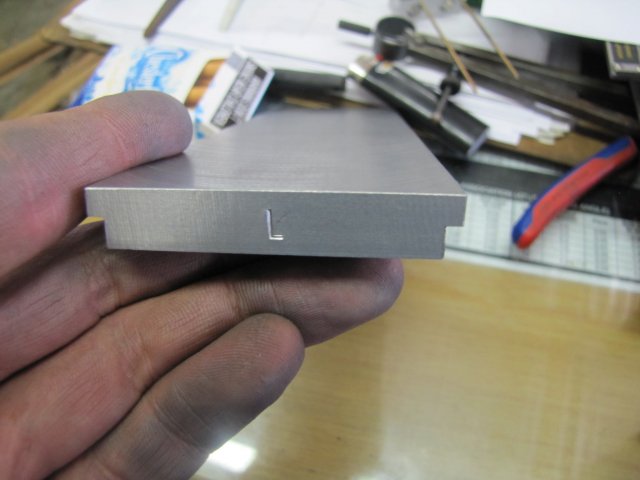
This is for a reason. Because the plate was just clamped on the top of the vise - where it's normal usage position will be, the movable vise jaw will have lifted a tiny amount (no matter how good quality your vise is!). It was machined square to the spindle on top with this slight lift in play. If one rotates the plate, and mount it in the vise with the original "left side" on the right, the error from lifting is in fact doubled, and the tool plate will be higher by double the vise movable jaw lift at the side of the movable jaw. There are other factors that also come into play, such as how hard the tool plate is clamped, how much wear occurs on the vise and so on, but IMHO the lift in the vise jaw is the main player. It will never be 100% accurate on re-clamping, but for 98% of my work it will go back accurately enough if oriented correctly. For the other 2% requiring the optimum accuracy, there are other ways to address the issue. Incidentally, I measured the difference on the front and back sides, and my vise lifts by about 0.02mm at that width.
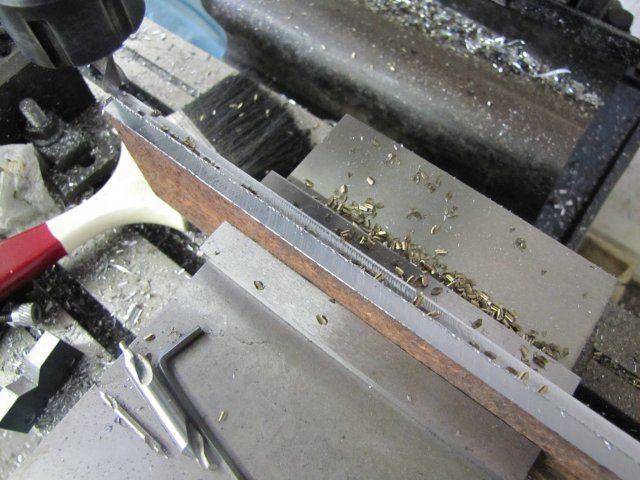
Then I clamped the workpiece back in the mill vise, and drilled a grid of 5mm holes in it. Didn't bother with spotting the holes first; I just chucked the 5mm drill bit in the collet chuck with about 15mm of it sticking out to allow for some clearance but to keep it "stiff" and poked the holes:
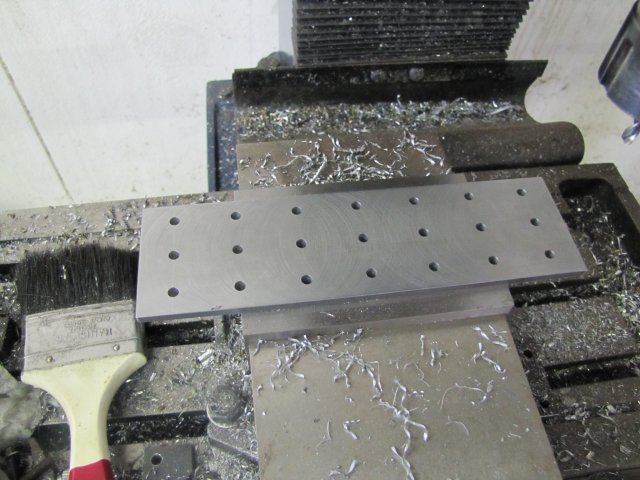
I don't know how many will be convenient in future; that's a lesson of learning on the job. For now, I just used convenient spacing - 30mm apart in X (10 turns of my mill's x handle) and 20mm apart in Y. I set the mill dials to zero on the top left hole - that was my reference and co-ordinate drilled from there, counting turns.
The drilling was followed by a good dose of counter-sink in each hole:
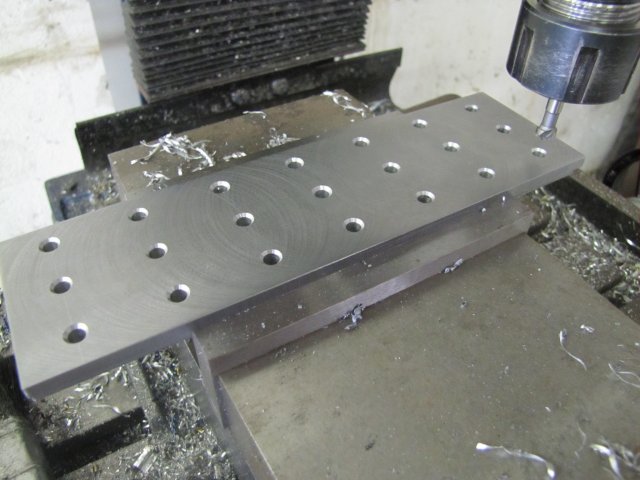
Then on to a new process for me... I have not tapped under power on my mill yet.
- well, I haven't even had it for a year!
It has a "tapping" function, which cuts power when the quill indicator reaches maximum depth, and prevents forward rotation to be switched on, but does allow reverse to be turned on. This has actually annoyed me in the past, as on many occasions I would have liked to adjust the quill indicator to use it as a stop to repetitively drill down to an exact depth without the spindle stopping. Today, some of that frustration was alleviated

- I'll re-wire the mill later on to allow me to switch the feature on and off though - but for today it was just great
Before embarking on this power threading learning curve, I sat down and thought it through. I have not seen any detailed write-ups on the process, but then, neither have I searched for any.
I decided to treat it exactly like I do hand-tapping. Go through the entire set of taps, cleaning the tap and squirting some cutting fluid on it before each hole. For the machine part, mill at the slowest (80 RPM), and a light one-finger down-feed on the quill handles; that should let me feel when the tap "takes", with the down-feed kept on while the tap is doing it's business. When the machine stops, lighten the one-finger feed, to allow the quill to pull up, but not at full strength.
I was concerned about the second and third taps not "taking" properly and cross threading - that didn't happen; they picked up the previous tap's thread just fine - I could feel when that happened quite distinctly on the feeding "finger". Needless to say, things worked a treat and saved me a lot of wrist-twisting
:
There was one brown-pant moment though... When I changed from the first to the second tap, I left the tap sticking out a bit longer than the first and forgot to adjust the cut-off... Nearly ran the tap shank into the hole before I realised and hit the E-Stop. Didn't forget to change for the last tap though
The result of about 4 1/2 hours work in total from a bit of rusty metal:
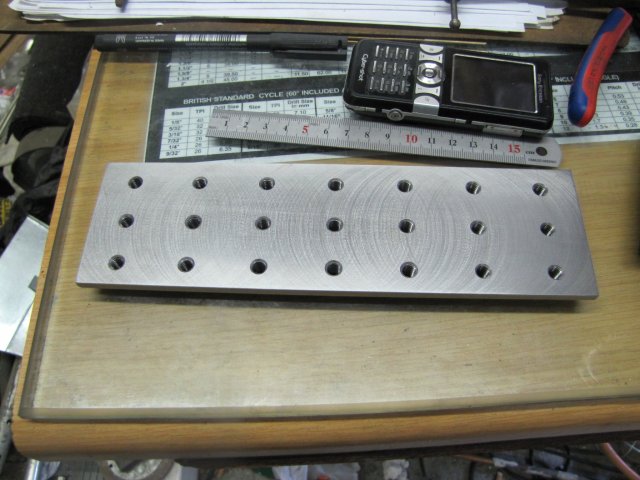
Not pretty - No surface grinding or scraping, but a bit of tooling that will come in very handy in coming weeks


Arnold


