Author Topic: Potty Simpson build - MZT  (Read 11128 times)

Offline mzt

  • Jr. Member
  • **
  • Posts: 88
  • Country: it
Potty Simpson build - MZT
« on: June 05, 2012, 10:31:09 AM »
Stew’s plans (THANK YOU!) were too tempting to be left seasoning into the to-do list and that lump of C.I. has been sitting on that shelf for
so long it had already started to bend, that I could not spare myself from thinking about them while machining parts for another project I was working on.
Results were I planned them wrong, and performed so worse I ended with being thrown a workpiece at by an angered lathe.

I’m OK, it missed. But...

..where’s  the point into spending precious shop time without enjoying at full what I’m doing?

A quick glance at the “current projects” boxes on the shelf and the contents of my double sized Elmer’s #3 went back among the raw materials.
That 'doubling' idea was never good, btw: that little thingy was nice because it was little, when doubled it was losing most of its appeal.

Hope You will enjoy this e-travel as much as I will do, wherever it will take.
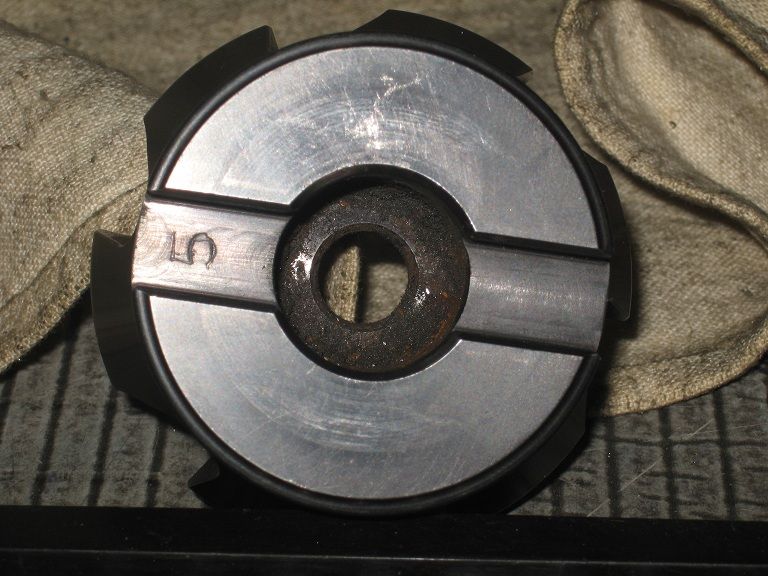
The Cylinder Block

That’s the only piece I have in suitable sizes, I’m not even 100% sure there will be enough meat beyond the crust to get the job done.

What I will find inside of it, I plainly do not know.


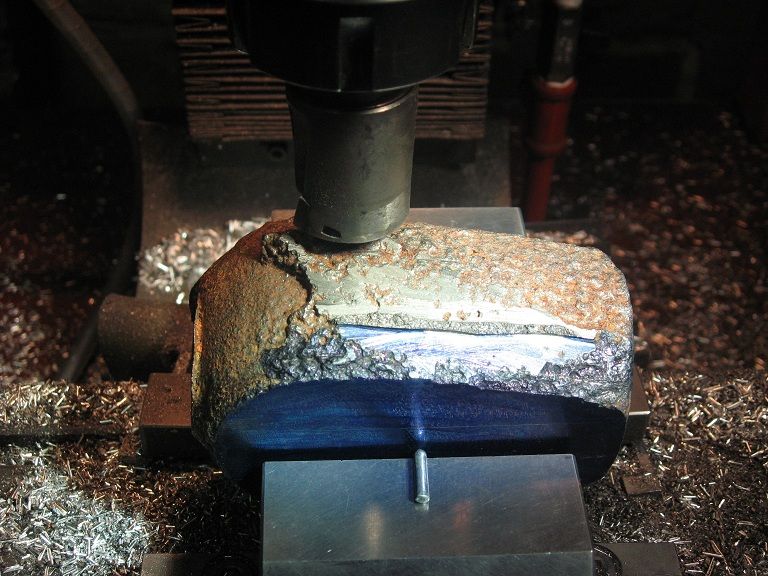
First problem I had to face was about holding it into the vice: the jaws were not deep enough to hold it above its centreline, no parallel lines
(let alone surfaces) to ease the job, and one only small almost flat area where it was sawn off from whatever it was attached to.

Put it lenghtvise into the vice, enclosed between a couple of clamps used as additional jaws, then machined a starting flat on top of it, using the oldest,
dullest, roughing mill I have, 20mm dia. IIRC.
Did not want to risk the precious carbide inserts of some other mill more suitable for the job.


The HSS mill didn’t last long, the glazed crust having quickly had reason of what was still in its cutting edges.
But the setup was firm, and that was what I wanted to know for sure. Time for a change.


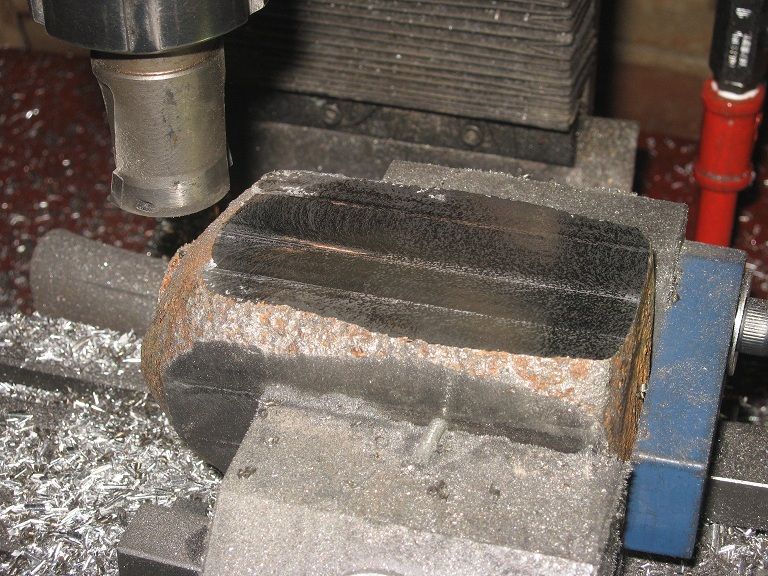
Now on the opposite surface, as parallel to the first as I can get it. Parallelism is not an issue, at the moment:
I will choose later wih one of the two will be used as reference surface to machine the others.


Made my choice. From now on, all machining will be done between fixed jaw and dovel, with parallels (if HSS blanks can be so called) on the final cuts.


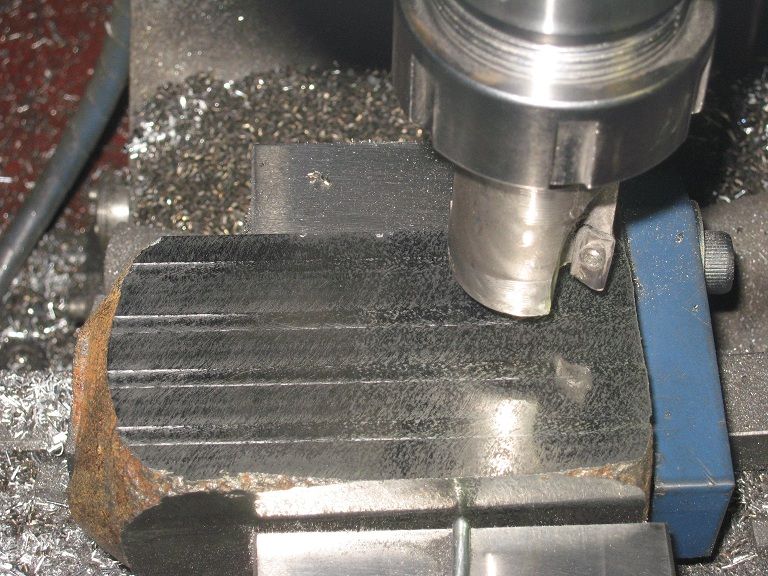
No climb cuts were taken while using that 2 inserts 30mm mill, unused axis locked, max depth I could gain was 1.1mm
(above that, the quill raised by itself during the cut, however tight I locked it), speed around 1300rpm, cuts maximum 12mm wide (if not for some operator’s errors), 
feed..  eh.., feed was just cranking like hell: the faster the better (the less the machine was complaining, the better the finish).
Several hours of that, rather tiresome in the end.

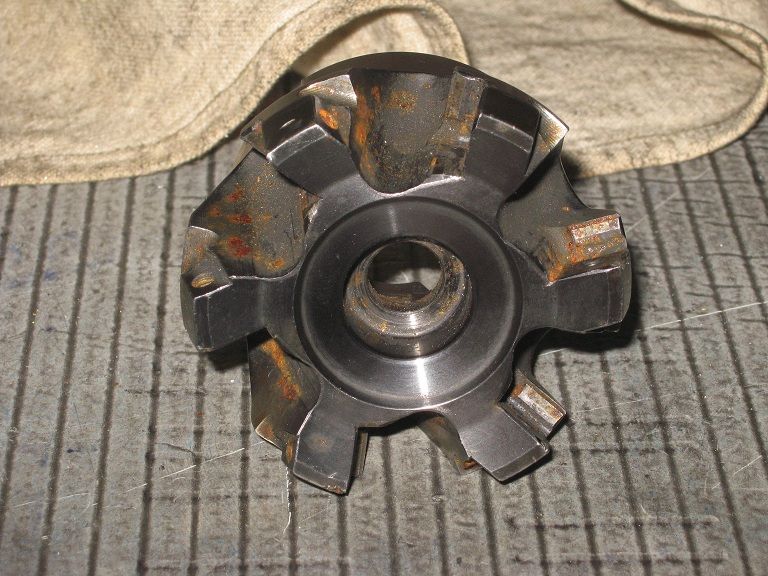
I wished I had a suitable arbour to put this 63mm monster to the test.


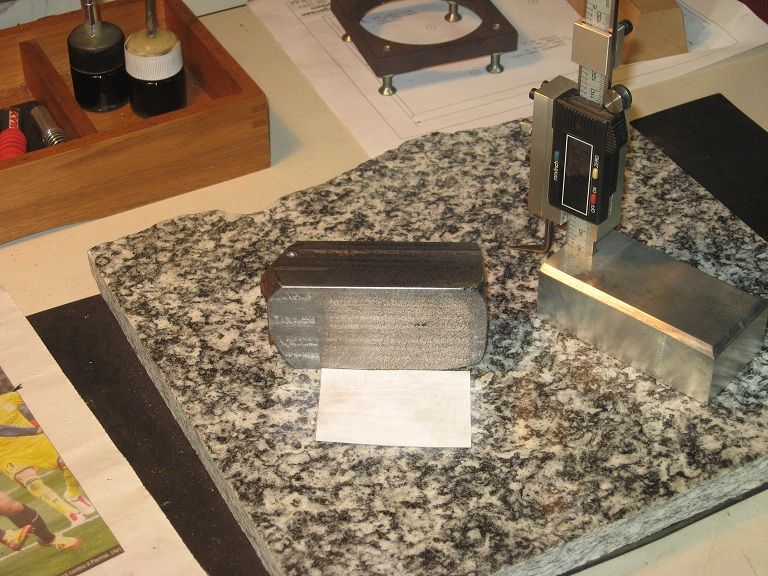
End of the day, if not of the job: the piece is to size within the limits of my measuring tools, a few voids are starting to  show - that’s not good news, we’ll see.. –
As for what I’m planning for next, recent experiences taught me to begin with drilling a hole somewhere in the material I’m gonna discard and test-thread it:
don’t want to risk ending with a finished cylinder I cannot tap (though I would probably find press- fit or loctite the studs, if that were the case).

The eventual behaviour of my boring head on C.I. in general, if not on that workpiece in particular, is a mystery, too. 

We’ll see.


Marcello


Offline stefang

  • Jr. Member
  • **
  • Posts: 61
  • Country: de
Re: Potty Simpson build - MZT
« Reply #1 on: June 05, 2012, 12:13:36 PM »
In every rusted piece of iron, there is a part of a machine hidden in it  :)

I am looking forward to see more pictures!

Stefan

Offline Stilldrillin

  • Global Moderator
  • Hero Member
  • *****
  • Posts: 4972
  • Country: gb
  • Staveley, Derbyshire. England.
Re: Potty Simpson build - MZT
« Reply #2 on: June 05, 2012, 12:19:08 PM »
Marcello.
That's a great start.......   :clap: :clap:

Good luck with the chilled sections and voids........  :thumbup:

Watching, quietly.

David D
David.

Still drilling holes... Sometimes, in the right place!

Still modifying bits of metal... Occasionally, making an improvement!

Offline sbwhart

  • Global Moderator
  • Hero Member
  • *****
  • Posts: 3530
  • Country: gb
  • Smile, Be Happy, Have Fun and Rock Until you Drop
Re: Potty Simpson build - MZT
« Reply #3 on: June 05, 2012, 12:27:10 PM »
Blimy Marcello thats one chunk of steel you have.

Cleaning up well though,

as Dave said watch out for the hard bits they can be SOB

I'll be watching along.

Stew
A little bit of clearance never got in the road
 :wave:

Location:- Crewe Cheshire

Offline steamer

  • Jr. Member
  • **
  • Posts: 86
  • Country: us
Re: Potty Simpson build - MZT
« Reply #4 on: June 05, 2012, 10:18:46 PM »
A braver man than I Marcello!   :bow:
That's one ugly looking piece of stock....but it's getting more attractive as you go along!
If you have enough stock left, you might want to put it in a good fire for a while and soften things up a bit.

Dave
"Mister M'Andrew, don't you think steam spoils romance at sea?"
Damned ijjit!

Offline mzt

  • Jr. Member
  • **
  • Posts: 88
  • Country: it
Re: Potty Simpson build - MZT
« Reply #5 on: June 06, 2012, 06:59:45 AM »
Stefan, David, Stew, Dave,

chilled sections I MAY find a way to deal with, but voids?
I'm staying as clear as I can from the workpiece edges, not to face this again:   :jaw:


YEP! The blank end was shaped like the finished workpiece needed to be,  :ddb: "why should I not take advantage of that?"   
I kno' the answer. (too many icons would fit here).


Dave,
as for the softening trick, I've tried that a few times, with no success at all, on a barbel weight: but I don't think the problem was in the trick, that barbel weight was made of glaznium. 
Was fun, tho, seeing how easy it ate my (cheap) brazed carbide tools after each cooling down.
Sandwik inserts had reason of it, when I got access to them: now it's a decent flywheel (with voids), sitting patiently in wait for an engine to be brought to completion.
Had plans to try again with all the foudry scraps I had, last winter, but somehow I never got around doing so. Maybe next winter, now it's not the right season of the year for me to light the shop stove.

Marcello


Offline mzt

  • Jr. Member
  • **
  • Posts: 88
  • Country: it
Re: Potty Simpson build - MZT
« Reply #6 on: June 06, 2012, 09:55:13 AM »
Yesterday night I had a little shop time I wanted use for a quick drilling and tap-testing of a hole somewhere into that block.
On second thought, I decided to take the longer, but safer, way of scribing FIRST and drilling NEXT. I seem to recall that random
placed holes have the bad habit of getting in the way on later stages of the build.

Being in haste, I hurried with rulers, squares and dividers for a while: had a glance at the finished mess and went looking for
solvent and rag. Either I do it or do it not, doing it bad makes no sense.

Decide to treat the thing as it were a casting (well, it IS a casting! Is it not?) and clamped it to an angle plate to set it vertical
with all the faces square to the reference plate. Then brought into play my digital scriber and presto, got it done as precisely as I needed it.


It took less than on the previous attempt, but I will never learn that.

 
Here it is, scribed in one piece together with the base (for the moment, will decide what in due time). The blackened parts needing a complete
removal however I will tackle the job, the encircled area showing the largest void I can see at the moment.


No time for a second check of the dimensions, to say nothing about drilling. Maybe tonite.


Marcello


Offline mzt

  • Jr. Member
  • **
  • Posts: 88
  • Country: it
Re: Potty Simpson build - MZT
« Reply #7 on: June 07, 2012, 06:06:50 AM »
Got curious about using an hacksaw.
Started with a groove about 1mm deep, little more than 1mm outside the end line, turned the piece into the vice 90deg,
grooved again and so on till I made all four. Then, I deepened each of them to about half of the blade height, and finally the
two on the 35mm faces down to full blade.

Made the cut on both the large sides, reversing the wp. into the vice two or three times. Wasn’t sure about the pros and
cons of mixing cast iron dust with the thick oil I had at hand, so I made it dry. It took less than an hour of hand powered
machining, slow motion, caring to make use of the full blade length. Job ended before I was sweating.

The cut was straight, close to perfection,  and the ‘opening’ of the wp. revealed to me some nice fine grained cast iron.
Made my day!


The offcut went back to the metals shelf, You bet it.

Marcello

Offline Stilldrillin

  • Global Moderator
  • Hero Member
  • *****
  • Posts: 4972
  • Country: gb
  • Staveley, Derbyshire. England.
Re: Potty Simpson build - MZT
« Reply #8 on: June 07, 2012, 06:37:16 AM »
Got curious about using an hacksaw.

It took less than an hour of hand powered machining, slow motion, caring to make use of the full blade length. Job ended before I was sweating.

The cut was straight, close to perfection,  and the ‘opening’ of the wp. revealed to me some nice fine grained cast iron.
Made my day!


Marcello.

You're a fitter, and more accurate worker, than me.........  :thumbup:

Blummin, well done:clap: :clap:

David D
David.

Still drilling holes... Sometimes, in the right place!

Still modifying bits of metal... Occasionally, making an improvement!

Offline sbwhart

  • Global Moderator
  • Hero Member
  • *****
  • Posts: 3530
  • Country: gb
  • Smile, Be Happy, Have Fun and Rock Until you Drop
Re: Potty Simpson build - MZT
« Reply #9 on: June 07, 2012, 08:00:51 AM »
Well done I bet you had a saw arms  (pun)

That off cut would make the steam chest.

Stew
A little bit of clearance never got in the road
 :wave:

Location:- Crewe Cheshire

Offline AdeV

  • Madmodder Committee
  • Hero Member
  • *****
  • Posts: 2434
  • Country: gb
Re: Potty Simpson build - MZT
« Reply #10 on: June 07, 2012, 08:11:34 AM »
Marcello - you must have the patience of a saint, I would have been looking for a mechanical method of cutting after a few minutes.... in fact, I bought a mechanical hacksaw for that exact reason!

You were right not to add oil, Cast Iron should be cut dry, the graphite (carbon) in it "lubricates" the cut. If you do add oil, you just end up with a sticky mess everywhere.
Cheers!
Ade.
--
Location: Wallasey, Merseyside. A long way from anywhere.
Occasionally: Zhengzhou, China. An even longer way from anywhere...

Offline mzt

  • Jr. Member
  • **
  • Posts: 88
  • Country: it
Re: Potty Simpson build - MZT
« Reply #11 on: June 07, 2012, 09:30:45 AM »
David,

I had concerns about wandering cuts: they would have meant more material to remove.
Rather take it calm,  think, look and (why not?) enjoy the task, however little appealing it might appear.
There may be (that's not guaranteed!) satisfaction awaiting at the end of it.   :bang: :thumbup:


Stew,

a quick look at the drawings confirmed there shoud be enough meat leaft to make the chest.
Btw, (not that it matters so much, any reasonable size would do I guess) the total thickness of the valve chest appears to be missing from Sht 4:
that would be 15mm + the height of the 14mm dia. flange on the right. 
For sake of completeness, if You go editing that page, the thickness of the cylinder cover is missing, too.


Ade,

does it not take patience looking at the mechanical hacksaw  :drool: while it's doing the work for You? Or do You let it work unwatched?  :poke:

(spoken with more than a bit of envy, tho)

As for the oil, I suspected what You confirmed.
Had a few bottles of machine cutting fluid (of the type You mix with water) ready for use (already mixed) upstairs: that might have helped,
but probably one should either use a lot of it or none. And I've got only enough to fill the tank once, the day I will put a working pump into my mill cooling system.
Gotta get around that, too. Possibly, before boring this cylinder.
Boh! We'll see.

Marcello


Offline sbwhart

  • Global Moderator
  • Hero Member
  • *****
  • Posts: 3530
  • Country: gb
  • Smile, Be Happy, Have Fun and Rock Until you Drop
Re: Potty Simpson build - MZT
« Reply #12 on: June 07, 2012, 10:29:51 AM »
Quote
Stew,

a quick look at the drawings confirmed there shoud be enough meat leaft to make the chest.
Btw, (not that it matters so much, any reasonable size would do I guess) the total thickness of the valve chest appears to be missing from Sht 4:
that would be 15mm + the height of the 14mm dia. flange on the right. 
For sake of completeness, if You go editing that page, the thickness of the cylinder cover is missing, too.

Thanks Marcello

I've put them right it's 15+3=18 and for the covers its 3mm or 1/8"

Stew
A little bit of clearance never got in the road
 :wave:

Location:- Crewe Cheshire

Offline mzt

  • Jr. Member
  • **
  • Posts: 88
  • Country: it
Re: Potty Simpson build - MZT
« Reply #13 on: June 08, 2012, 06:02:42 AM »
Thank You for the dimensions, Stew.

I've a question for You, out of curiosity, regarding how You bored the cylinder as explained here: http://madmodder.net/index.php?topic=6485.msg71075#msg71075

If I got it correctly, You bored the cyl. to full depht, moved X 1mm and again to full depth, repeating the operations till You reached bore full size. Correct?

Did You do that by hand, or do You have automatic feed on the quill of Your mill?

Reason I ask that is I can't see myself doing so turning the little knob on my BF-20, where I can get all but constant feed.
Will think about a larger knob, maybe with an handle: the lathe may lend one for a while.
I suppose I will try chucking a large (and long) mill while I'm still on the roughing cuts, to cut the sides full depht in a single one passage. That would require flooding the cut, tho.
Now I think of it, a battery screwdriver on the quill knob could do, too: that would be interesting.
I've a lot to experiment.

Marcello


Offline sbwhart

  • Global Moderator
  • Hero Member
  • *****
  • Posts: 3530
  • Country: gb
  • Smile, Be Happy, Have Fun and Rock Until you Drop
Re: Potty Simpson build - MZT
« Reply #14 on: June 08, 2012, 06:16:10 AM »
Thats what i did Marcello but I lowered the whole head not the quill (with the little wheel) that was left locked.

Stew
A little bit of clearance never got in the road
 :wave:

Location:- Crewe Cheshire

Offline mzt

  • Jr. Member
  • **
  • Posts: 88
  • Country: it
Re: Potty Simpson build - MZT
« Reply #15 on: June 08, 2012, 06:57:53 AM »
Could not even think about lowering the entire head: my mill being way too coarse in that.
Now You tell me, I seem to recall having done exactly the same while boring the Bernays, or I did  bore to quill depth, raise the quill, lower the head and down quith the quill again.
Cannot say which: unless I've put it down in words, it's forgotten. Sure, it that was a matter of not having enough quill travel to get the job done, in that case.
Worth having a look at what is inside the mill column, anyway: they may have hidden some adjustable parts there, too, who knows? Will check.
Thank You.

Marcello


Offline krv3000

  • Hero Member
  • *****
  • Posts: 2183
  • Country: gb
Re: Potty Simpson build - MZT
« Reply #16 on: June 08, 2012, 11:03:01 AM »
im looking fowert to this one to

Offline mzt

  • Jr. Member
  • **
  • Posts: 88
  • Country: it
Re: Potty Simpson build - MZT
« Reply #17 on: June 13, 2012, 04:56:42 AM »
Bob,

DON'T hold Your breath!  :D

(ain't ever been quick into building engines. And I'm no more doing them in haste to see them running)

Marcello

Offline mzt

  • Jr. Member
  • **
  • Posts: 88
  • Country: it
Re: Potty Simpson build - MZT
« Reply #18 on: June 13, 2012, 05:02:48 AM »
Proper tools make a difference

And what a difference they make!

I had started the previous cut using the 24tpi frame: all the teeth were still there, but they had already faced hours of activities.
Not being entirely convinced I’d have brought the job to completion, there was no point into wasting shop time looking for a new blade,
nor I wanted to risk one of the precious coarse ones.

By the time I got “convinced”, I had already grooved the four faces: no place to start a new cut,
had to go on with what I had used before. You don’t want use a new blade into an old cut, You know.

On this occasion, I decided to risk using the 18tpi frame*, knowing it had only faced little use on aluminium.
Even took the risk of cutting closer to the scribed line: You really need to make it all wrong to get a wandering cut into C.I.


Putting the “difference” into numbers, this job was done in 22 minutes.

Marcello

--
(*) Yep! Some years ago I bought myself three identical frames, to put an end to the repeated blade changes, to suit the job at hand.
I wish I had purchased quality ones. 


Offline mzt

  • Jr. Member
  • **
  • Posts: 88
  • Country: it
Re: Potty Simpson build - MZT
« Reply #19 on: June 20, 2012, 05:05:06 AM »
What about a link to Stew's design and build of this engine ?
Just for history, all credits where they're due.

http://madmodder.net/index.php?topic=6485.msg68756#msg68756

Marcello