Hi all,
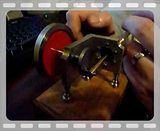
This is the final installation of my rocking engine, barring a better video once I get some sort of air supply sorted. I'm telling you up front, the video is rubbish so you don't get your hopes up! I still have a headache from being the human compressor!
I turned the recess on the other side of the flywheel, I was going to grind the proper tool up as in John's thread but I thought I'd leave that for another time since I already had the 2 tools and packing pieces that I needed to hand.
I then decided I would drill the lightening holes, in attempt to get it done quickly, I thought I'd try to plunge them with a slot drill ... that was a mistake! I think the cutter was blunt and tried to run off, then the flywheel moved

, don't really know what I was thinking but I didn't fancy centre drilling then gradually opening 6 holes up to 3/8". I remember last time it was a bit of a pain, I just did it on the bench drill but with the centre web being quite thin it was snatching a lot.
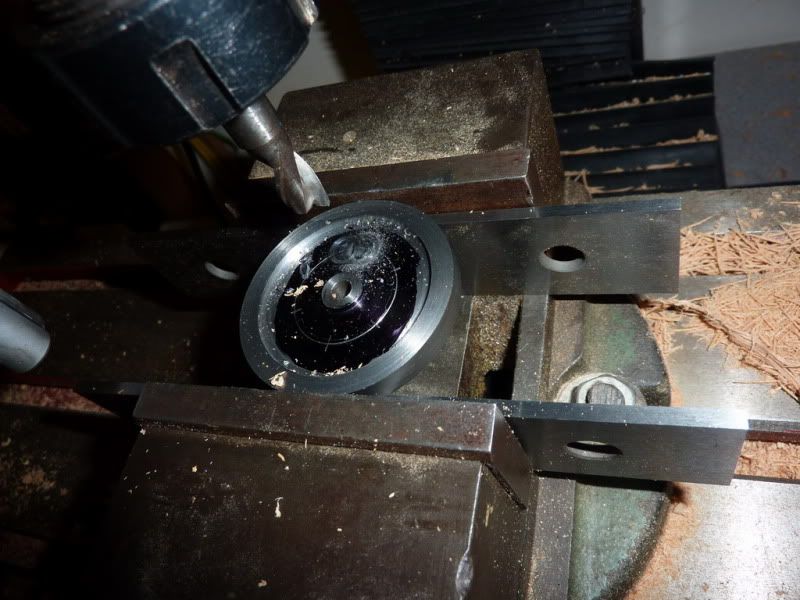
So abandoned that idea, just wish I hadn’t bothered wasting time marking it out etc. Luckily I was able to take a small skim to get rid of the nasty marks from the nasty slot drill!
Next I mounted it on a mandrel in the lathe to skim the OD … it was pretty concentric anyway but I coouldn’t seem to shift the phosphate coating or whatever it was just with emery cloth. As John said, don’t try machining the whole thing like this, it’s not rigid enough. Just enough to take a very light skim really. I found a bit of 3/16” silver steel so just put a 2ba thread on one end as I knew I had a nut and washer. Gripped it tight in the lathe chuck and tightened the nut on so it squished the flywheel against the chuck jaws.
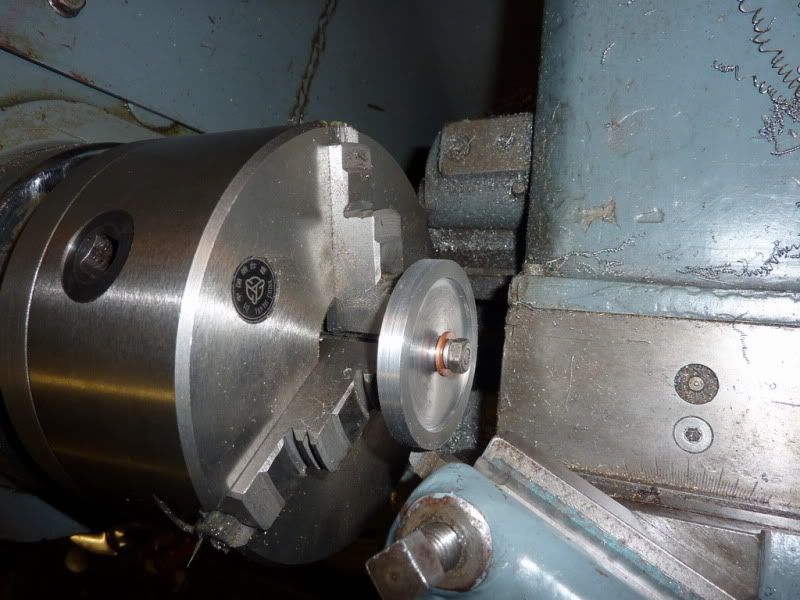
All that was left was to drill and tap an angled hole 8ba to fasten it onto the crankshaft. I still need a decent screw …for the flywheel that is!

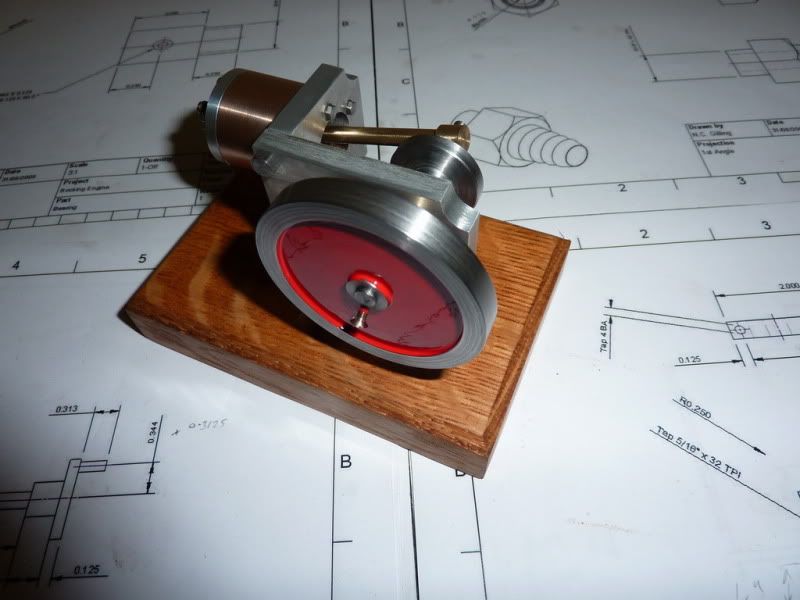
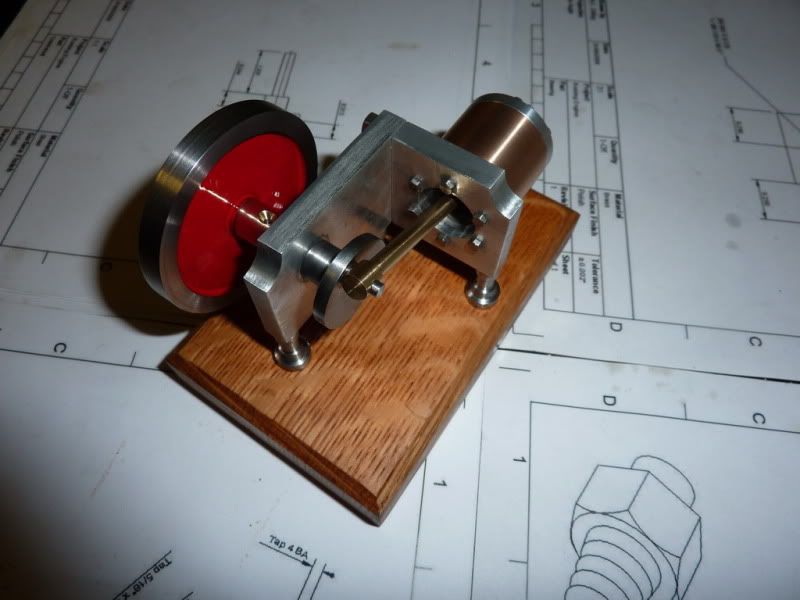
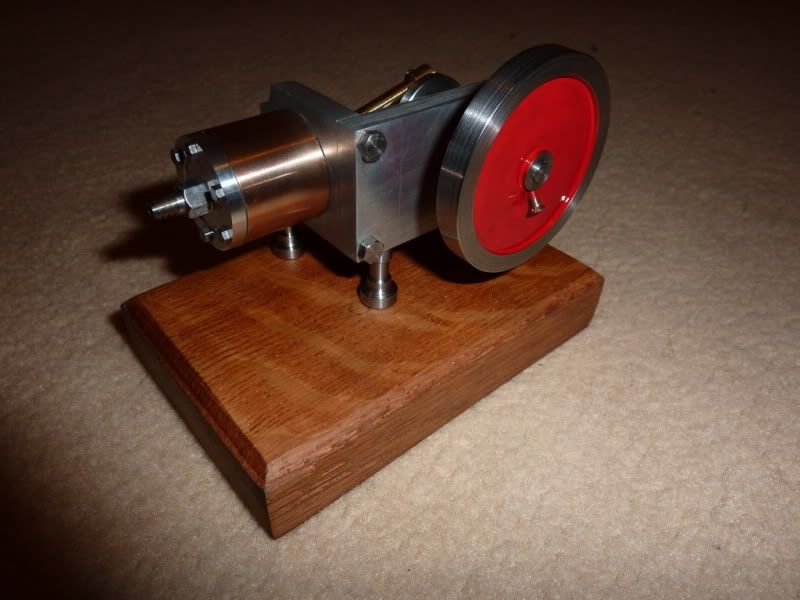
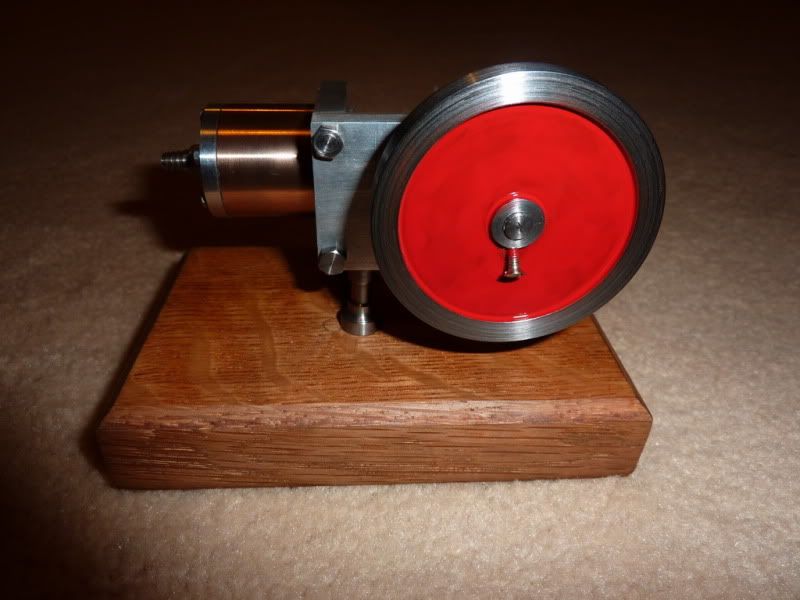
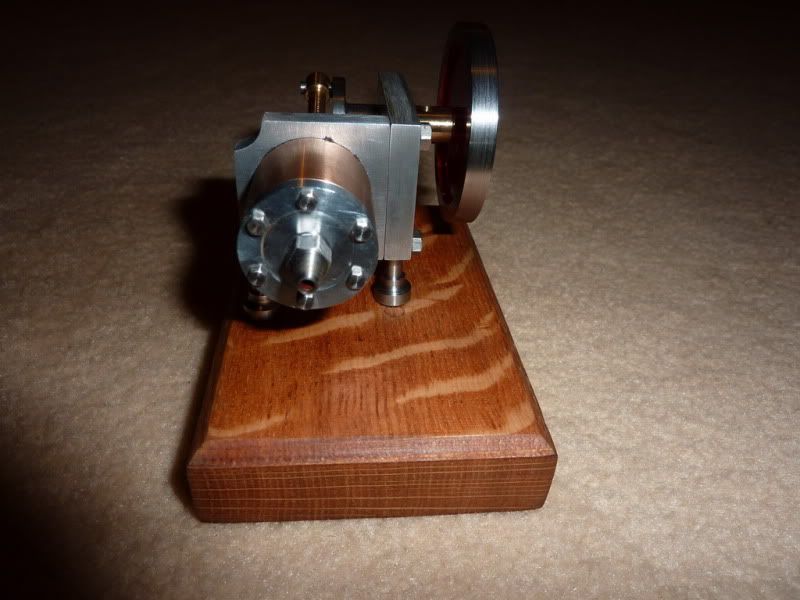
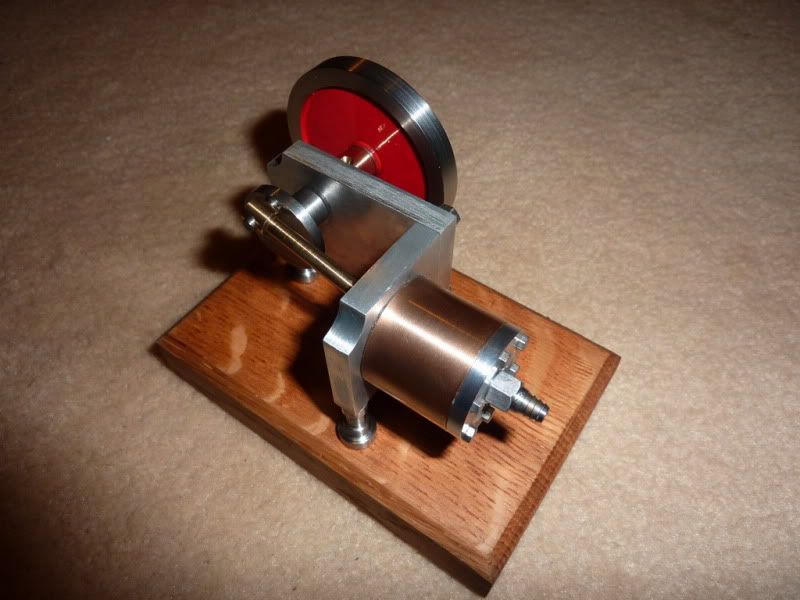
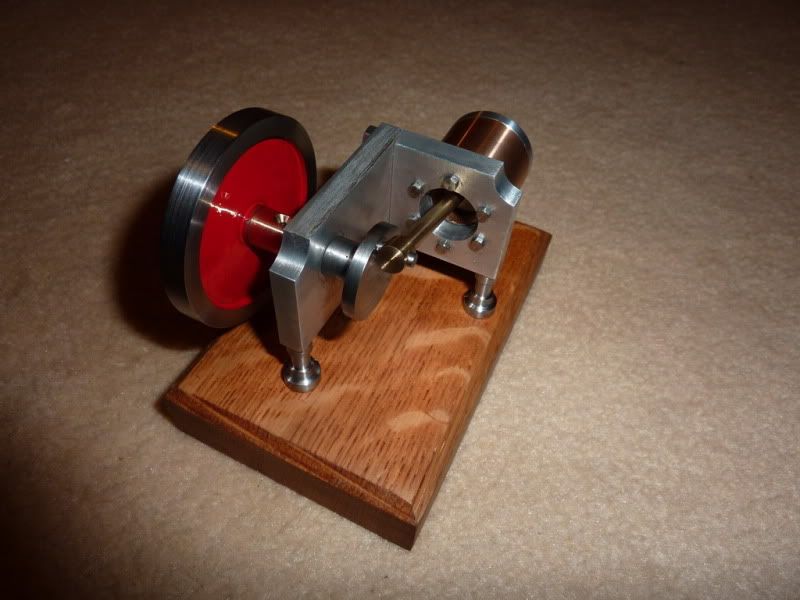
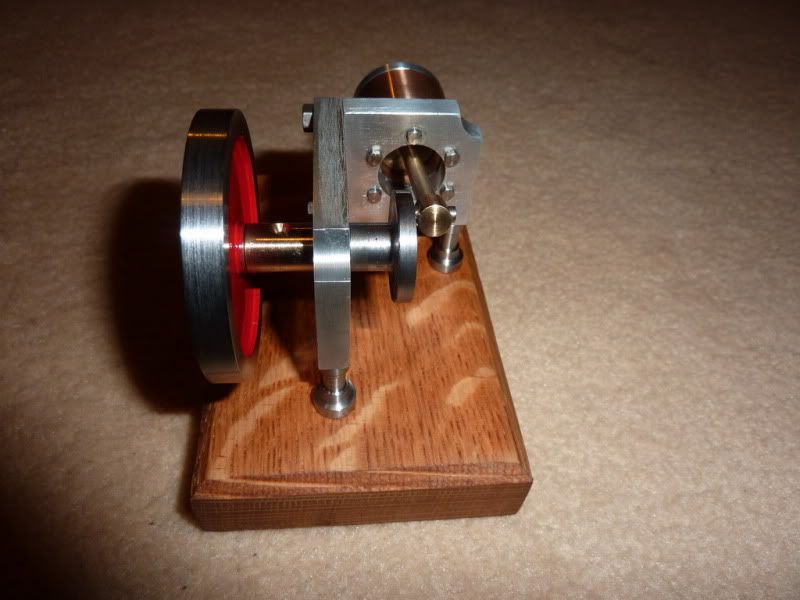
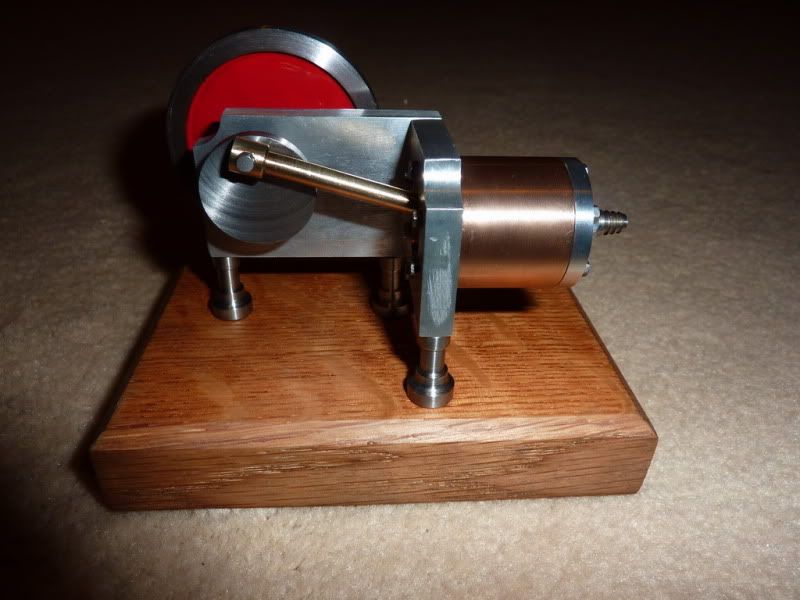
I then painted the recess red!
I tried to bling it all a bit but am not very good at that / don’t have the right stuff. The aluminium from the shelf brackets I got over excited about … it’s pretty naff material, too soft. It won’t even polish very well, see the finish compared to the high strength stuff on the cylinder cover!
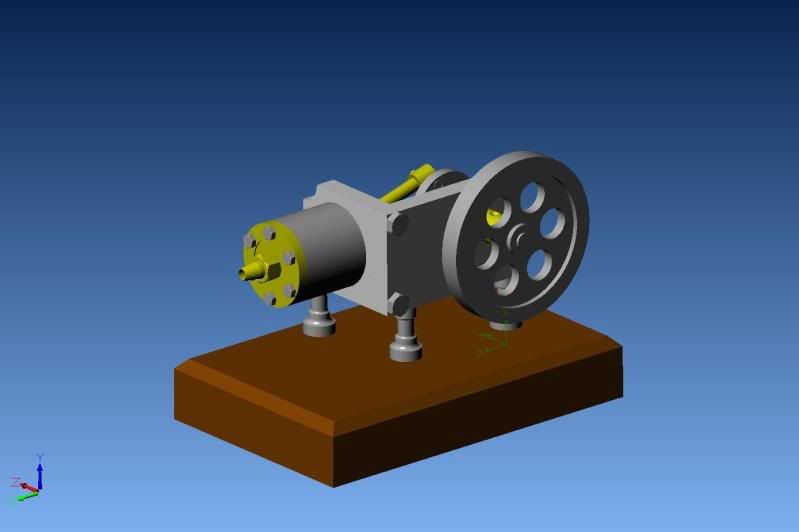
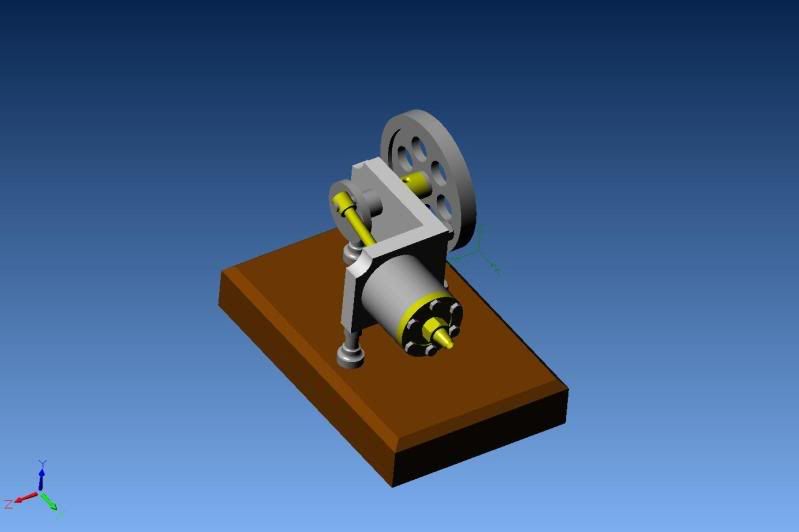
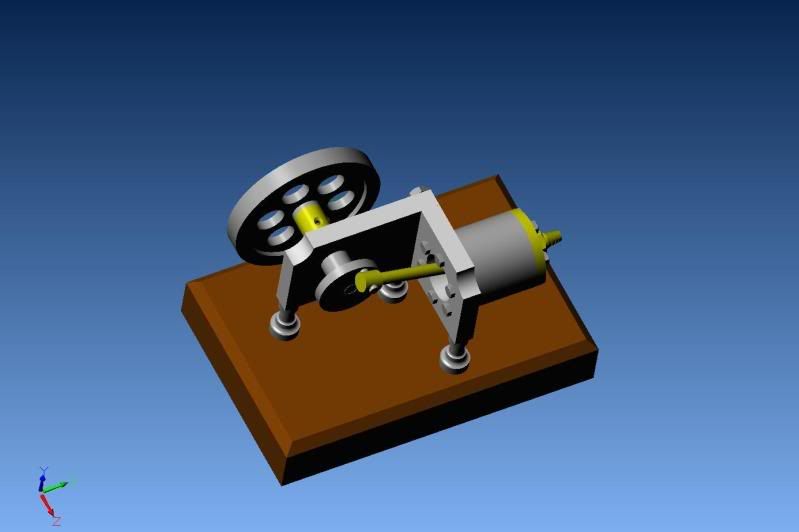
Just lots of pics to follow now, it’s a bit of overkill but it shows it compared with my CAD model.
Now for the video .. sorry about this, it’s the best I could do for now short of taking the car tyre compressor into the car and shooting a video in there, or busting a gut!
I’m quite happy with it, there are a few mistakes but it’s turned out pretty much how I expected, just glad it runs!
Now I will make sure all the drawings are correct incase anybody else wants to have a go ..probably not as it’s way over the top for a rocker but it’s one for the internet archive anyway!
My next project is going to be the restoration of my 3 ½” gauge ‘mabel’ locomotive (same design as Stew’s) so probably no machining for a while. Unless I decide I need a break and if that happens I’ll be making a QCTP with 4 holders … according to my project plan!
But as you have all seen how well I stick to plans, don’t take my word for it!

Thanks for all the replies, support and advice

Nick


