As most of you know I do a lot of welding. All kinds of welding, gas, TIG, and Stick. I work by myself most of the time and frequently need a place to rest a lit and adjusted OA torch while I shrink metal or planish a weld down. A few years ago I built a little stand to hold my torch and decided to incorporate a BBQ Piezo Lighter into it so I could strike the torch without scrounging up a flint striker (I must own 2 dozen strikers but they never seem to be handy without some searching).
Stand v.1 also incorporated a welding wire dispenser that turned out to be less than optimal in its functionality. All told the stand was a success and served my needs well for a couple of years until a couple of defects rose to glaring prominence. The scrounged lamp base I had based v.1 on had a cement filled plastic base that contained enough moisture to freeze and burst when left in an unheated environment and the welding wire dispenser was a waste of time.
On a recent trip to a thrift store I found an old microphone stand that had a cast iron base I decided to splurge for the $5 USD asking price and revise the Torch Stand. Upon taking my bargain to the checkout, I was informed by the nice lady that it was a “Everything is ½ Price Day” and my treasure would actually only cost me $2.50 plus sales tax. I was chuffed!!!!
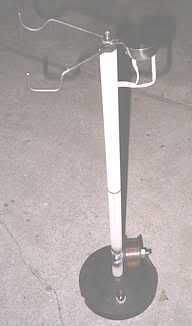
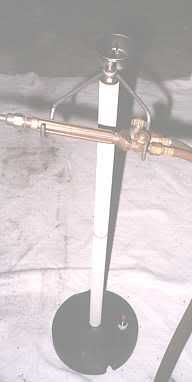
The original stand as it was conceived and built, prior to paint.
 "As the Nut Turns" Revisits the Welding Torch Ignitor and Holder Stand
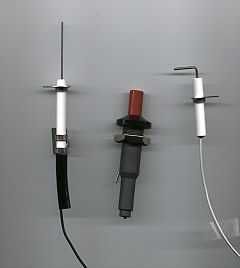
The Piezo electric spark generator kit is available at any well stocked hardware purveyor (iron monger for the tea and crumpet set). I think the whole kit was about $10 USD.
 "As the Nut Turns" Revisits the Welding Torch Ignitor and Holder Stand
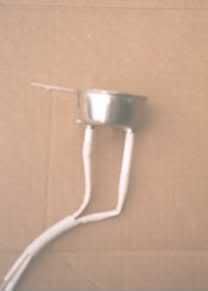
A little scrounging through my “Possibles Box” yielded this 1/3 cup stainless steel measuring cup that fit the bill perfectly. I first drilled the holes for the piezo electrodes near the edge of the bottom and then drilled three ½” vent holes at 90 degrees to the electrodes to prevent the build up acetylene it the cup which will cause a loud explosion when struck off (DAMHIKT).

Also noticed I have protected the wires with lengths of “High Temp Fiberglass” wire insulation to protect them from the inferno they may encounter when using this igniter.
 "As the Nut Turns" Revisits the Welding Torch Ignitor and Holder Stand
Detail of the lighter cup with the electrodes and vent holes in place.
 "As the Nut Turns" Revisits the Welding Torch Ignitor and Holder Stand
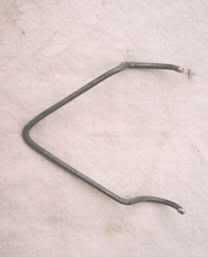
The Torch cradle is simply a length of ¼” rod bent to accommodate your torch. Since I use several different torches for different jobs mine is rather universal, fitting my most frequently used torches better than others. What isn’t shown in this photo is the 3/8” flat washer welded into the “Vee” bend that provides a method of attaching the cradle to the stand.
 "As the Nut Turns" Revisits the Welding Torch Ignitor and Holder Stand
The completed stand with a Victor Journeyman torch in the cradle. Since v.1 was not height adjustable, the wiring was fed through the upright tube and the piezo generator was fitted into a convenient hole in the plastic coated concrete base. To light the torch, you simply hold the tip over the cup, start the acetylene flow and depress the the igniter button with your toe. Easy, Peasy! I can light and adjust my torch with just one hand, instead of the usual clumsy two handed method.
 "As the Nut Turns" Revisits the Welding Torch Ignitor and Holder Stand
The completed v.1 Torch Stand. I added a welding wire dispenser thinking it would be convenient for dispensing the .035” MIG wire I frequently use to weld sheet metal, but the wire needs to be sized to straighten the curl out and my idea for a sizing fixture proved too impractical. I still keep the spool under the bench and cut off the length I need and then size it using safety wire pliers.
 "As the Nut Turns" Revisits the Welding Torch Ignitor and Holder Stand
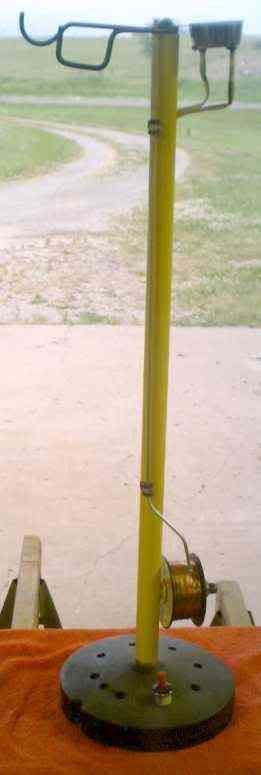
The completed v.2 Stand. The solid cast iron base and height adjustment required a bit of modification to the original design.
 "As the Nut Turns" Revisits the Welding Torch Ignitor and Holder Stand
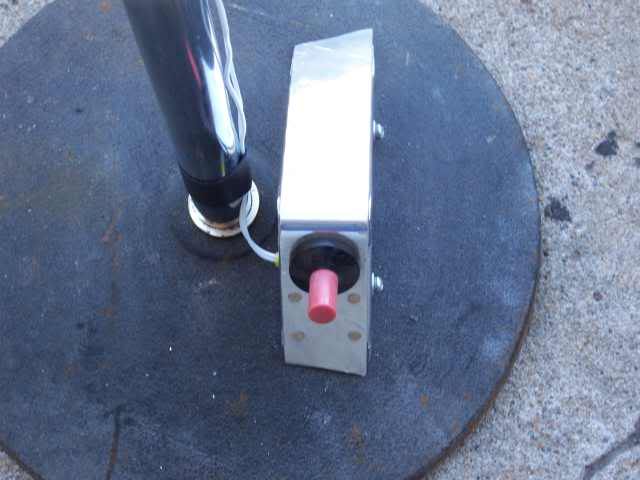
Since the cast iron base was solid and was considerably thinner than the original base I had to fab a simple aluminum enclosure for the piezo generator. I made it a wedge shape which placed the button at a comfortable angle for me to depress with my toe. Also, the height adjustment necessitated the routing of the wires outside the upright tube.
 "As the Nut Turns" Revisits the Welding Torch Ignitor and Holder Stand
A view from the top. The only modification needed to the mic stand was to dispose of the plastic collar and attaching fixture for the microphone and welding a 3/8” nut into the end of the tube. The igniter cup is now hose clamped to the lower portion (non-adjusting) part of the stand tube. I recommend dis-assembling the adjuster before doing any welding as the tapered collar that cinches the height adjustment is probably some sort of plastic and will melt during the welding process. NO, I did not destroy mine learning this. I destroyed a few ball valves in previous brain lock to learn this.
 "As the Nut Turns" Revisits the Welding Torch Ignitor and Holder Stand
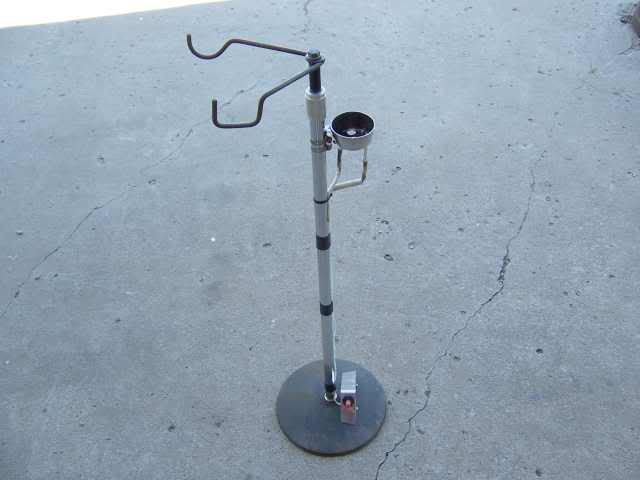
The Completed v.2 stand with the cradle adjusted up for a standing position. The height adjustment has proven very convenient, especially when working out dings in roof panels.
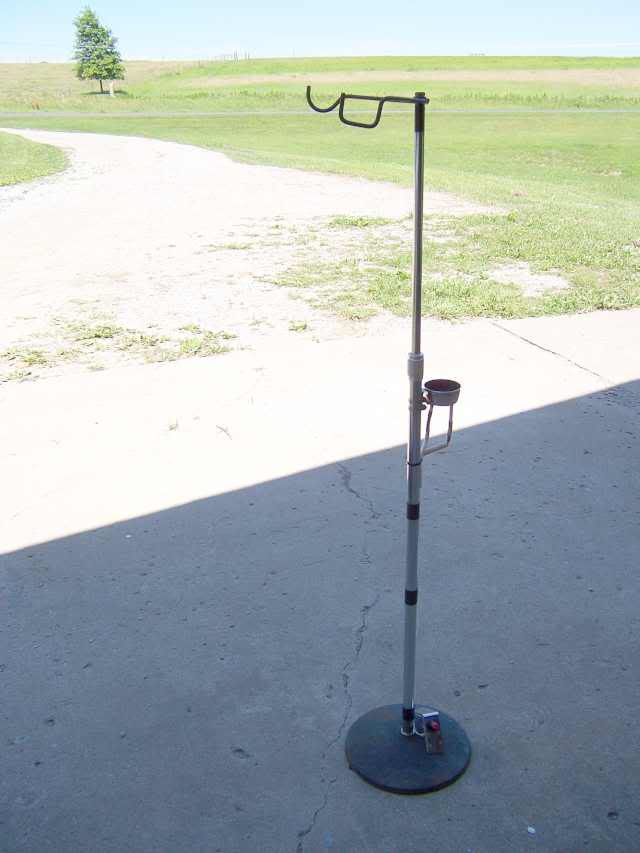 "As the Nut Turns" Revisits the Welding Torch Ignitor and Holder Stand
V.2 has worked out better than expected and I now know of at least two other copies being used regularly by other fabricators. The ability to rest the lit torch makes many tasks much simpler, especially if you are going to repeat the task several times.
A NOTE OF CAUTION!
Be aware of anything in the flame path of the torch before resting the lit torch in the cradle. Waste paper and rags on the floor have been known to burst into flames even though the flame is not striking them directly.
OK, that is the end of this episode of “As The Nut Turns”.


