Author Topic: Elmer's horizontal mill engine.  (Read 52429 times)

Offline Manxmodder

  • Hero Member
  • *****
  • Posts: 739
  • Country: gb
Re: Elmer's horizontal mill engine.
« Reply #75 on: July 12, 2015, 07:44:47 PM »
Lovely job,Abraham. That's a very nice looking engine you have there......OZ.
Helixes aren't always downward spirals,sometimes they're screwed up

Offline tom osselton

  • Hero Member
  • *****
  • Posts: 1256
  • Country: ca
Re: Elmer's horizontal mill engine.
« Reply #76 on: July 13, 2015, 12:42:31 AM »
Well done!

Offline modeldozer

  • Sr. Member
  • ****
  • Posts: 299
  • Country: es
  • Valencia, Spain
    • AJ´s Truckmodeling
Re: Elmer's horizontal mill engine.
« Reply #77 on: July 13, 2015, 03:43:29 AM »
Hi Andrew, OZ and Tom,

Thank you for the kind words.

Andrew,

You are right on the stresses plus this material has a lot of hard sections.

Cheers
Abraham

Offline vtsteam

  • Global Moderator
  • Hero Member
  • *****
  • Posts: 6466
  • Country: us
  • Republic of Vermont
Re: Elmer's horizontal mill engine.
« Reply #78 on: July 14, 2015, 07:58:39 PM »
Been away for a couple weeks -- just catching up, so:

Great work Abraham, and Congratulations!!!

 :clap: :clap: :clap: :clap: :clap: :thumbup: :beer:
I love it when a Plan B comes together!
Steve
https://www.youtube.com/watch?v=4sDubB0-REg

Offline modeldozer

  • Sr. Member
  • ****
  • Posts: 299
  • Country: es
  • Valencia, Spain
    • AJ´s Truckmodeling
Re: Elmer's horizontal mill engine.
« Reply #79 on: July 15, 2015, 05:19:06 AM »
Hi Steve,

Thanks for the kind worsds.

Cheers
Abraham

Offline modeldozer

  • Sr. Member
  • ****
  • Posts: 299
  • Country: es
  • Valencia, Spain
    • AJ´s Truckmodeling
Re: Elmer's horizontal mill engine.
« Reply #80 on: July 26, 2015, 08:31:46 AM »
Hi all,

Made some oil cups for the bearings.


Drilled a lube hole in the connecting rod with a centre drill.


Made two more oil cups for the crosshead. Still need to drill and tap the mounting holes.


Set up the machine vice at an angle to mill the sides of the two bases with a “fake” draft.


The one side has a section at the bearing with no draft. It was first milled across to get a start for milling this side.


Next the vice was reset to normal and a setup made to mill the ends at an angle.


Both finished.


Cheers
Abraham

Offline vtsteam

  • Global Moderator
  • Hero Member
  • *****
  • Posts: 6466
  • Country: us
  • Republic of Vermont
Re: Elmer's horizontal mill engine.
« Reply #81 on: July 26, 2015, 02:31:44 PM »
That looks even better! :thumbup:
I love it when a Plan B comes together!
Steve
https://www.youtube.com/watch?v=4sDubB0-REg

Offline krv3000

  • Hero Member
  • *****
  • Posts: 2183
  • Country: gb
Re: Elmer's horizontal mill engine.
« Reply #82 on: July 26, 2015, 06:44:53 PM »
in a word brill

Offline SwarfnStuff

  • Hero Member
  • *****
  • Posts: 588
  • Country: au
Re: Elmer's horizontal mill engine.
« Reply #83 on: July 27, 2015, 03:51:42 AM »
Hi Modeldozer, I notice you used a digital protractor and this question is off topic I guess, but how do you go battery life wise? I find that my batteries will go flat in the drawer even though I routinely take em out when finished for the day. I may not need the protractor for a month or so and it's getting a tad bothersome. Perhaps it's the brand of battery? Or is it that I store them in the box with the protractor and naturally they get attracted to the magnetic base?

John B
Converting good metal into swarf sometimes ending up with something useful. ;-)

Offline modeldozer

  • Sr. Member
  • ****
  • Posts: 299
  • Country: es
  • Valencia, Spain
    • AJ´s Truckmodeling
Re: Elmer's horizontal mill engine.
« Reply #84 on: July 27, 2015, 07:57:22 AM »
Steve, krv,

    Thank you kindly.

John,

    Had it for a couple of years and is still on the orriginal batteries.  I make a point of manually switching it off after use and leave the batteries in.

Cheers.
Abraham

Offline tom osselton

  • Hero Member
  • *****
  • Posts: 1256
  • Country: ca
Re: Elmer's horizontal mill engine.
« Reply #85 on: July 27, 2015, 12:49:51 PM »
I went to use mine the other day and they were flat also mind you I have to wonder if my son used it or not I'll have to pick up another and try round 2.

Offline trapper

  • Jr. Member
  • **
  • Posts: 52
Re: Elmer's horizontal mill engine.
« Reply #86 on: July 27, 2015, 02:58:49 PM »
Really enjoyed following your project obviously a very good all round machinist-keep them coming very well presented as well
« Last Edit: July 27, 2015, 05:06:19 PM by trapper »

Offline SwarfnStuff

  • Hero Member
  • *****
  • Posts: 588
  • Country: au
Re: Elmer's horizontal mill engine.
« Reply #87 on: July 28, 2015, 03:01:14 AM »
Thank you for the life span info of your batteries Abraham. I shall try some new ones and leave em in then see what happens. Wouldn't care too much if they weren't the more expensive size. There is an inclinometer app in my phone but naturally the phone body is slightly curved to assist handling - bummer that doesn't help.
Converting good metal into swarf sometimes ending up with something useful. ;-)

Offline modeldozer

  • Sr. Member
  • ****
  • Posts: 299
  • Country: es
  • Valencia, Spain
    • AJ´s Truckmodeling
Re: Elmer's horizontal mill engine.
« Reply #88 on: August 16, 2015, 09:32:02 AM »
Hi all,

Trapper,
         Thank you for the comments.

Got a bit more finishing done.
The ends of the anchors also needed some fake draft, but as they are “complex “ curves and angles, they were milled on the CNC router.


Then the lathe broke down and spent a few days to repair it.

Printed some gaskets on gasket paper and made a few hole punches to cut the small holes.


Turned a mandrel for the piston to cut a groove for packing.


Also made a new piston rod from stainless steel.


At the moment busy polishing all the brass bits.

Cheers.
Abraham

Offline modeldozer

  • Sr. Member
  • ****
  • Posts: 299
  • Country: es
  • Valencia, Spain
    • AJ´s Truckmodeling
Re: Elmer's horizontal mill engine.
« Reply #89 on: September 13, 2015, 08:16:32 AM »
Hi all,

The corners of the bearing posts and bottom crosshead guides were rounded over.


For accessories am adding a governor based on the one from Elmer’s twin rope drive.

For the throttle valve cover started by centering a piece of brass in the 4 jaw.


Machined and threaded the boss.


Flipped around the end was faced.


For the throttle body started by drilling the valve bore and cover mounting holes in a squared and to size piece of brass.


A pilot hole was drilled through the length.


The pilot hole was used to center the part in the 4 jaw.


A boss was turned, drilled and taped.


It was turned around and the other end was machined, unfortunately the photo did not come out.
The valve shaft was turned for a close fit in the body.


The parts so far.


The throttle was assembled and the pilot hole located to drill the passage through the body and valve.


Had to mill a piece of hex stock to a smaller size for the gland nut and lock nut.


It was drilled and taped in the lathe.


The nut was parted off.


Both nuts done.


And assembled.


The various linkages were machined.


That’s all for now.

Cheers
Abraham


Offline modeldozer

  • Sr. Member
  • ****
  • Posts: 299
  • Country: es
  • Valencia, Spain
    • AJ´s Truckmodeling
Re: Elmer's horizontal mill engine.
« Reply #90 on: October 18, 2015, 02:30:43 PM »
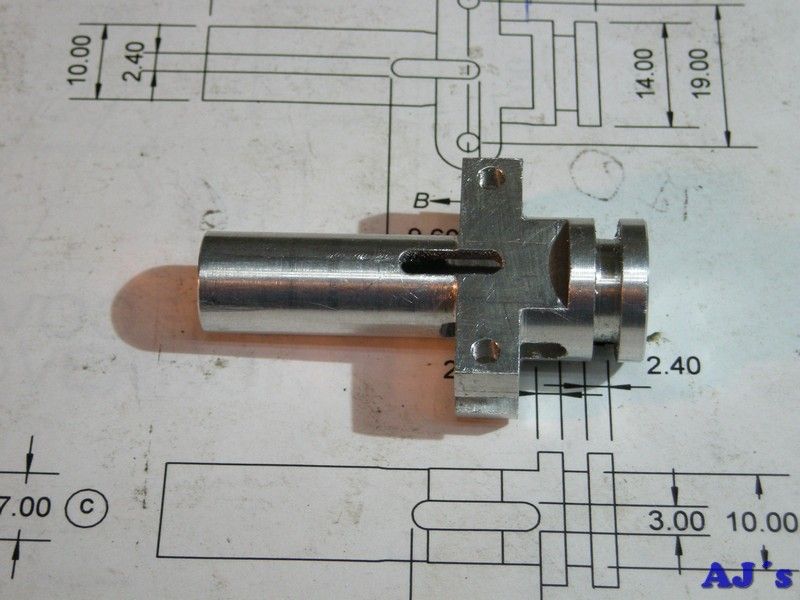
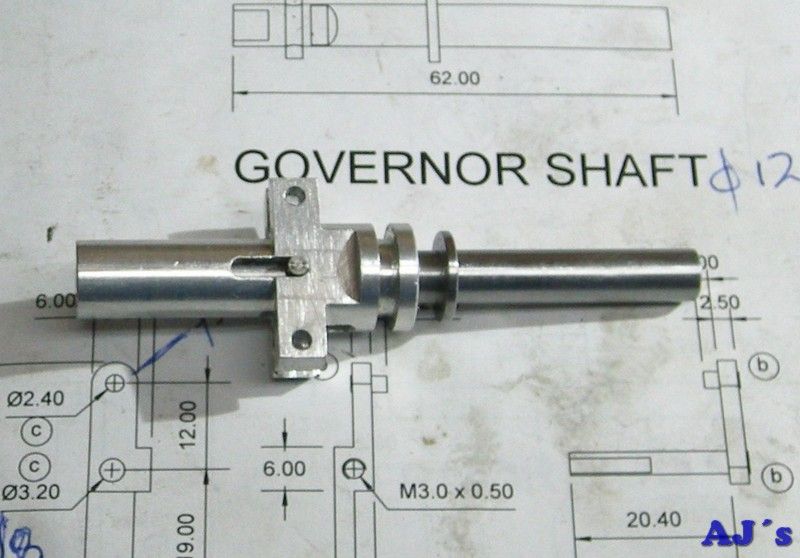
We have been away on a short holiday and I got so involved with finishing the governor that I am a bit behind in updating.

Because of a few tricky operations on the governor body it was made from aluminium.  I could just squeeze it into a 25mm round bar.

The outer end was faced and turned down.
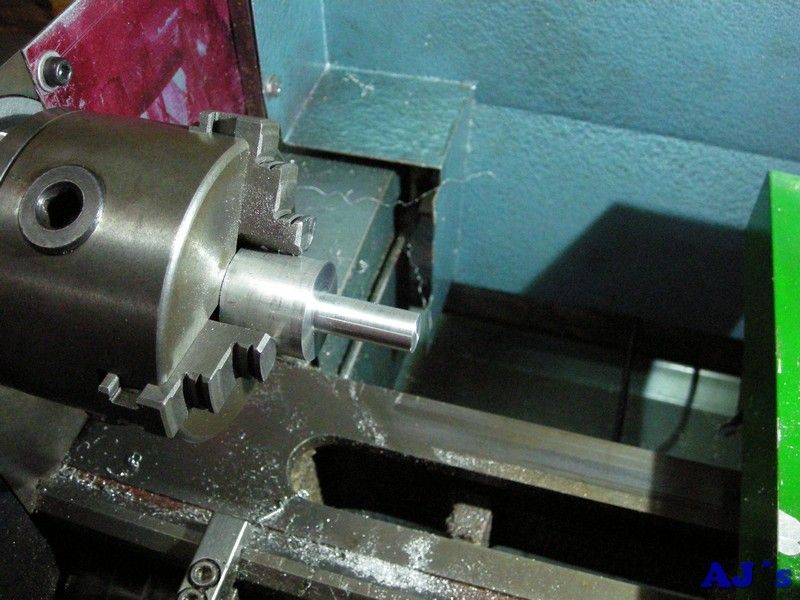


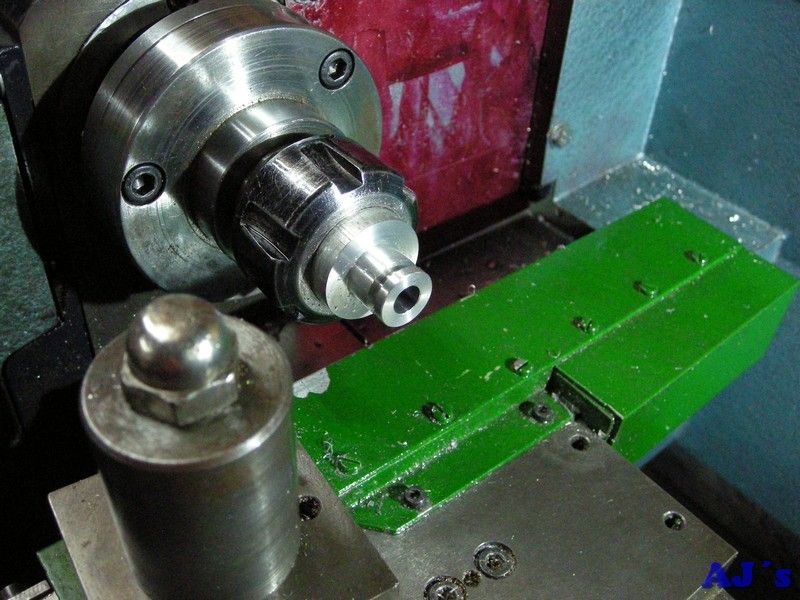
It was mounted in the collet chuck and the inner end faced and turned to size.  The groove for the fork was cut with a parting off tool.
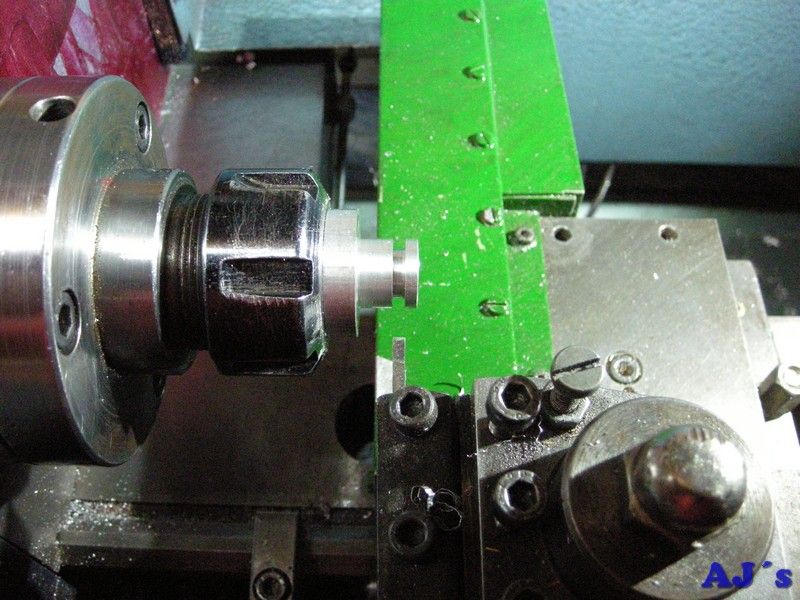


It was carefully drilled for the spring and shaft and the very end drilled through and taped for the adjusting screw.


Then it was over to the mill to mill the ears flat, drill the holes for the weight arms and mill the slot for the drive pin.
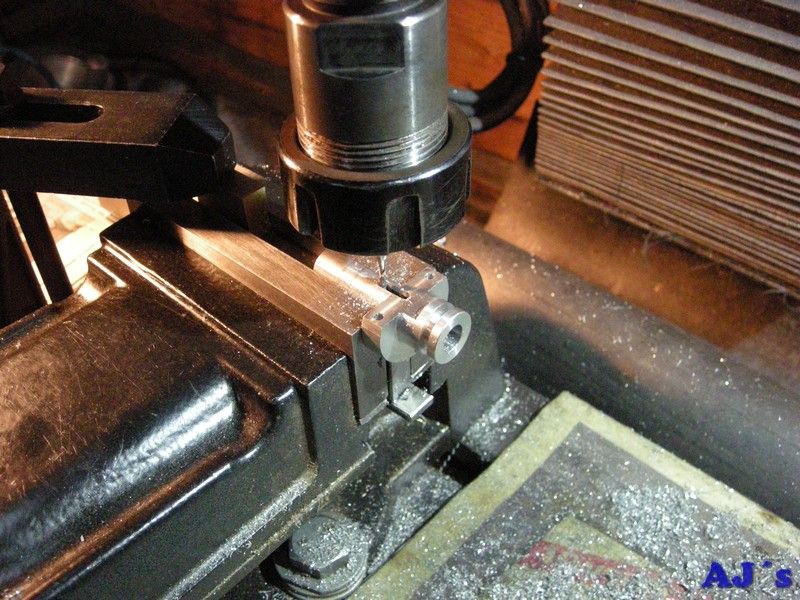


After doing the same on the other side it was set up and the slot for the arms milled flush with the outer part.  Holes were then drilled at the ends of the slot.
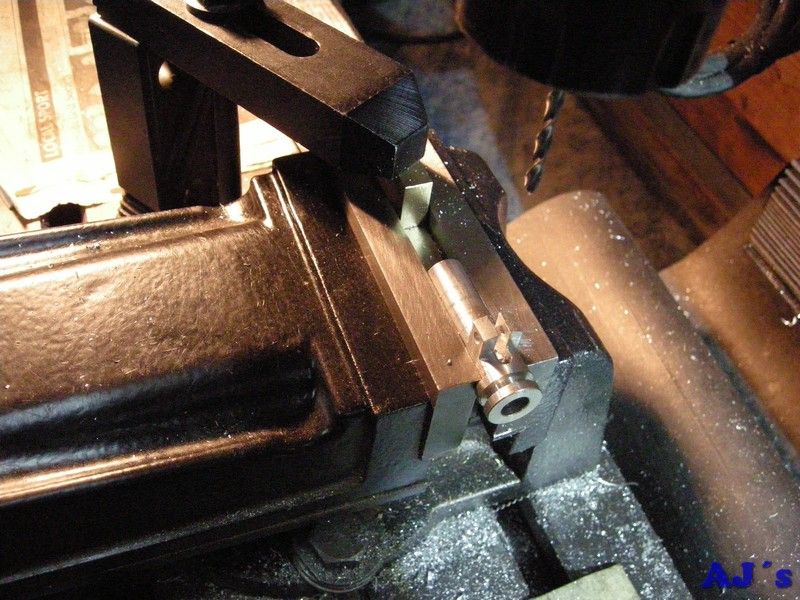


The slots were finished with a carbide single flute cutter that I normally use on the CNC router, as this is thin and long it was done very slowly.
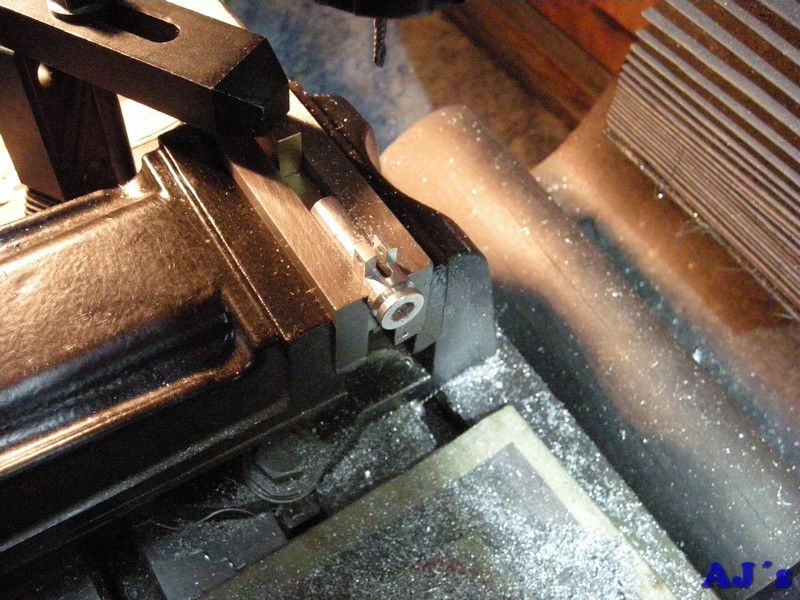


The finished body.  The “ears” will be filed round.
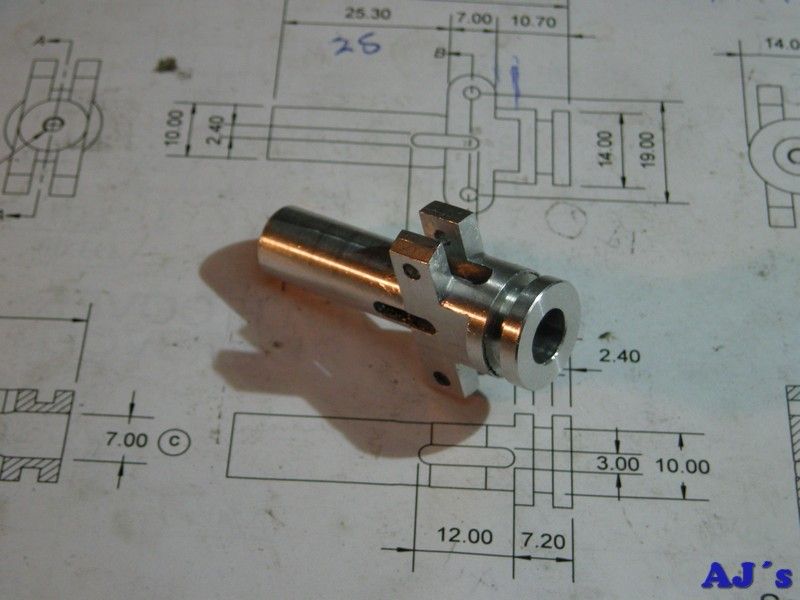


Next a piece of mild steel bar was turned down for the bearing end of the shaft.
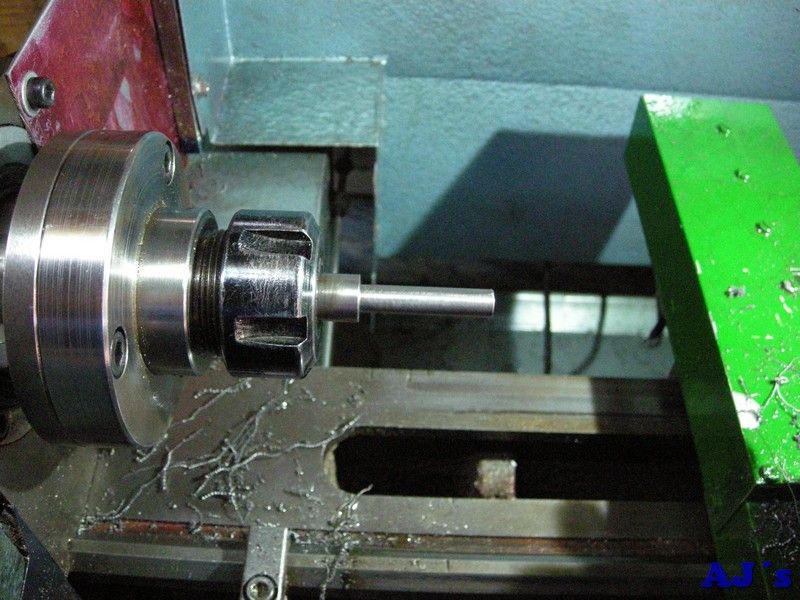


It was swapped around and the end that fits in the body was turned down.  A pocket was cut in the end for locating the spring.
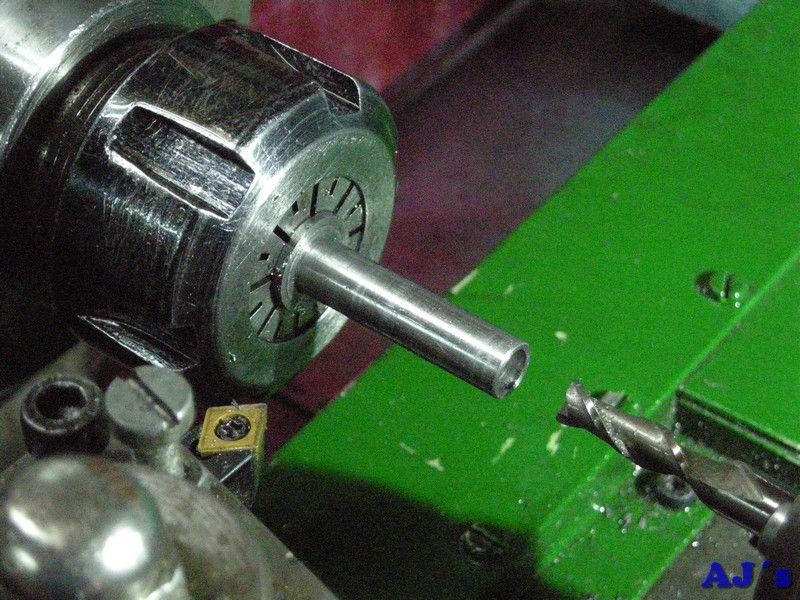


It was then clamped in a V-block and set up on the mill to cut the two slots where the arms engage.
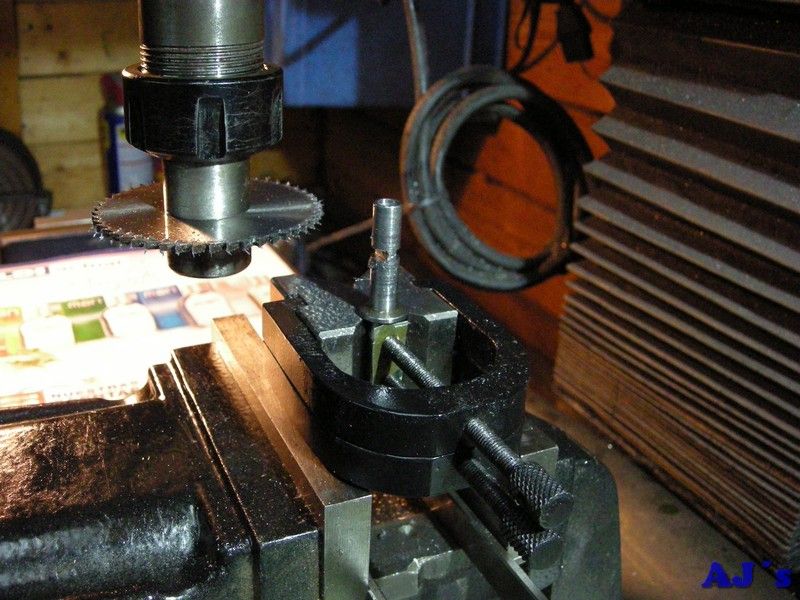


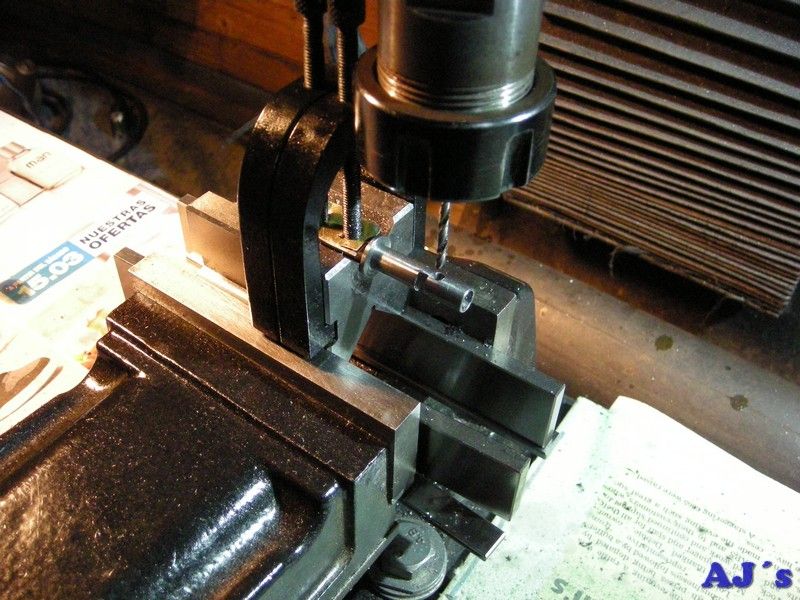
The V-block and shaft was then repositioned to drill the hole for the drive pin.


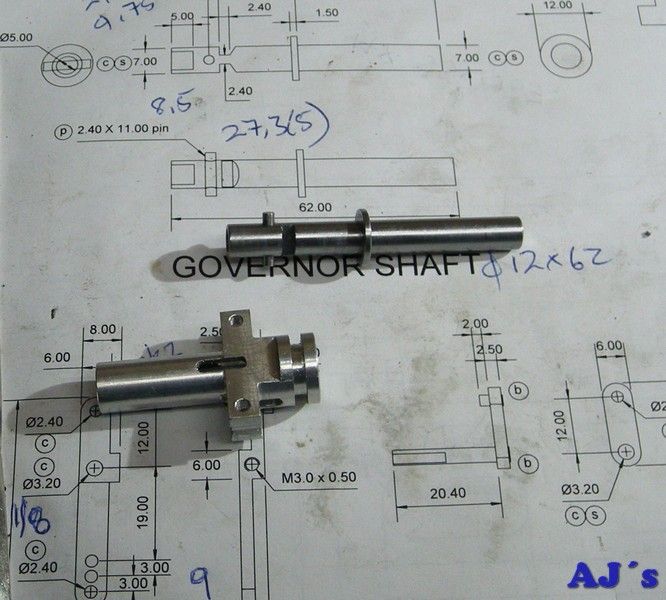
The shaft and body.


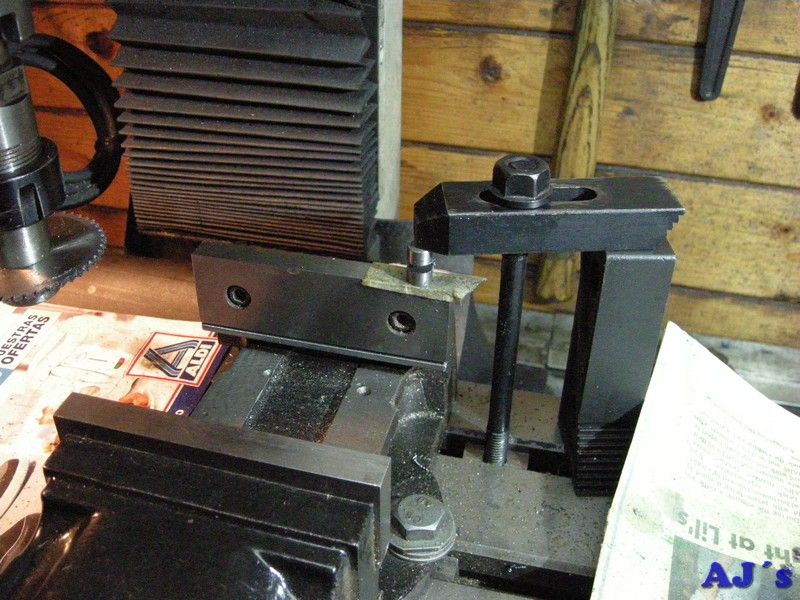
The weights were turned and then, after a bit of head scratching, clamped down like this on the fixed jaw of the milling vice to cut the slots for the arms.


For the arms a few pieces of 3mm plate was milled with a tiny upright on the one side (these will be filed to engage with the slots in the shaft).
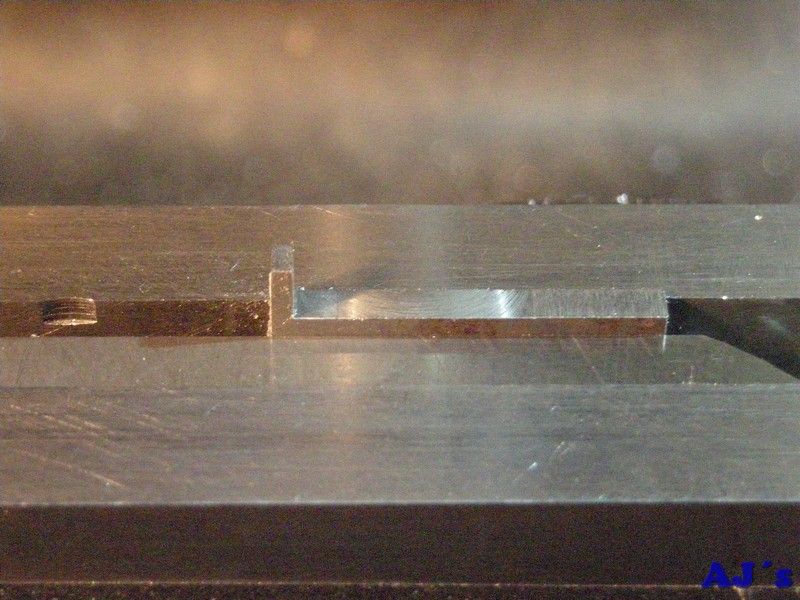


The other sides were milled down leaving material to file the pivot ears.
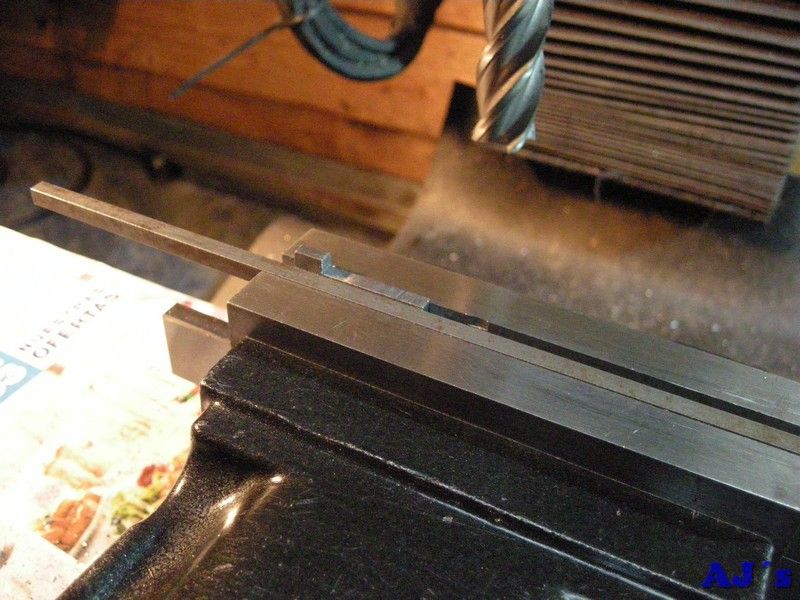


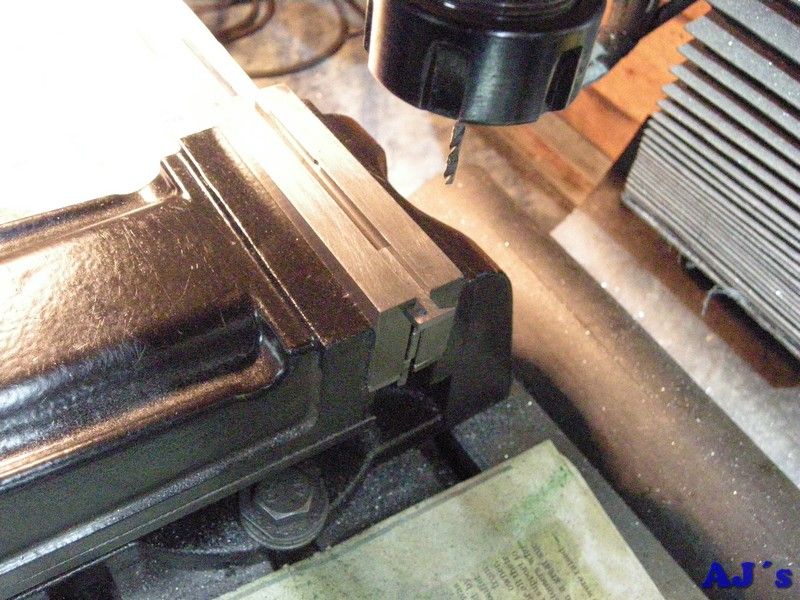
They were then held on their sides and the pivot holes located and drilled.


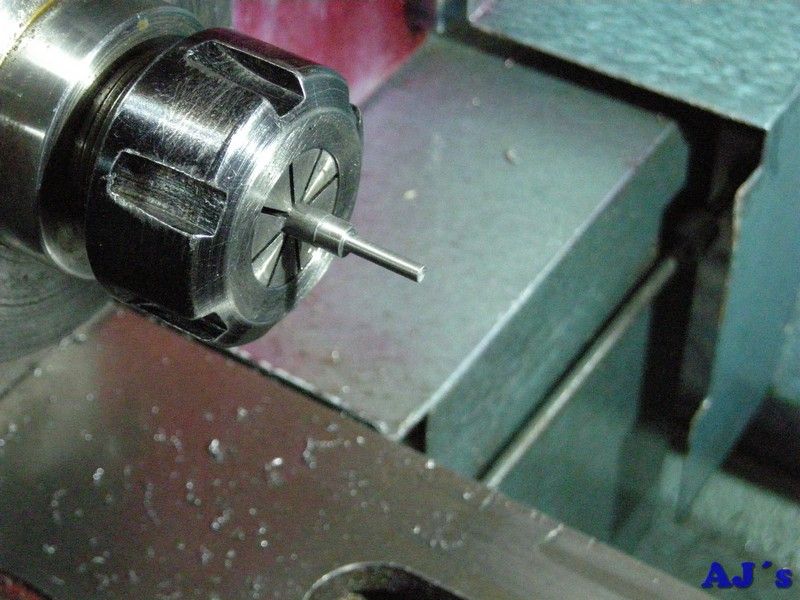
Turning the pivot pins.


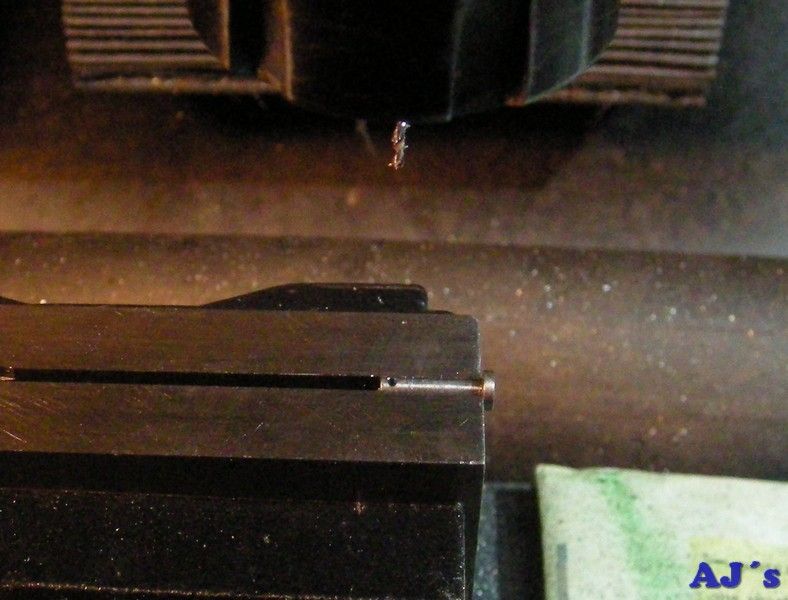
The pins were drilled for split pins.


Various other pins were made from 3mm and 2.5mm rod.  Had to cut these with a cutoff disk in the Dremel as these rods are some mystery very hard material and could not me turned.
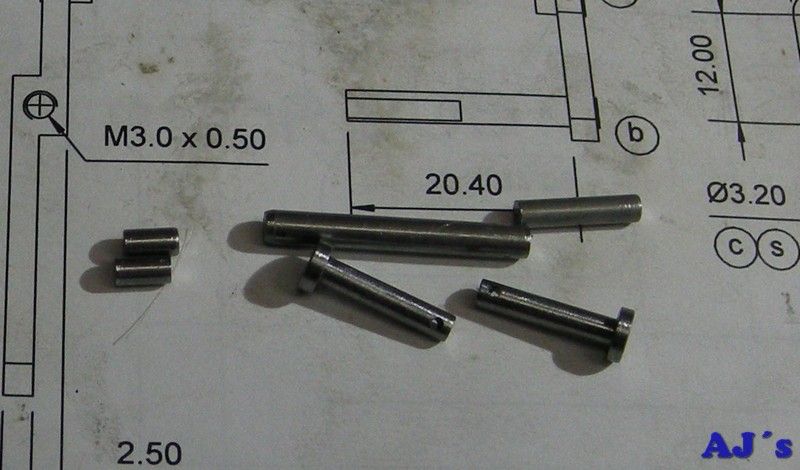


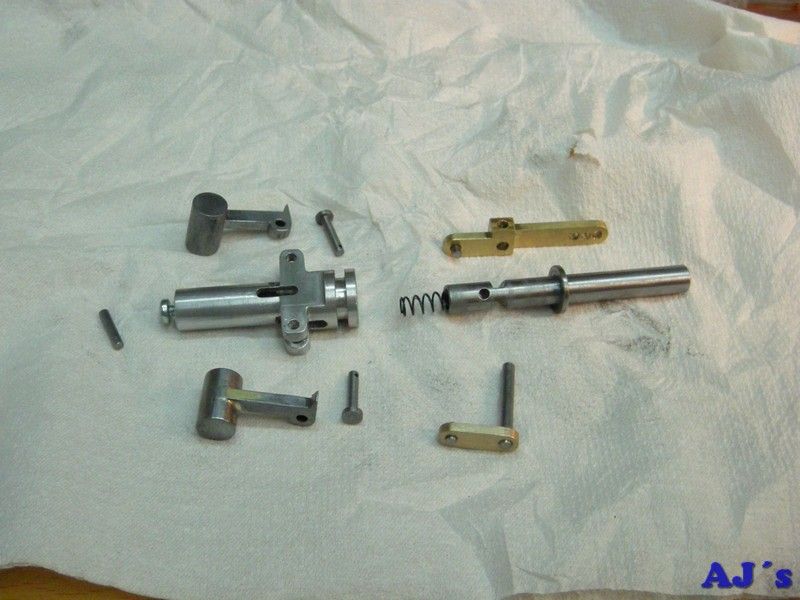
All the parts so far, after soldering, filling and a bit of cleanup.


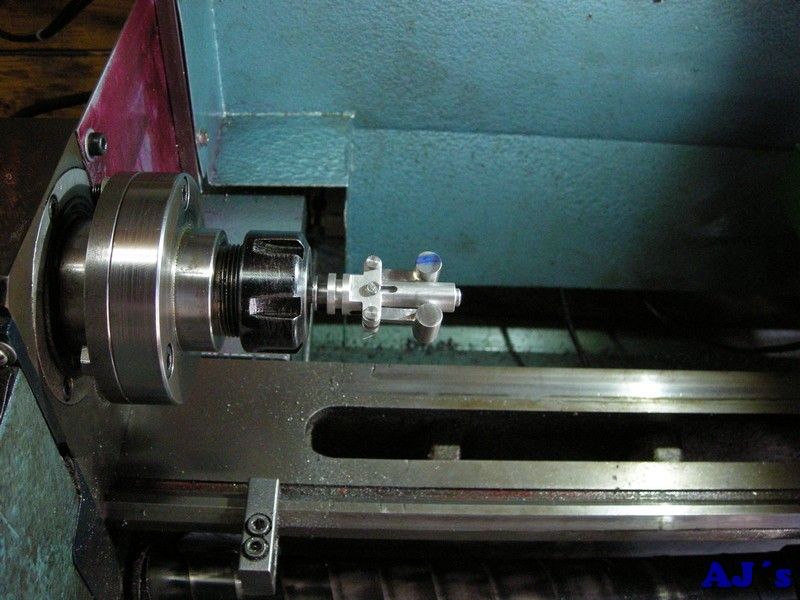
The governor was assembled and tested in the lathe.  A few different springs were tried until one was found that gave a nice smooth operation.  With this spring it was at full travel around 600 RPM.  Once fitted it might be tweaked a little more.


More to follow.

Cheers
Abraham


Offline Manxmodder

  • Hero Member
  • *****
  • Posts: 739
  • Country: gb
Re: Elmer's horizontal mill engine.
« Reply #91 on: October 18, 2015, 02:54:57 PM »
Superb work as usual,Abraham. This is going to be a very pretty engine indeed.....OZ.
Helixes aren't always downward spirals,sometimes they're screwed up

Offline modeldozer

  • Sr. Member
  • ****
  • Posts: 299
  • Country: es
  • Valencia, Spain
    • AJ´s Truckmodeling
Re: Elmer's horizontal mill engine.
« Reply #92 on: October 20, 2015, 12:17:44 PM »
OZ,
Thanks for looking in and the kind words.

Made a fixture to hold the levers for silver soldering.


Melted the one link a bit while soldering, unfortunately I only have 20% silver content rods.


Turning the small pulley using a thread cutting tool and feeding at halt angle with the compound.


Drilled out before parting off.


Turning the large pulley.


Both pulleys were drilled and tapped for a grub screw.


For the post a piece of aluminium was milled square and to size and then set up.


To drill the hole for the fork shaft.


It was flipped and the cutouts for the governor milled.


And the shaft hole drilled.


Mounted upright to drill a oil hole with a small centre drill.


Flipped over and mounting holes drilled and taped.


Finished for now, some detailing might follow once tested.


Two bushes were turned from brass.


And fitted with retaining compound.


The floor was set up and the mounting holes were located, drilled and counter sunk.


With everything mounted the length for the connecting link was confirmed.  The link was machined from a piece of 3mm plate.


Pins were silver soldered in, here with a coupling I made for the exhaust port.


All mounted on the engine, am waiting for some belt material to arrive.


Cheers
Abraham

Offline Manxmodder

  • Hero Member
  • *****
  • Posts: 739
  • Country: gb
Re: Elmer's horizontal mill engine.
« Reply #93 on: October 20, 2015, 03:36:17 PM »
With the collective parts all seen together the effect of all your painstaking detail work is really shining now.

Very impressive build :clap: :clap:.....OZ.
Helixes aren't always downward spirals,sometimes they're screwed up

Offline Stilldrillin

  • Global Moderator
  • Hero Member
  • *****
  • Posts: 4972
  • Country: gb
  • Staveley, Derbyshire. England.
Re: Elmer's horizontal mill engine.
« Reply #94 on: October 20, 2015, 05:12:13 PM »
Abraham.

This build, just gets better and better!  :thumbup:

Well done!  :clap: :clap:

David D
David.

Still drilling holes... Sometimes, in the right place!

Still modifying bits of metal... Occasionally, making an improvement!

Offline modeldozer

  • Sr. Member
  • ****
  • Posts: 299
  • Country: es
  • Valencia, Spain
    • AJ´s Truckmodeling
Re: Elmer's horizontal mill engine.
« Reply #95 on: November 01, 2015, 11:21:14 AM »
OZ and David,
   Thanks for looking in and kind words.

The belt material arrived and a belt was made.
A video of the engine running and testing the governor.


With the governor working, the post and valve was removed for some finishing work.
The post set up on the mill.


A few holes were drilled and bored.


The corners were rounded over.


The finished post.


The corners on the valve body were also rounded.


I needed a connector for the exhaust.  Started by turning and drilling a piece of rectangular brass.


After cutting it off it was mounted in the collet chuck to face and put a radius on the outside of the flange.


I did not have any round brass for the outer part and had to turn down a piece of hex bar.  The end was threaded 3/8-32 ME to take a commercial union nut.  The inside was tapered with a centre drill for a union coupling.


The two pieces done.


The pieces were silver soldered together while soldering some other bits
The governor parts and exhaust connector after a bit of polishing.


The coupling mounted on the engine.


The governor remounted on the engine.


And finally a couple of videos of the engine running. (sound is unfortunately a bit bad)


I will be building a generator to go with the engine that I will post in a different thread.  Once that is done they will be painted and mounted on a base.

Thanks to all for following along.

Cheers
Abraham


Offline DMIOM

  • Hero Member
  • *****
  • Posts: 676
  • Country: gb
  • Isle of Man
Re: Elmer's horizontal mill engine.
« Reply #96 on: November 01, 2015, 11:45:01 AM »
.......Thanks to all for following along.....

 :clap:  :clap:  :clap:  :clap:  :clap:  :clap:  :clap:

Thanks for taking us along for the ride.

Dave

Offline modeldozer

  • Sr. Member
  • ****
  • Posts: 299
  • Country: es
  • Valencia, Spain
    • AJ´s Truckmodeling
Re: Elmer's horizontal mill engine.
« Reply #97 on: April 17, 2016, 09:32:28 AM »
Hi all.

Am finally at the last stretch of this build.

For the base 4 pieces of wood had their ends milled at 45 degrees.  The only way I had to hold them was an angle plate and two large gudgeon pins,


They were milled to with.


And glued together.


Forgot to drill a hole in the one end piece and had to set it up on the lathe do drill it nice and square.


A mounting adaptor was turned from brass to fit in the hole in the base.  A DC power connector will be fitted in the adaptor to supply excitation to the generator.


After the base was stained and varnished a DC motor speed controller and the connector were fitted inside.


Then the fun started with painting all the parts.  In the end it took 4 tries and a change from brush enamel to aerosol spray.  On the smaller parts the painting was done with an airbrush.


The cylinder was lagged using stained and varnished ice-cream sticks and bands made from brass shim stock.


The steam chest cover was engraved on the CNC router. (nearly 150000 lines of code and two and a half hours running)


And the background was painted.


Finally the completed engine set.


My dear wife assisted me in making a short video, it was a bit windy so the sound is not so good in a few places.


Thank you to for following along and encouragement given.

Cheers
Abraham

« Last Edit: April 17, 2016, 10:25:27 AM by modeldozer »

Offline awemawson

  • Global Moderator
  • Hero Member
  • *****
  • Posts: 8967
  • Country: gb
  • East Sussex, UK
Re: Elmer's horizontal mill engine.
« Reply #98 on: April 17, 2016, 11:20:17 AM »
VERY nice  :bow:

And we promise not to tell your wife that you had it in bits on the dining room table  :lol:
Andrew Mawson
East Sussex

Offline DMIOM

  • Hero Member
  • *****
  • Posts: 676
  • Country: gb
  • Isle of Man
Re: Elmer's horizontal mill engine.
« Reply #99 on: April 17, 2016, 01:13:06 PM »
Abraham - that is MAGNIFICENT -  :bow:  :clap:  :clap:  :clap:  :clap:  :clap:  :clap:  :clap:  :clap:

Dave